4-8
¡
Working in the Editor window
object. The dotted lines disappear, but the markers always indicate that
you have successfully selected the object, as shown here:
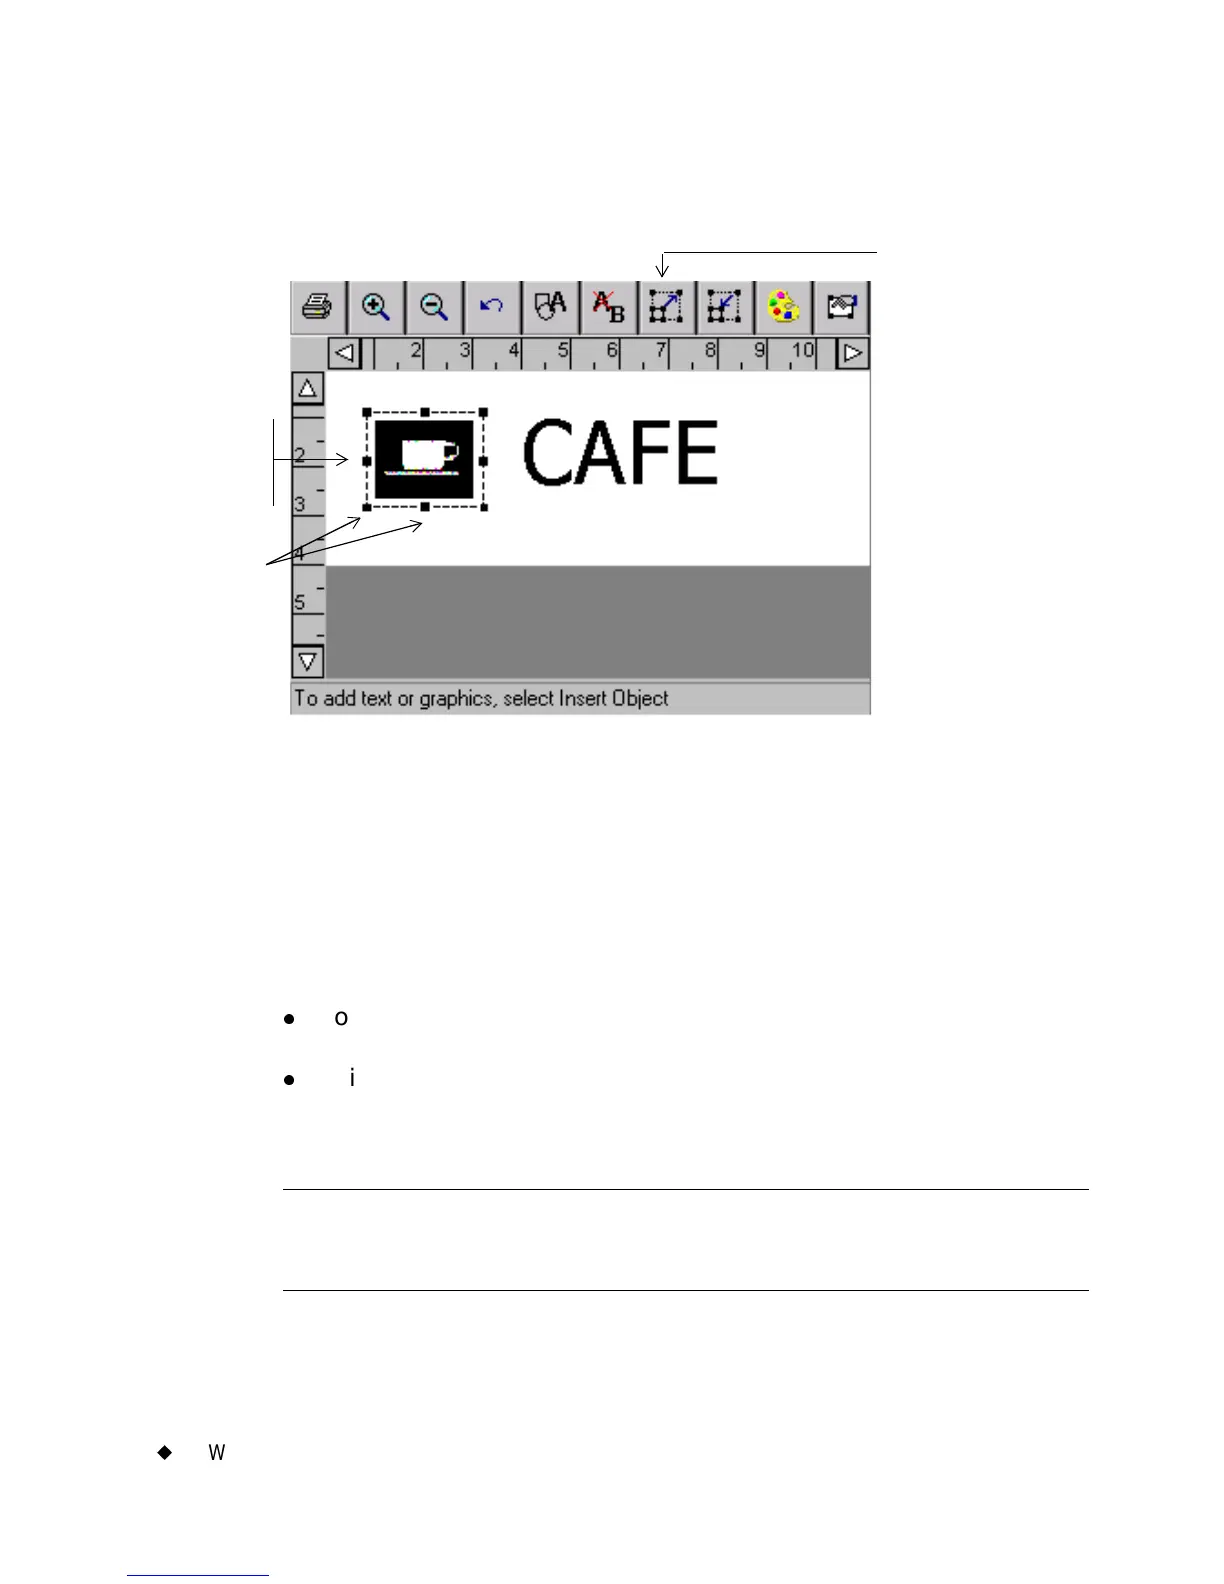
Figure 4-3. The Editor window with a graphic selected.
For instance, if you want to enlarge the coffee cup graphic in the
label in Figure 4-3, you first select the graphic on the label using one
of the methods described below, then choose the Increase Size tool.
You can use either of the methods below to select an object in the
Preview area on the Editor window, depending on your preference and
the equipment your system offers:
z
Touch the object you want to select. Selection markers appear
around the object, indicating that it is selected.
z
Using the mouse, move the cursor to the object and click the left
mouse button. The object is highlighted to indicate that it is selected.
The changes you make will apply only to the object you have selected.
Hint! When your label contains multiple objects, if any object is
selected, you can press <Tab> to cycle through the objects on
the screen.
Selected
object
Selection
markers
Increase
Size tool