53-1002177-19 Hardware Installation Guide
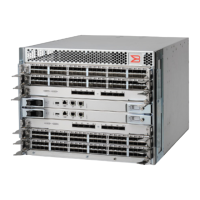
Brocade DCX 8510-4 Backbone Hardware Installation Guide
DANGER
For safety reasons, the ESD wrist strap should contain a series 1 megaohm resistor.
1. Remove the chassis door (Chassis door removal and replacement) if not already done.
2. Remove the cable management finger assemblies (Vertical cable management fingers removal and replacement).
3. Remove the port blades or filler panels (Port application and encryption blade removal and replacement and Blade
filler panel removal and replacement).
4. Remove the core switch blades (CR16-x) (Core switch blade (CR16-x) removal and replacement).
5. Remove the control processor blades (CP8) (Control processor blade (CP8) removal and replacement).
6. Remove the power supplies or filler panels (Power supply removal and replacement).
7. Remove the blower assemblies (Blower assembly removal and replacement).
Installing the replacement chassis
Complete the following steps to install the replacement chassis.
DANGER
Use safe lifting practices when moving the product.
DANGER
A completely empty Brocade DCX 8510-4 chassis weighs approximately 25.4 kg (56 lb) and requires a hydraulic
or assisted lift to install it.
DANGER
Make sure the rack housing the device is adequately secured to prevent it from becoming unstable or falling
over.
1. If the chassis is in a cabinet, remove it from the cabinet.
2. Place the chassis on a lift or on the shipping pallet provided with the original chassis.
3. Unpack the new chassis:
a) Cut the bands that encircle the packaging.
b) Remove the lid and the kits and foam from the top of the chassis.
c) Lift the cardboard box off the chassis and remove the plastic bag from around the chassis. Save the packing
materials for use when returning the old chassis.
d) Leave the chassis on top of the plastic shipping tray if the chassis must be transported to the installation location.
NOTE
The device packaging does not incorporate a wood pallet and pallet brackets. The chassis sits on top of
a plastic shipping tray.
4. Use a pallet jack or other assisted lift to transport the new chassis to the installation area. Doorways must be wider
than 91 cm (36 in.) to accommodate the chassis on the pallet.
5. Use a lift to raise the chassis to the correct level. If installing the chassis in a cabinet, follow the instructions provided
by the rack kit manufacturer.
Installing components into the chassis
Follow electrostatic discharge (ESD) precautions when installing new components. Wear a wrist grounding strap
connected to chassis ground (if the device is plugged in) or a bench ground.
53-1002177-19
146