53-1002177-19 Hardware Installation Guide
Brocade DCX 8510-4 Backbone Hardware Installation Guide
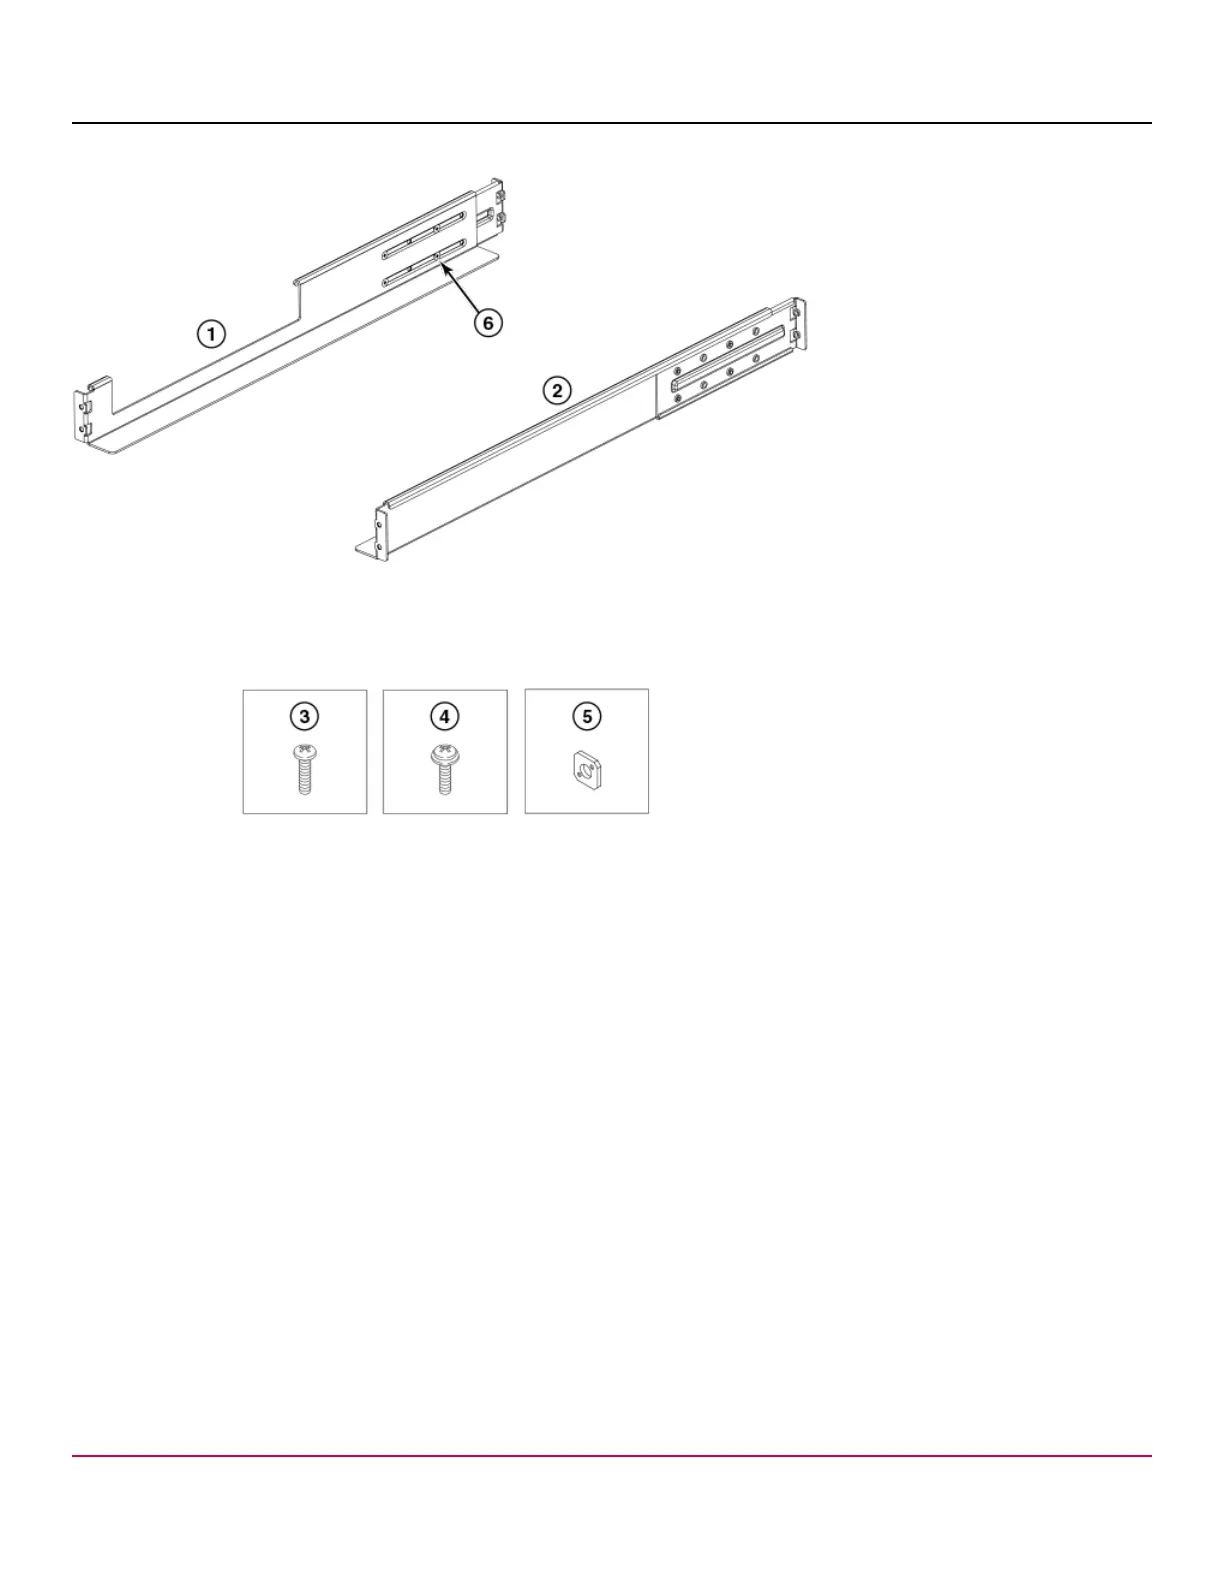
Figure 24: Rack Kit Parts
1. Left Rail
2. Right Rail
3. 10-32 x .5 in. (1.27 cm) Phillips Screw
4. 10-32 x .63 in.(1.60 cm) Phillips Screw with Square Cone Washer (for racks that have rails with round holes)
5. Alignment Washer (for racks that have rails with square holes)
6. Adjusting Screw Locations
Assembling the Rack Hardware
Use the following instructions to install the rack mount kit illustrated in the previous figure into the equipment rack for
mounting the device.
1. On each rail (1 and 2 in the previous figure), loosen the four 10-32 screws on the adjustable brackets and adjust the
rails to the depth of your equipment rack. Tighten screws after adjustment.
2. Noting that the rails are designated "Left" and "Right," install each rail in the rack using four 10-32 x .63 in. or four
10-32 x .5 in. screws, two screws on each end of each rail. See the following figure.
•
Position the rails so that the adjustable ends are mounted on the intake aisle side of the rack.
•
For rails with round holes - use two 10-32 x .63 screws with square-cone washers on each end of the rail assembly.
Tighten the screws to a torque of 33.6 to 42 cm-kg (29.2 to 36.5 in.-lb).
•
For rails with square holes - use the two standard 10-32 x .5 in. screws with blue Loctite on the threads and
alignment washers on each end of the rail assembly. Tighten the screws to a torque of 33.6 to 42 cm-kg (29.2 to
36.5 in.-lb).
53-1002177-19
52