4-22
Punch Recording
Suppose you are happy with most of a track but want to replace one
small sectionÑperhaps as small as a couple of notes. This is where
punch recording comes in handy, because it lets you record new material
only within a speciÞed range of times.
For example, suppose you recorded a 32-bar keyboard solo but made
some mistakes in the 24
th
and 25
th
bars. With punch recording, you play
the entire solo again, so you make sure you can get the feel you want.
However, only the bars you want to correct are actually recorded. That
way, you donÕt have to worry about introducing new mistakes elsewhere
in the recording. When you use punch recording, Pro Audio deletes any
material between the start and end times of the punch.
To use punch recording, follow these steps:
¥ Enable punch recording.
¥ Set the start and end times of the punch.
¥ Start recording by pressing R or clicking the button on the
toolbar.
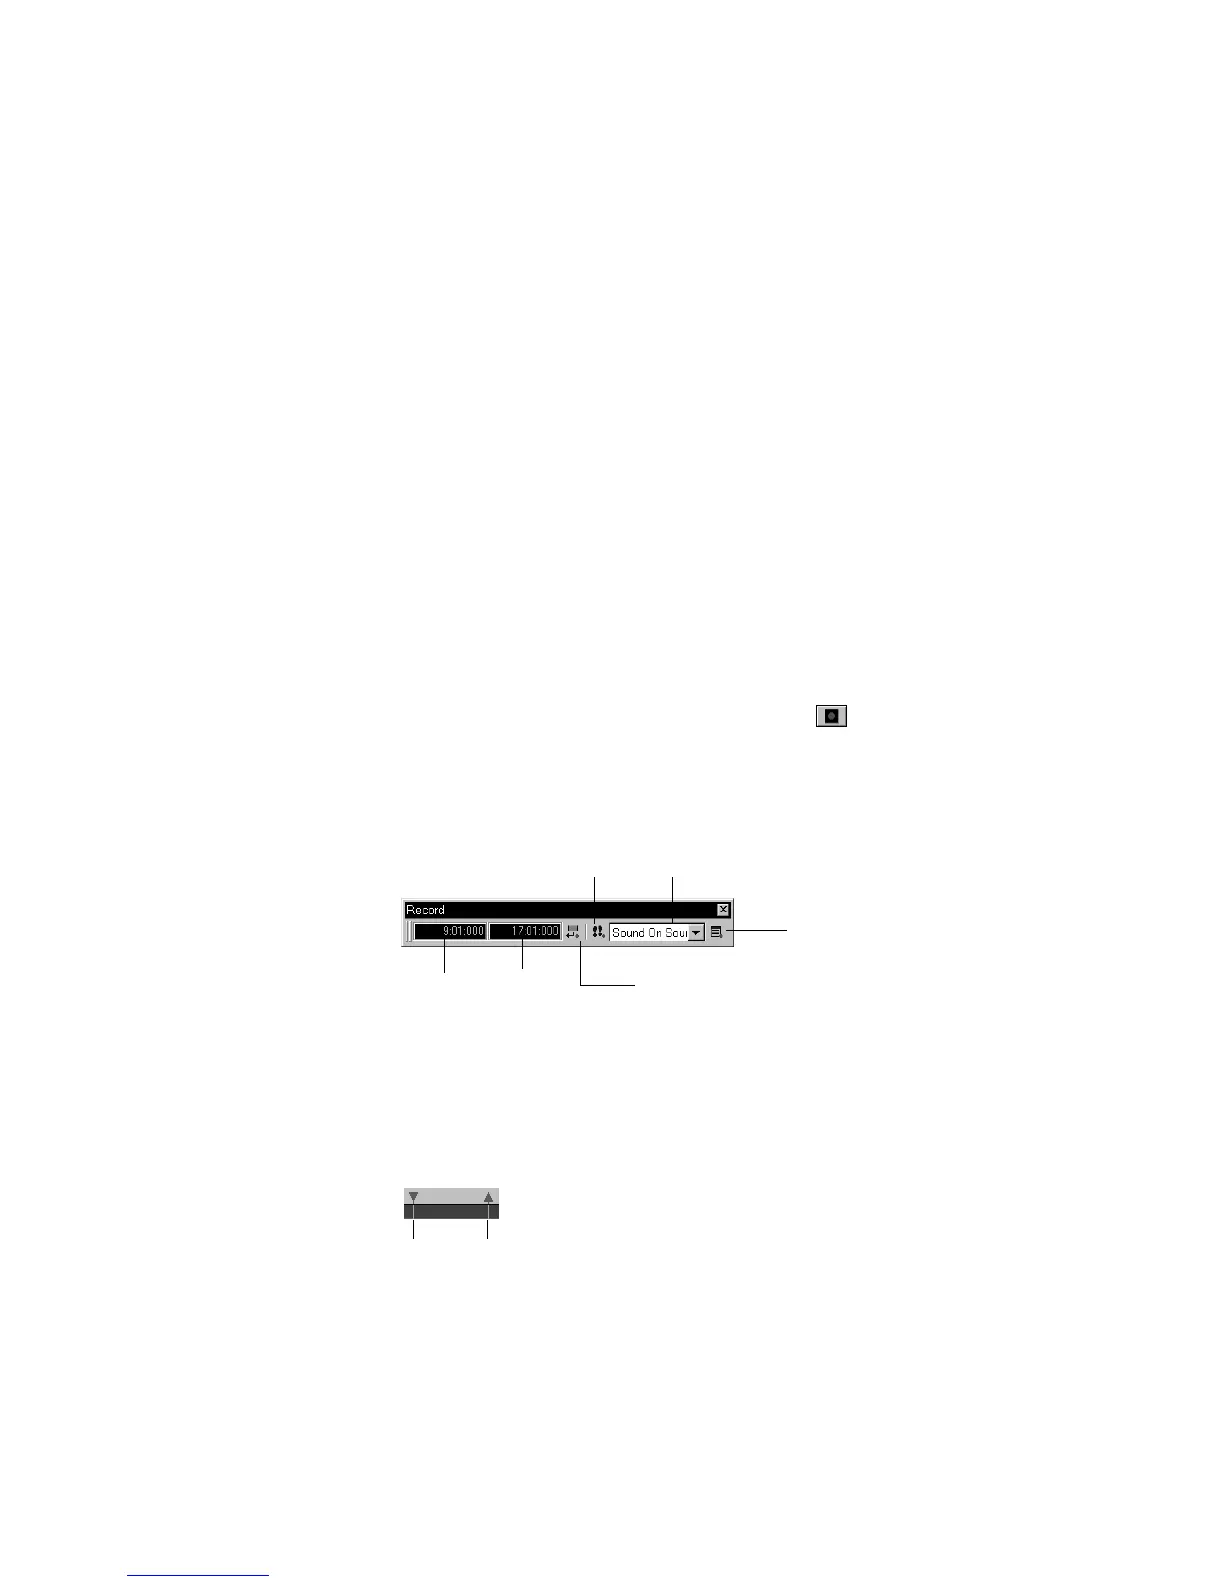
The Recording toolbar shows the punch settings, as shown here:
When punch recording is enabled, the punch times are indicated by
special markers in the time ruler:
Click here to set
punch times to the
selection start and
end times
Punch In
Time
Click to open the Record
Options dialog box
Step record
Record mode
Punch Out
Time
Punch In Punch Out