2-23
Getting Started
Punch-In Recording
Imagine that one of your takes was close to ideal, except for one or two
notes in one measure. Rather than recording another full take, you'd
prefer to keep the take but replace that measure.
Punch-in recording lets you replace a section of a track. The way it works
is this: First, you set the start and end times of the punch to the section
you want to replace and turn on punch recording. Then, you arm the
track and start recording. You can play along with the original take to
get the rhythm and feeling. However, nothing will be recorded until the
punch start time. During the punch, the material already in the track
will be replaced with what you record. When the punch ends, the song
will continue to play, but recording will stop.
Let's try it. Suppose you want to replace measures 5 and 6 in the take in
track 8.
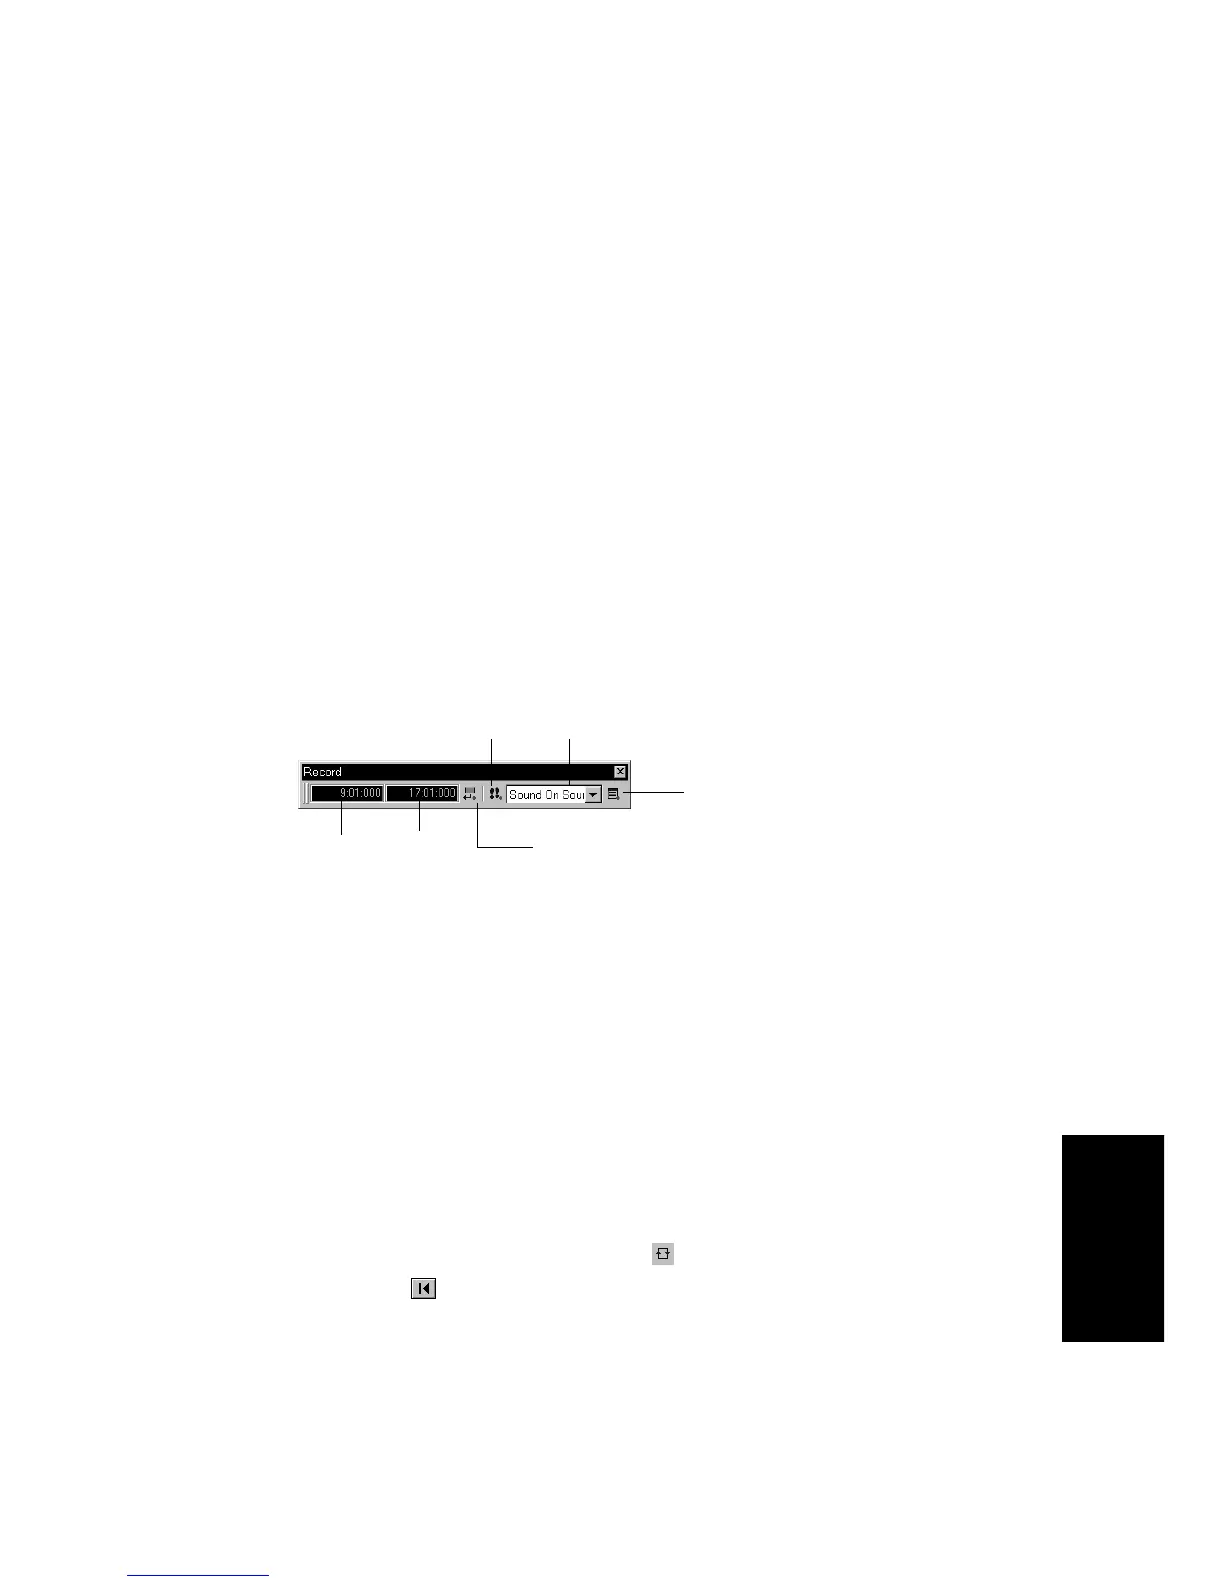
1. Display the Record toolbar by choosing
View-Toolbars-Record.
2. In the Record toolbar, click on the Punch In Time.
3. Type 5 and press Enter.
4. Click on the Punch Out Time.
5. Type 7 and press Enter.
6. Select Auto Punch from the Record Mode drop-down list.
7. Arm track 8 and disarm any other tracks that are armed.
8. If you like, you can mute the tracks containing your other takes,
or even solo track 8.
9. If looping is still on, click the Loop button to turn it off.
10. Click Rewind .
Click here to set
punch times to the
selection start and
end times
Punch In
Time
Click to open the Record
Options dialog box
Step record
Record mode
Punch Out
Time