8. PASCAL adjustment
Enter the values shown on the label that comes with the
part in the following service mode items.
Enter the values of OFST-P-Y, OFST-P-M, OFST-P-C,
and OFST-P-K in the following service mode, and write
the entered values on the service label.
• COPIER>ADJUST>PASCAL>OFST-P-Y (Y
density adj at test print reading)
• COPIER>ADJUST>PASCAL>OFST-P-M (M
density adj at test print reading)
• COPIER>ADJUST>PASCAL>OFST-P-C (C
density adj at test print reading)
• COPIER>ADJUST>PASCAL>OFST-P-B (Bk
density adj at test print reading)
9. Copyboard geometric adjustment
Enter the values shown on the label that comes with the
part in the following service mode items.
• COPIER > ADJUST > ADJ-XY > ADJ-X (Adj of img
pstn in book mode: vert scan)
• COPIER > ADJUST > ADJ-XY > ADJ-Y (Adj of img
pstn in book mode: (horizontal scanning direction)
• COPIER > ADJUST > ADJ-XY > ADJ-X-MG (Fine
adj image ratio: vertical scanning)
Enter the values in the foregoing service mode.
10. ADF geometric adjustment
1. On an image copied using the ADF, check the non-
image width in the X and Y directions and the
expansion/contraction in the X direction.
In the case of E353MGMH, perform 2-sided
original reading from the ADF.
If adjustment is needed, enter necessary
adjustment values in the following service mode:
• COPIER > ADJUST > ADJ-XY > ADJ-Y-DF
(Adj img pstn in ADF mode:horz scan)
• FEEDER > ADJUST > DOCST (Fine
adjustment of VSYNC timing at ADF reading
[front side])
• FEEDER > ADJUST > DOCST2 (Fine
adjustment of VSYNC timing at ADF reading
[back side])
• FEEDER > ADJUST > LA-SPD (Fine
adjustment of magnification ratio in vertical
scanning direction at ADF stream reading
[front side])
• FEEDER > ADJUST > LA-SPD2 (Fine
adjustment of magnification ratio in vertical
scanning direction at ADF stream reading
[back side])
2. If you enter adjustment values, write the final
values on the service label.
Removing the ADF Roller Unit
■ Procedure
CAUTION:
Do not touch the surface of the roller.
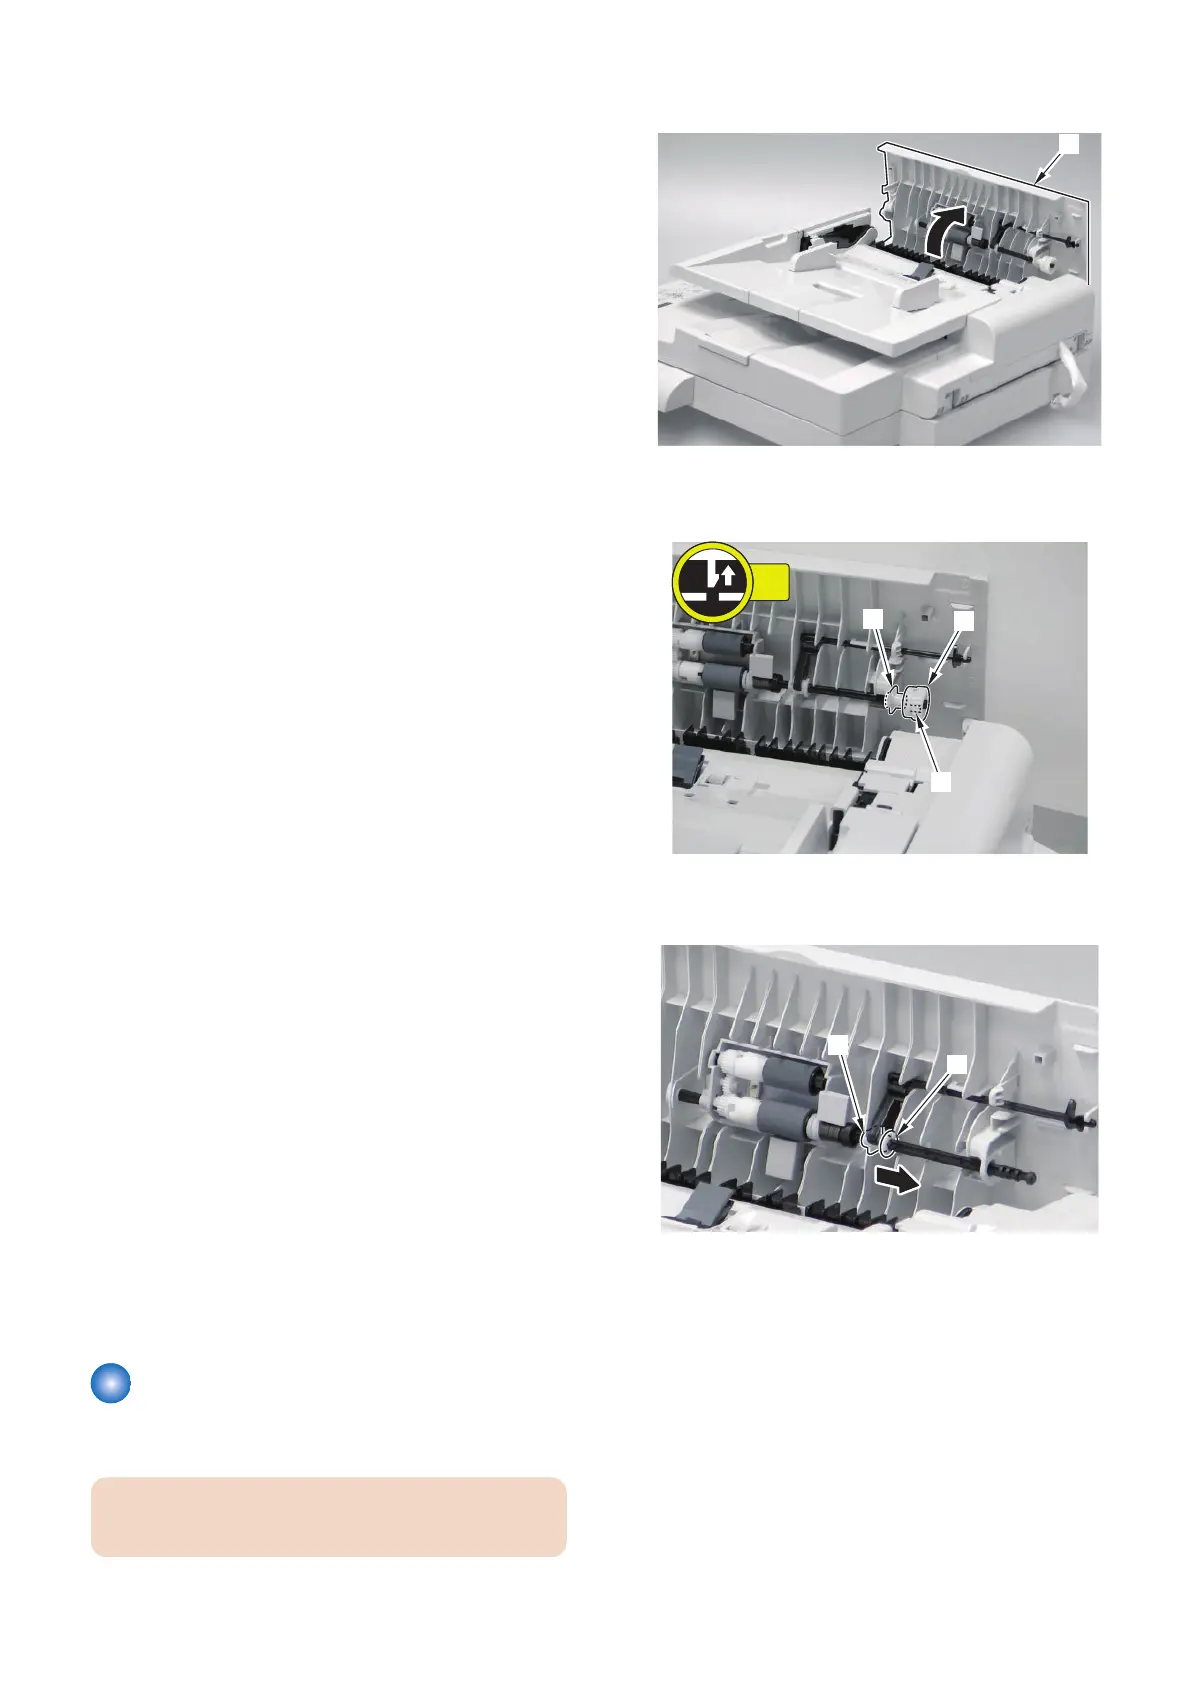
1. Open the ADF Upper Cover [1].
2. Remove the gear [1] and the bushing [2].
• 1 claw [3]
3. Remove the plastic E-ring [1] and slide the bushing
[2].
4. Disassembly/Assembly
136
 Loading...