5. ADF geometric adjustment
1. On an image copied using the ADF, check the non-
image width in the X and Y directions and the
expansion/contraction in the X direction.
In the case of E353MGMH, perform 2-sided
original reading from the ADF.
If adjustment is needed, enter necessary
adjustment values in the following service mode:
• COPIER > ADJUST > ADJ-XY > ADJ-Y-DF
(Adj img pstn in ADF mode:horz scan)
• FEEDER > ADJUST > DOCST (Fine
adjustment of VSYNC timing at ADF reading
[front side])
• FEEDER > ADJUST > DOCST2 (Fine
adjustment of VSYNC timing at ADF reading
[back side])
• FEEDER > ADJUST > LA-SPD (Fine
adjustment of magnification ratio in vertical
scanning direction at ADF stream reading
[front side])
• FEEDER > ADJUST > LA-SPD2 (Fine
adjustment of magnification ratio in vertical
scanning direction at ADF stream reading
[back side])
2. If you enter adjustment values, write the final
values on the service label.
Removing the Reader Scanner
Motor
■ Preparation
1. Remove the Right Cover.(Refer to “Removing the
Right Cover” on page 120)
2. Remove the Left Cover.(Refer to “Removing the Left
Cover” on page 118)
3. Remove the ADF Unit + Reader Unit.(Refer to
“Removing the ADF Unit + Reader Unit” on page
130)
4. Separate the ADF Unit from the Reader Unit.(Refer
to “Separating the ADF Unit + Reader Unit” on page
131)
5. Remove the Reader Unit Upper Cover Unit.(Refer to
“Removing the Reader Unit Upper Cover” on page
144)
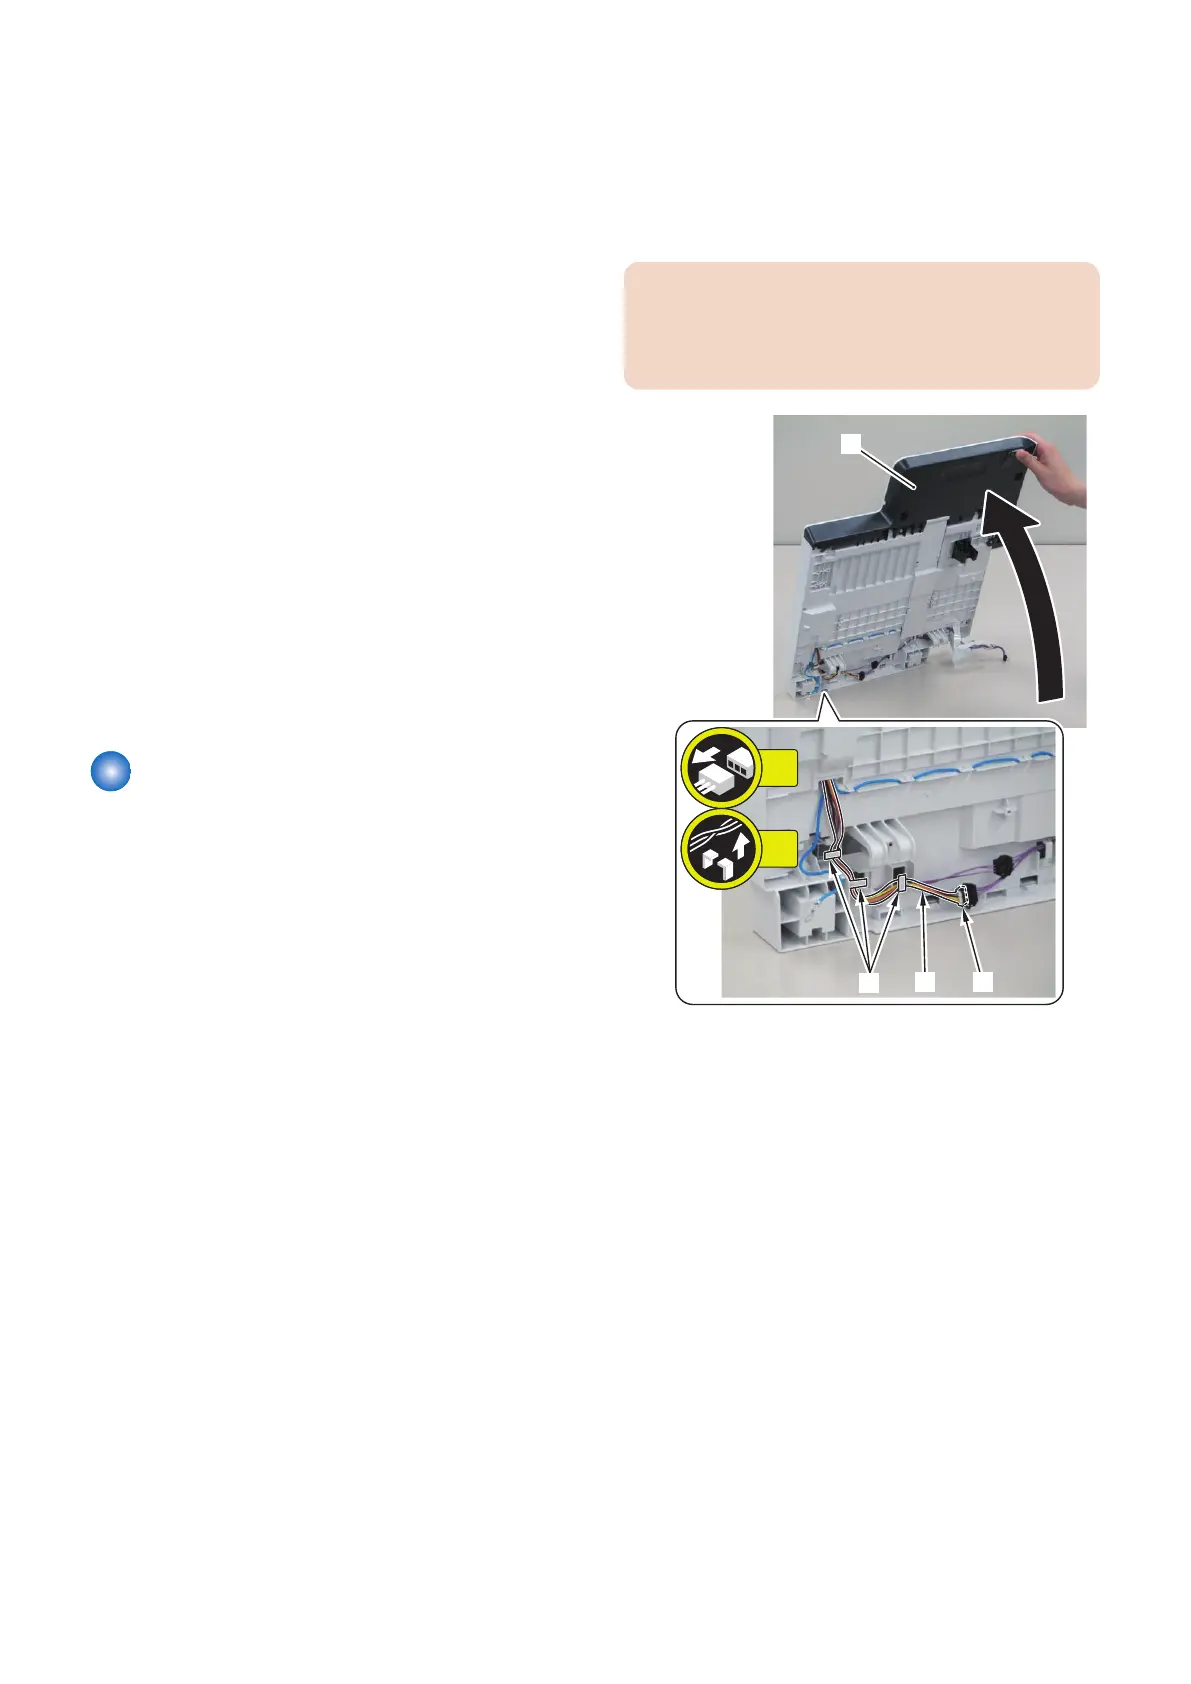
■ Procedure
1. Free the harness [2] while holding the Reader Unit
[1].
• 1 Connector [3]
• 3 Harness Guides at the [A] location
CAUTION:
To prevent parts on the top side of the Reader Unit, do
not tip the Reader Unit [1] into the perpendicular
position.
2. Pull the Drive Belt [1] to move the CIS Unit [2].
4. Disassembly/Assembly
151
 Loading...