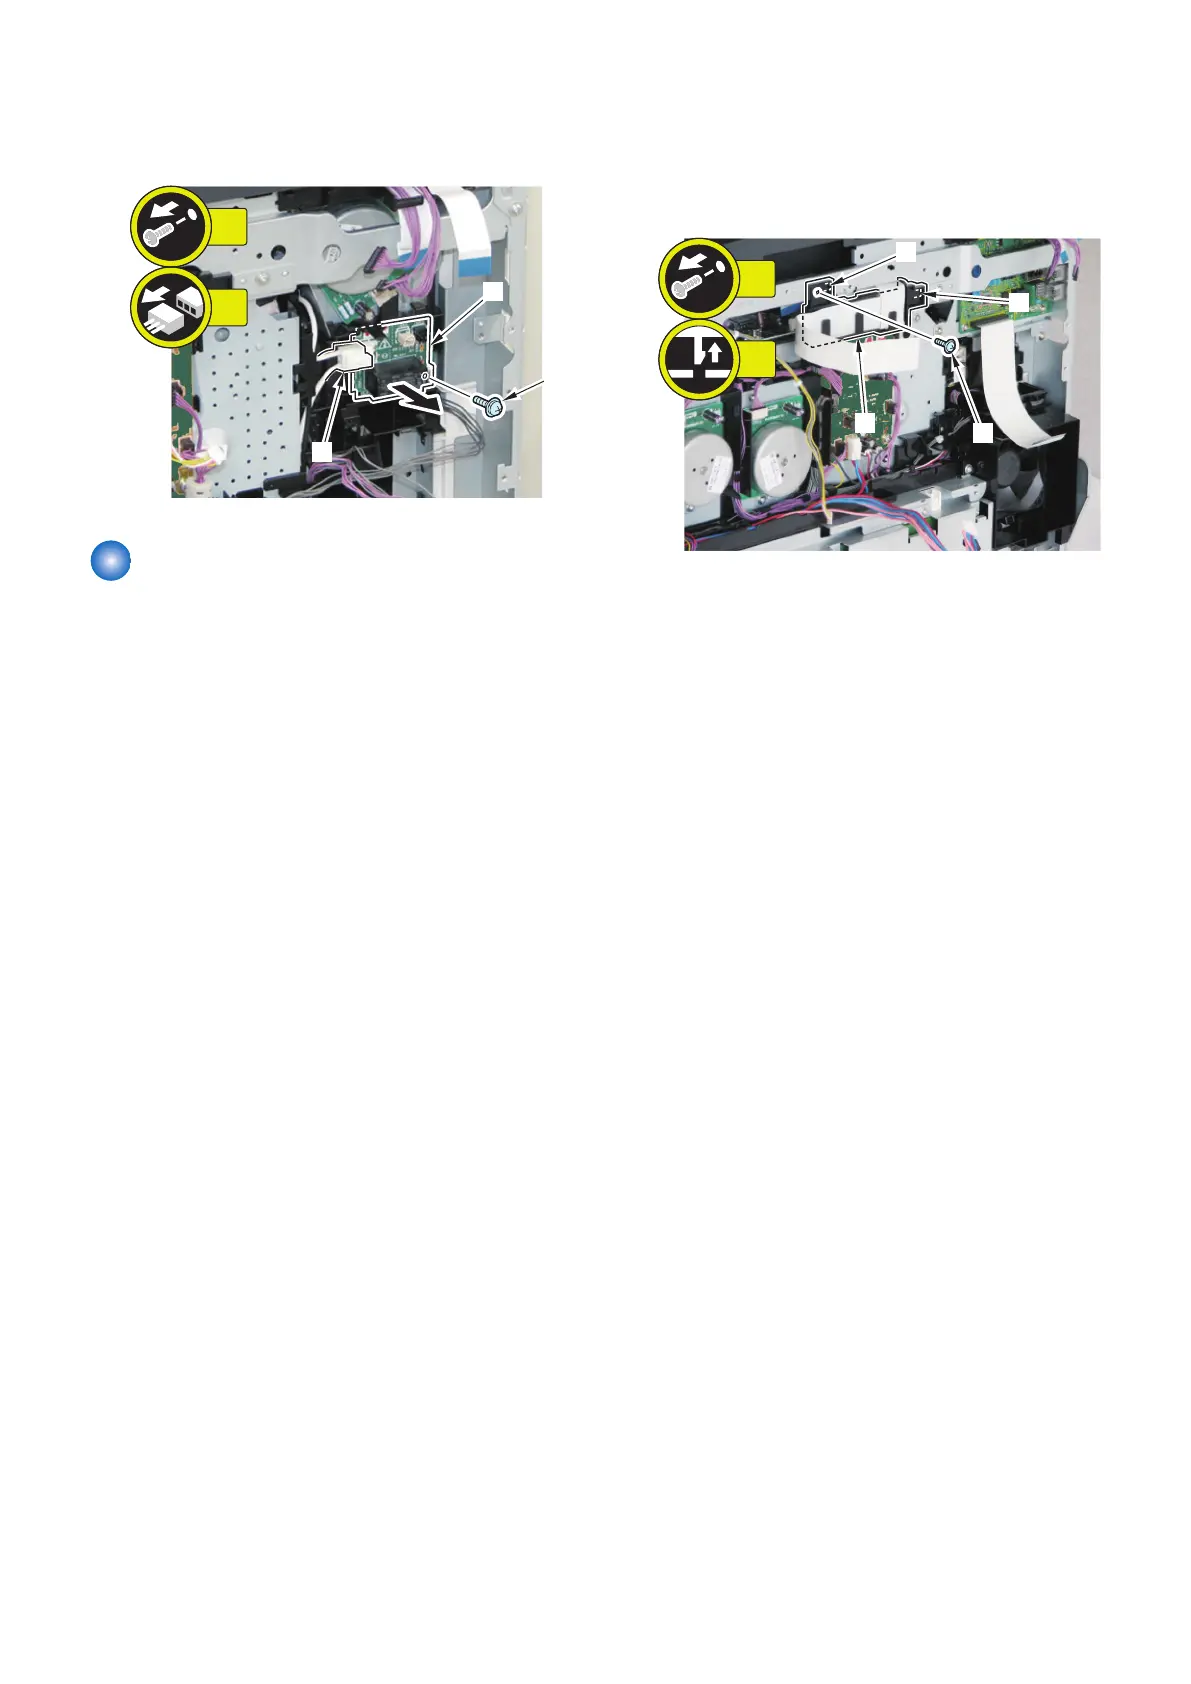
3. Remove the Fixing Sub PCB [1].
• 1 screw [2]
• 1 connector [3]
Removing the Driver PCB
■ Preparation
1. Removing the Right Cover.(Refer to “Removing the
Right Cover” on page 120)
2. Removing the Left Cover.(Refer to “Removing the
Left Cover” on page 118)
3. Removing the Right Front Cover.(Refer to
“Removing the Right Front Cover” on page 121)
4. Removing the ADF Unit + Reader Unit.(Refer to
“Removing the ADF Unit + Reader Unit” on page
130)
5. Removing the Rear Upper Cover.(Refer to
“Removing the Rear Upper Cover” on page 123)
6. Removing the Upper Cover.(Refer to “Removing the
Upper Cover” on page 125)
7. Removing the Wireless LAN PCB.(MF728Cdw /
727Cdw / 724Cdw only) (Refer to “Removing the
Wireless LAN PCB (MF728Cdw / 727Cdw / 724Cdw)”
on page 157)
8. Removing the Main Controller PCB.(Refer to
“Removing the Main Controller PCB” on page 157)
9. Removing the Main Controller Support Plate.(Refer
to “Removing the Main Controller Support Plate” on
page 161)
■ Procedure
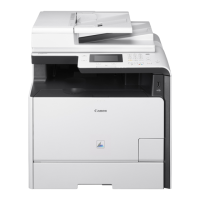
1. Remove the flat cable guide case [1].
• 1 screw [2]
• 2 claws [3]
4. Disassembly/Assembly
167