7. Whether the operation was successful or failed is
not shown on the UI, so perform the following
procedure to judge if the operation is successful or
not.
• COPIER > ADJUST > CCD > DFTAR-R
(Adjustment of shading target value (R) at ADF
reading)
• COPIER > ADJUST > CCD > DFTAR-G
(Adjustment of shading target value (G) at
ADF reading)
• COPIER > ADJUST > CCD > DFTAR-B
(Adjustment of shading target value (B) at ADF
reading)
Check the foregoing values, and if all the values
remain the same with those you entered, the
operation result is judged to be "failed".
8. If the operation result is "failed", turn OFF and then
ON the power, execute
• COPIER > FUNCTION > CCD > DF-WLVL1
(White level adj in book mode: color)
and then execute
• COPIER > FUNCTION > CCD > DF-WLVL2
(White level adj in ADF mode: color)
again.
9. Checking the value of DFTAR-BW
Check the value of
• COPIER > ADJUST > CCD > DFTAR-BW
(Adjustment of shading target value (B&W) at
ADF reading)
If the value remains the same as the value you
entered, the operation result is judged to be
"failed".
10. If the operation result is "failed", turn OFF and then
ON the power, execute
• COPIER > FUNCTION > CCD > DF-WLVL3
(White level adj in book mode (B&W))
and then execute
• COPIER > FUNCTION > CCD > DF-WLVL4
(White level adj in ADF mode (B&W))
again.
Removing the Reader Unit
Upper Cover
■ Preparation
1. Remove the Right Cover. (Refer to “Removing the
Right Cover” on page 120)
2. Remove the Left Cover. (Refer to “Removing the Left
Cover” on page 118)
3. Remove the ADF Unit + Reader Unit. (Refer to
“Removing the ADF Unit + Reader Unit” on page
130)
4. Seaparare the ADF Unit from the Reader Unit. (Refer
to “Separating the ADF Unit + Reader Unit” on page
131)
5. Remove the Scoopup sheet holder. (Refer to
“Removing the Scoopup sheet holder” on page 142)
■ Procedure
CAUTION:
Be sure to perform "After Replacing the Reader Upper
Cover Unit (Refer to “After Replacing the Reader Upper
Cover Unit” on page 145)" when replacing the Reader
Upper Cover Unit, respectively.
CAUTION:
To replace the Copyboard Glass, be sure to replace
the Copyboard Glass together with the Reader Unit
Upper Cover.
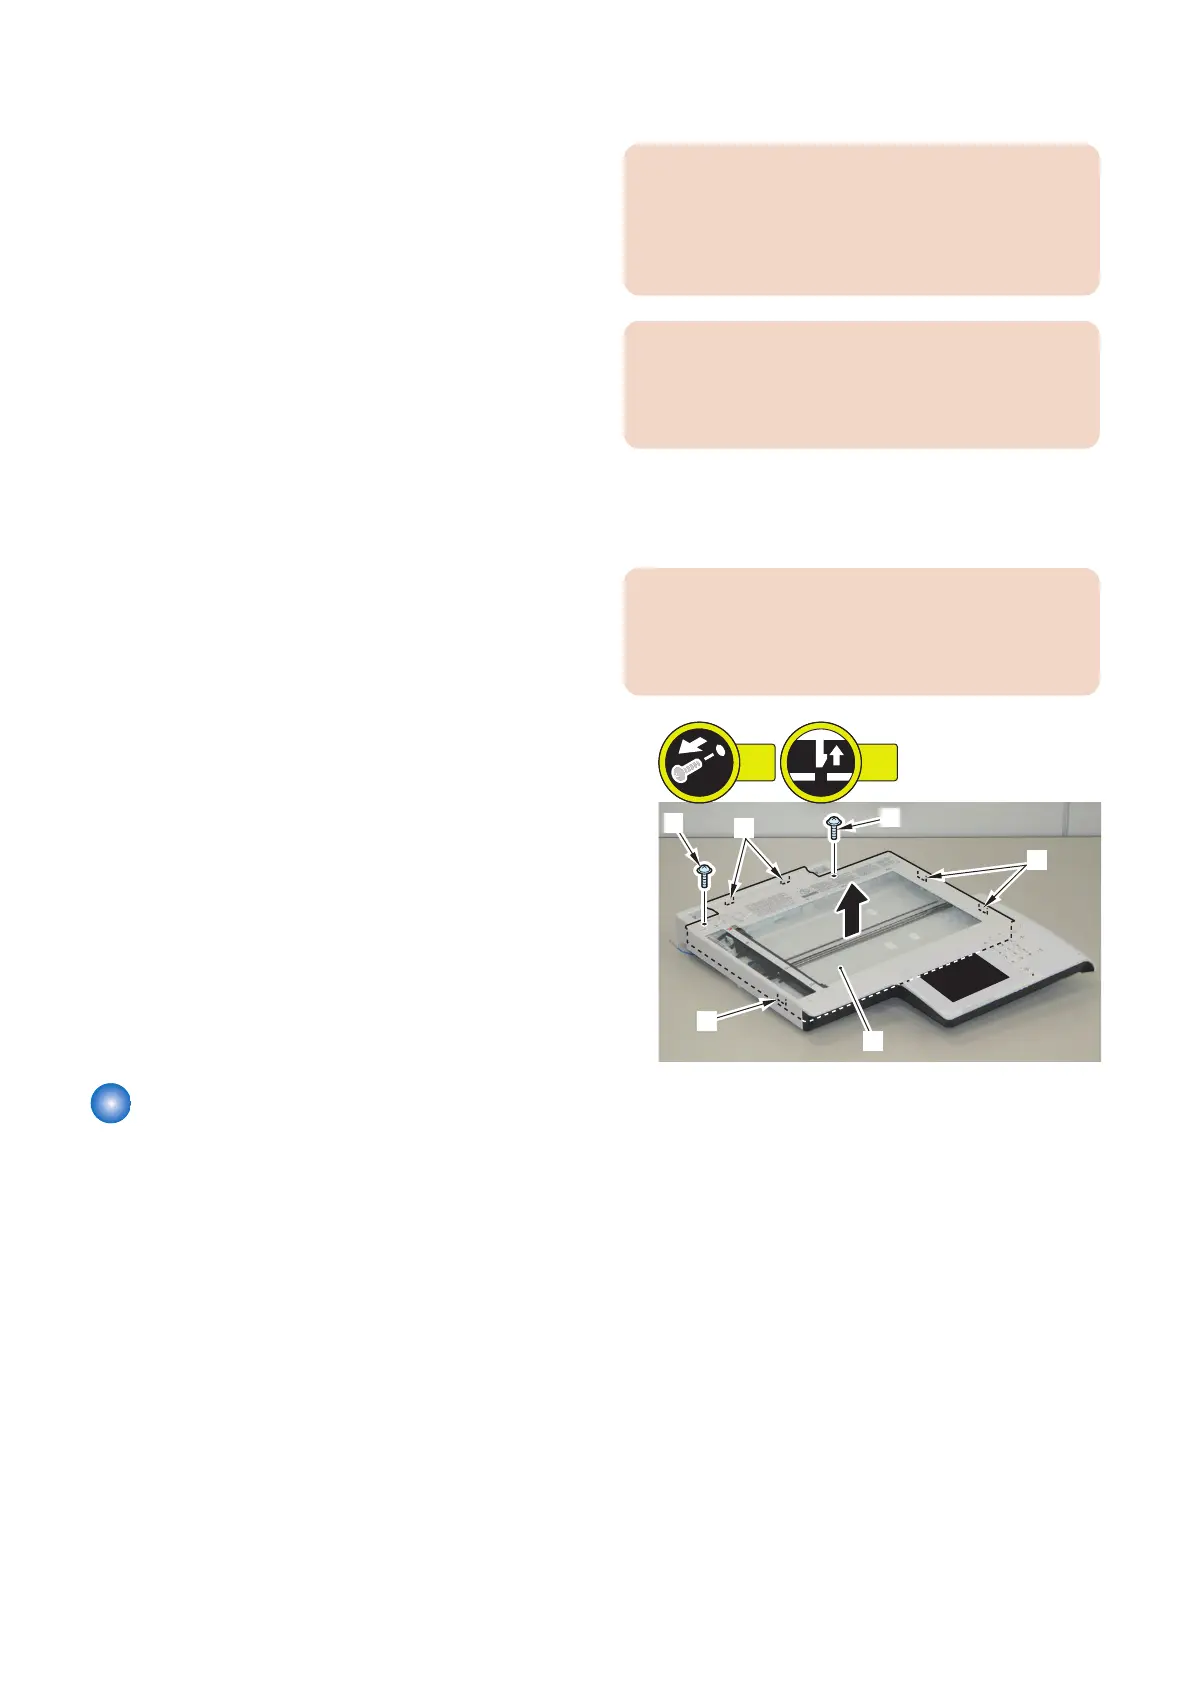
1. Remove the Reader Unit Upper Cover [1].
• 2 screws [2]
• 5 claws [3]
CAUTION:
Because the Copyboard Glass [2] is attached to the
Upper Cover [1], be careful not to drop or damage the
Upper Cover.
4. Disassembly/Assembly
144