2. Removing the Controller Cover.(Refer to “Removing
the Controller Cover” on page 157)
3. Removing the Wireless LAN PCB.(MF728Cdw /
727Cdw / 724Cdw only) (Refer to “Removing the
Wireless LAN PCB (MF728Cdw / 727Cdw / 724Cdw)”
on page 157)
4. Removing the Main Controller PCB.(Refer to
“Removing the Main Controller PCB” on page 157)
■ Procedure
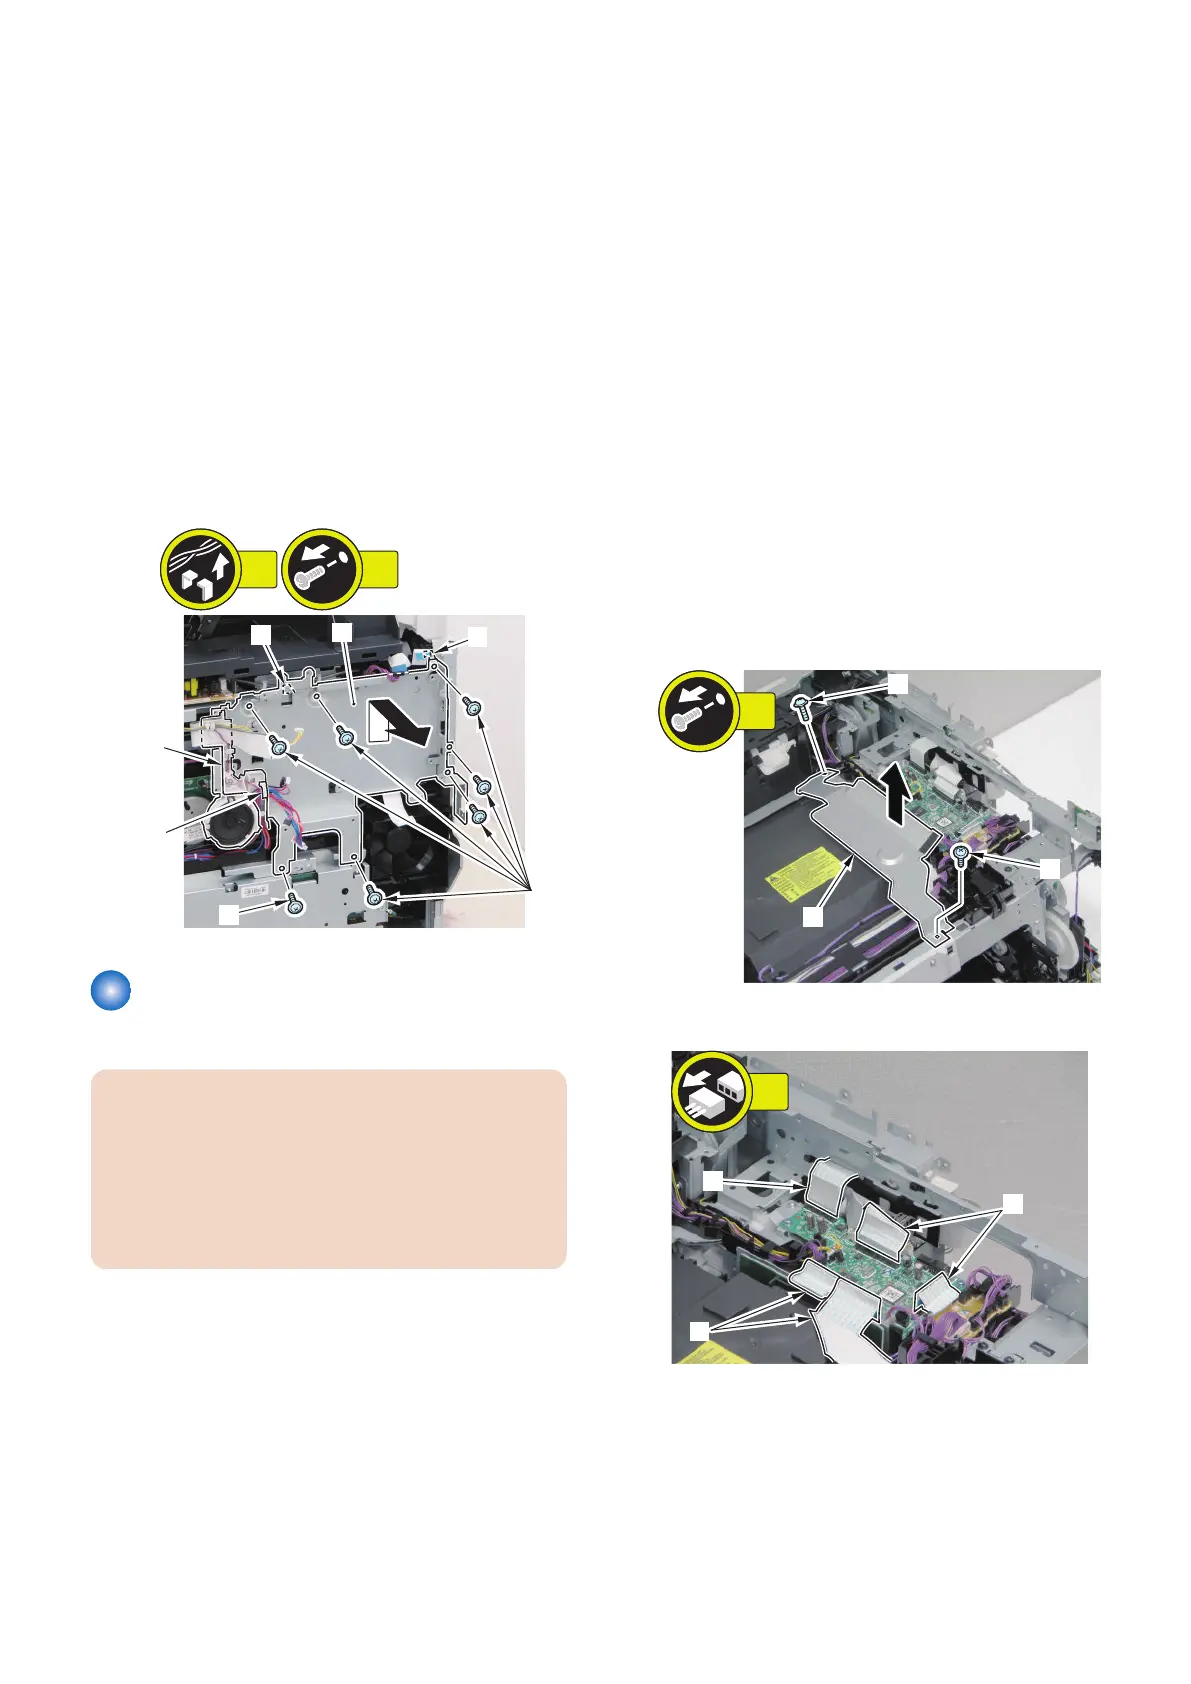
1. Remove the Main Controller Support Plate [1].
• 1 Wire Saddle [2]
• 1 Harness Guide [A]
• 7 Screws [3]
• 2 Hooks [4]
[4]
[4]
[1]
[A]
[3]
[3]
7x
2x
[2]
Removing the DC Controller
PCB
CAUTION:
When replacing the DC Controller PCB, be sure to
perform the works to be done before replacing the DC
Controller PCB (Refer to “Before Replacing the DC
Controller PCB” on page 162) and the works be done
after replacing the DC Controller PCB (Refer to “After
Replacing the DC Controller PCB” on page 163).
■ Before Replacing the DC Controller
PCB
1. Execute the following service mode to restore the
DC Controller setting values that were backed up in
the previous step.
COPIER > FUNCTION > VIFFNC > STOR-DCN
■ Preparation
1. Removing the Right Cover.(Refer to “Removing the
Right Cover” on page 120)
2. Removing the Left Cover.(Refer to “Removing the
Left Cover” on page 118)
3. Removing the Rear Upper Cover.(Refer to
“Removing the Rear Upper Cover” on page 123)
4. Removing the ADF Unit + Reader Unit.(Refer to
“Removing the ADF Unit + Reader Unit” on page
130)
5. Removing the Right Front Cover.(Refer to
“Removing the Right Front Cover” on page 121)
6. Removing the Upper Cover.(Refer to “Removing the
Upper Cover” on page 125)
■ Procedure
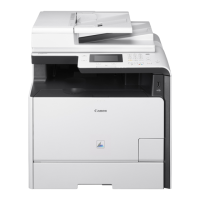
1. Remove the Harness Cover Plate [1].
• 2 screws [2]
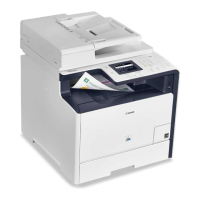
2. Disconnect the 5 flat cables [1].
4. Disassembly/Assembly
162