114
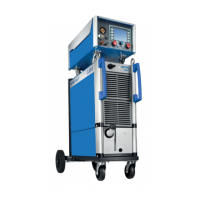
SD module
Reserve1* activated:
The input signal is rated for a voltage of 0…10 V. The name and the unit
are freely selectable. Via the menu item “Factor(10V)” a scaled value can be
allocated to the control voltage 10V. For example: 10 volts correspond to a
certain sensor signal.
Heat input activated:
The measured current and voltage values are offset against the wire speed
which was determined here and output in kj/cm.
The welding speed value is manually entered in the welding power source
and does not depend on the actual welding speed. If the actual welding
speed is higher than the one determined here, the heat input is lower
than the display in the welding power source. If the actual welding speed
is lower than the one determined here, the heat input is higher than the
display in the welding power source.
• Reserve2*
The input signal is rated for a voltage of 0…10 V. The name and the unit
are freely selectable. Via the menu item “Factor(10V)” a scaled value can be
allocated to the control voltage 10V. For example: 10 volts correspond to a
certain sensor signal.
• Ignition
After the start command given by the robot or the peripheral equipment
(PLC), the signal “Arc on” must be transmitted within the selected ignition
time from the power source controller to the master controller (robot or
PLC).
The welding process is immediately interrupted if the ”Arc on” signal is not
given within the preset ignition time and if the channels are set to “Abor-
tion group 1 or 2“. The master controller decides on an abortion if the set-
ting is on “Message group 1 or 2”.
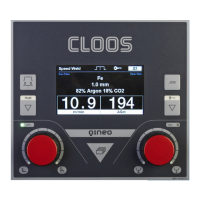
• Welding time
Each mechanised weld seam performed by a robot or another peripheral
equipment takes a certain time. This time is defined for the present job
in the menu item “Welding time”. If during job execution the key “Apply/
Accept set value” is pressed, the required welding time is automatically
adopted at the end of the weld seam. Use the arrow keys to enter a limit
value (+/-) and a warning threshold (+/-) for the welding time. The weld-
ing process is immediately interrupted if the channels are set to “Abortion
group1 or 2”. The master controller decides on an abortion if the setting is
on “Message group 1 or 2”. The welding times can be added when welding
several seams with the same job number. The set value is entered manually
via the middle rotary knob.
INFO!
 Loading...