82
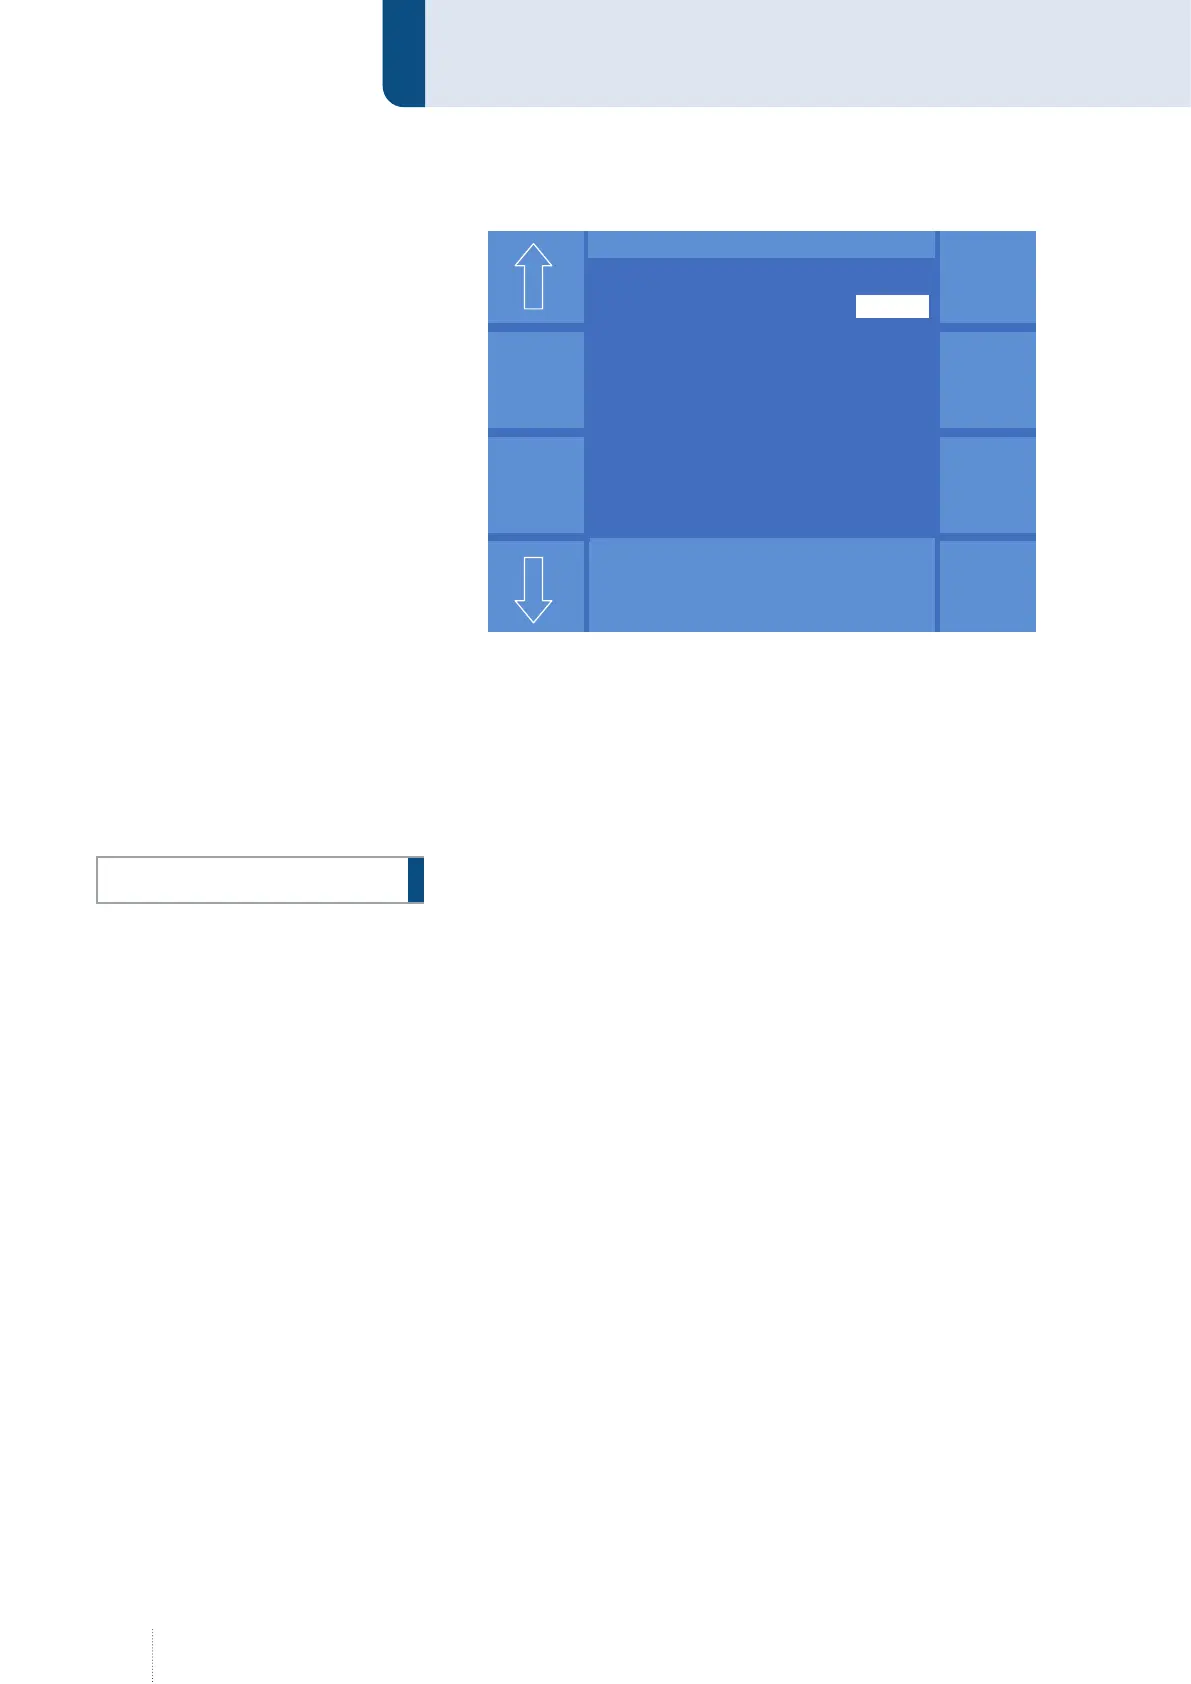
MAIN (2) - Config (Configuration)
• From software version number x.10 on
Before starting the measurement, make sure that either:
• there is no welding wire in the torch
or
• the welding wire is pulled off the torch so that the wire does not stick
out of the current tip.
Ensure that no welding wire touches the workpiece during the measure-
ment.
Measurement is started at the operating module via rotary knob. In the
operating modes 2-cycle, 4-cycle, Super-4-cycle and spot welding it is also
possible via torch trigger.
Proceed as follows in order to perform the measurement:
1. Remove the gas nozzle from the torch.
2. Select and confirm with the rotary knob in the "MAIN (2)" menu -->
"Config"--> "Compensation" --> "Enable measurement".
• The controller changes to the measurement mode.
3. Place the torch head firmly on the workpiece. The current tip must
touch the workpiece.
4. Press the torch trigger or select the menu item "Start measurement" at
the operating module to start the measurement.
• The measuring current is fed in.
Measurement is finished after approx. 1 second. The measured values are
automatically recorded.
Repeat the measurement until the measured values only differ a little bit.
Normally four subsequent measurements are enough.
Puls 4 -Takt
V
0
A
1.2 mm Fe
82% Argon 18% Co
2
0.0
Konfig - Kompensation
Schweißkreis
Gesamt- Kabellänge (m) 13
T- Anpassung (ms) 0.38
Puls 4 -Takt
V
0
A
1.2 mm Fe
82% Argon 18% Co
2
0.0
Puls 4 -Takt
V
0
A
1.2 mm Fe
82% Argon 18% Co
2
0.0
Konfig - Kompensation
Schweißkreis
Gesamt- Kabellänge (m) 13
T- Anpassung (ms) 0.38
Figure 40. Compensation of the welding current circuit
ATTENTION!