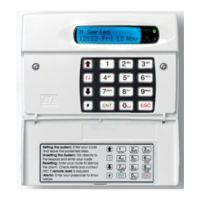
Engineer Menu 1-1 Engineering Manual
32
Inverted
By default, a zone is "triggered" by opening the zone contacts. If the zone's Inverted
attribute is set to YES, the zone triggers when the zone contacts close. Apply this attribute
when monitoring normally open devices such as exit terminator buttons or pressure pads.
Shuntable
Zones with this attribute are automatically shunted (Isolated) if:
A user chooses to shunt all zones in a selected ward using User option 1-3 (24 Hour
zones only).
A user code of type Shunt is entered at the keypad (as set up in User option 2-4).
A Shunt Key zone is triggered (page 28).
Beam Pair
Zones with this attribute cause an alarm only if two or more zones that are in the same
ward and have the Beam Pair attribute trigger within the time specified by the Beam Pair
timer (page 60). This attribute is normally used only for areas protected by an array of
infra-red beams, with each beam connected to a separate zone. Zones that have the
Beam Pair attribute should be the same type (normally Normal Alm or Perimeter).
Monitored
When triggered, a zone with this attribute activates outputs that follow the Monitored O/P
On (page 47) or Monitor (page 53) event.
Non Latching
Select this attribute for a zone of type Keyswitch (page 28), Shunt Key (page 28) or
Security (page 30) if a non-latching switch is used (i.e. a switch where the contacts do
not stay open after the key is operated).
Step 4 – Select Zone's Wards
Each zone can be assigned to one or more wards. If the Ward configuration option (page 73)
is set to ON, Zones assigned to more than one ward will only be armed when all the wards they
are in are set.
Step 5 – Enter Zone Description
Each zone can have up to 16 characters of text assigned to it. The zone text is displayed in, for
example, alarm messages displayed at the keypad. Refer to page 123 for details of how to
enter text.