Figure 115. Installing the display assembly
Steps
1. Align and place the display assembly on the computer chassis.
2. Replace the eight (M3x6, T8) epoxy screws that secure the display assembly to the computer chassis.
NOTE:
The epoxy screws are designed for single use. When replacing the display assembly, ensure to use the epoxy
screws shipped with the replacement package.
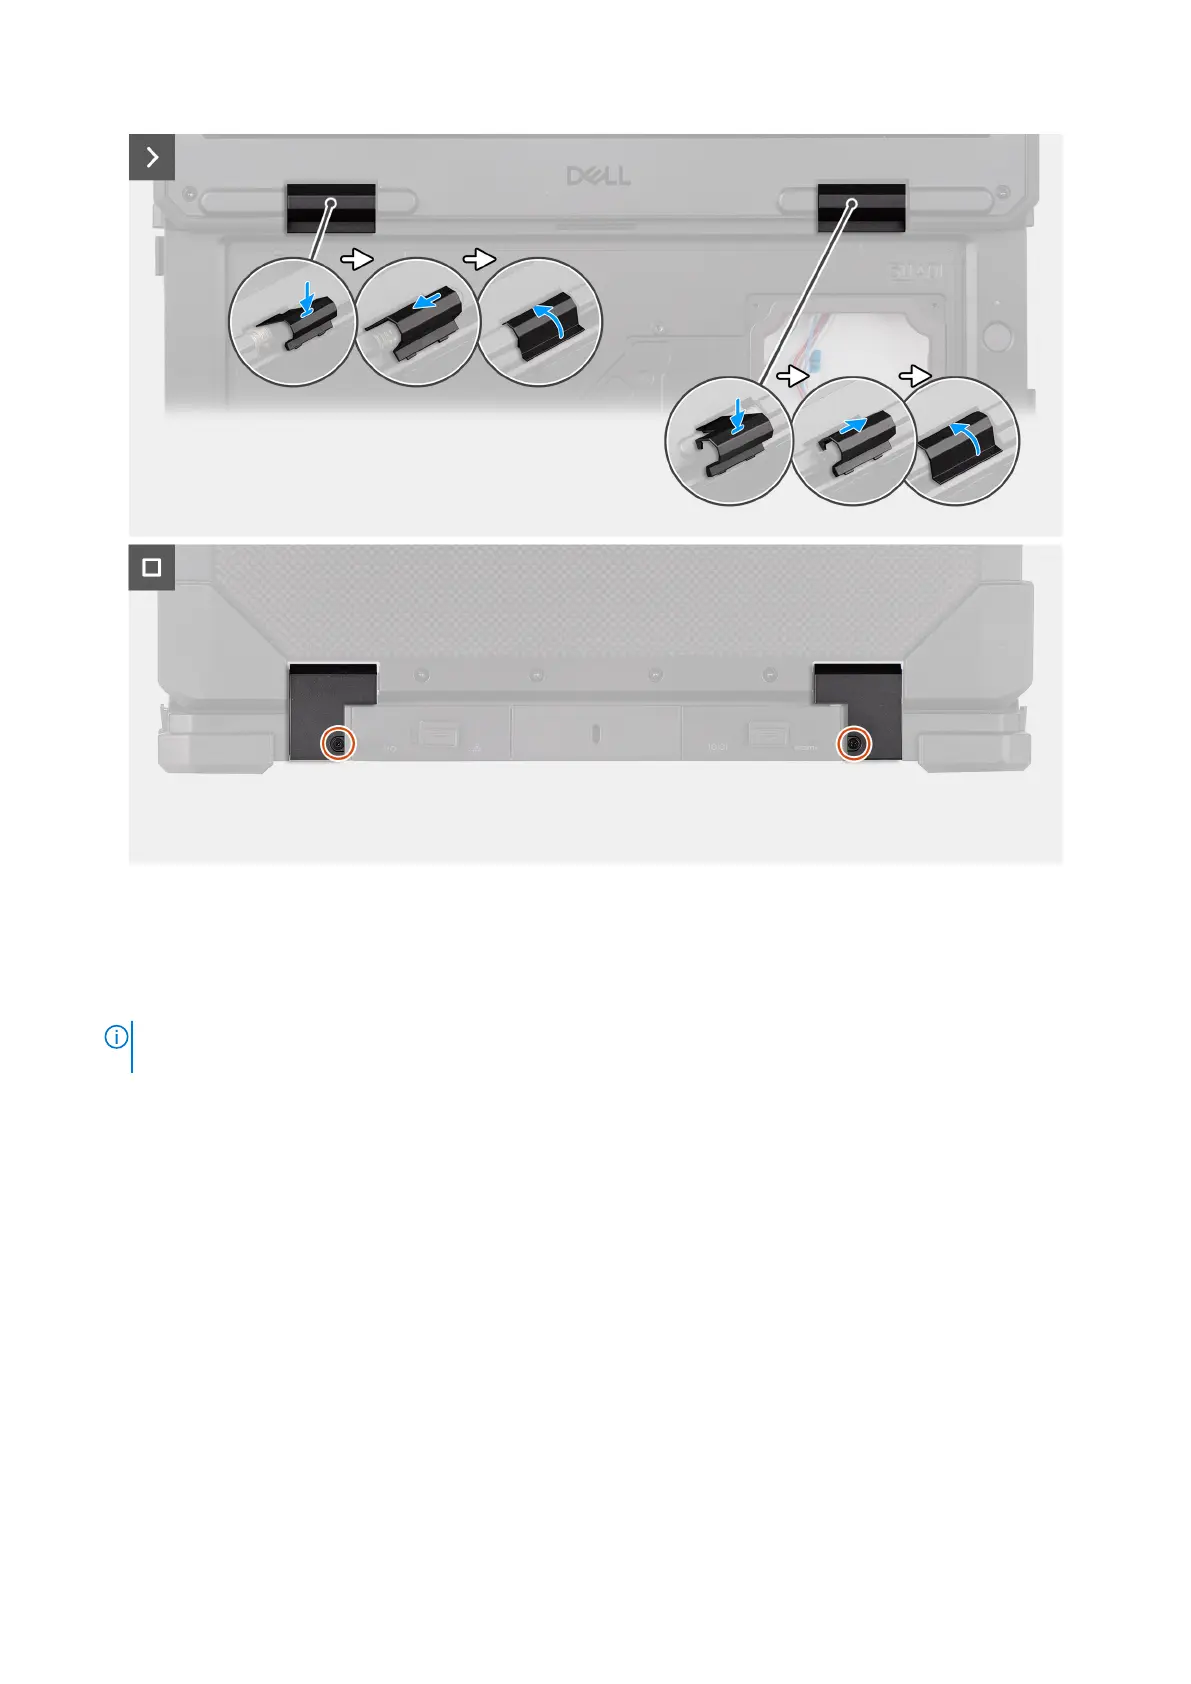
3. Replace the left/right hinge covers to the computer chassis and close the lid.
4. Replace the two (M2.5x5) screws that secure the left/right hinge covers to the computer chassis.
Next steps
1. Install the system board.
2. Install the heat sink .
3. Install the fan.
4. Install the smart-card reader.
5. Install the express-card reader.
6. Install the rear I/O-board.
7. Install the dock I/O-bracket.
8. Install the dock I/O-module.
9. Install the WWAN card.
10. Install the WLAN card.
11. Install the RF switch board.
12. Install the base cover.
13. Install the keyboard (rubberized) or keyboard (standard).
152
Removing and installing Field Replaceable Units (FRUs)