Figure 117. Removing the display-panel assembly
Steps
1. Remove the four (M2.5x6, T8) screws that secure the display-panel assembly to the display back-cover assembly.
NOTE:
These screws are coated with epoxy and are secured firmly, requiring more torque to remove them. To prevent
damage to the screws and surrounding plastics, use the correct screwdriver for each screw type.
2. Close the lid and remove the 11 (M2.5x6, T8) screws that secure the display-panel assembly to the display back-cover
assembly.
3. Use a plastic scribe to carefully pry open the top, left, and right sides of the display-panel assembly.
NOTE:
When prying open the display-panel assembly, ensure to pry along the outside edge of the display bezel using
your hand or a plastic scribe. Using a screw driver or any sharp object may damage the display cover.
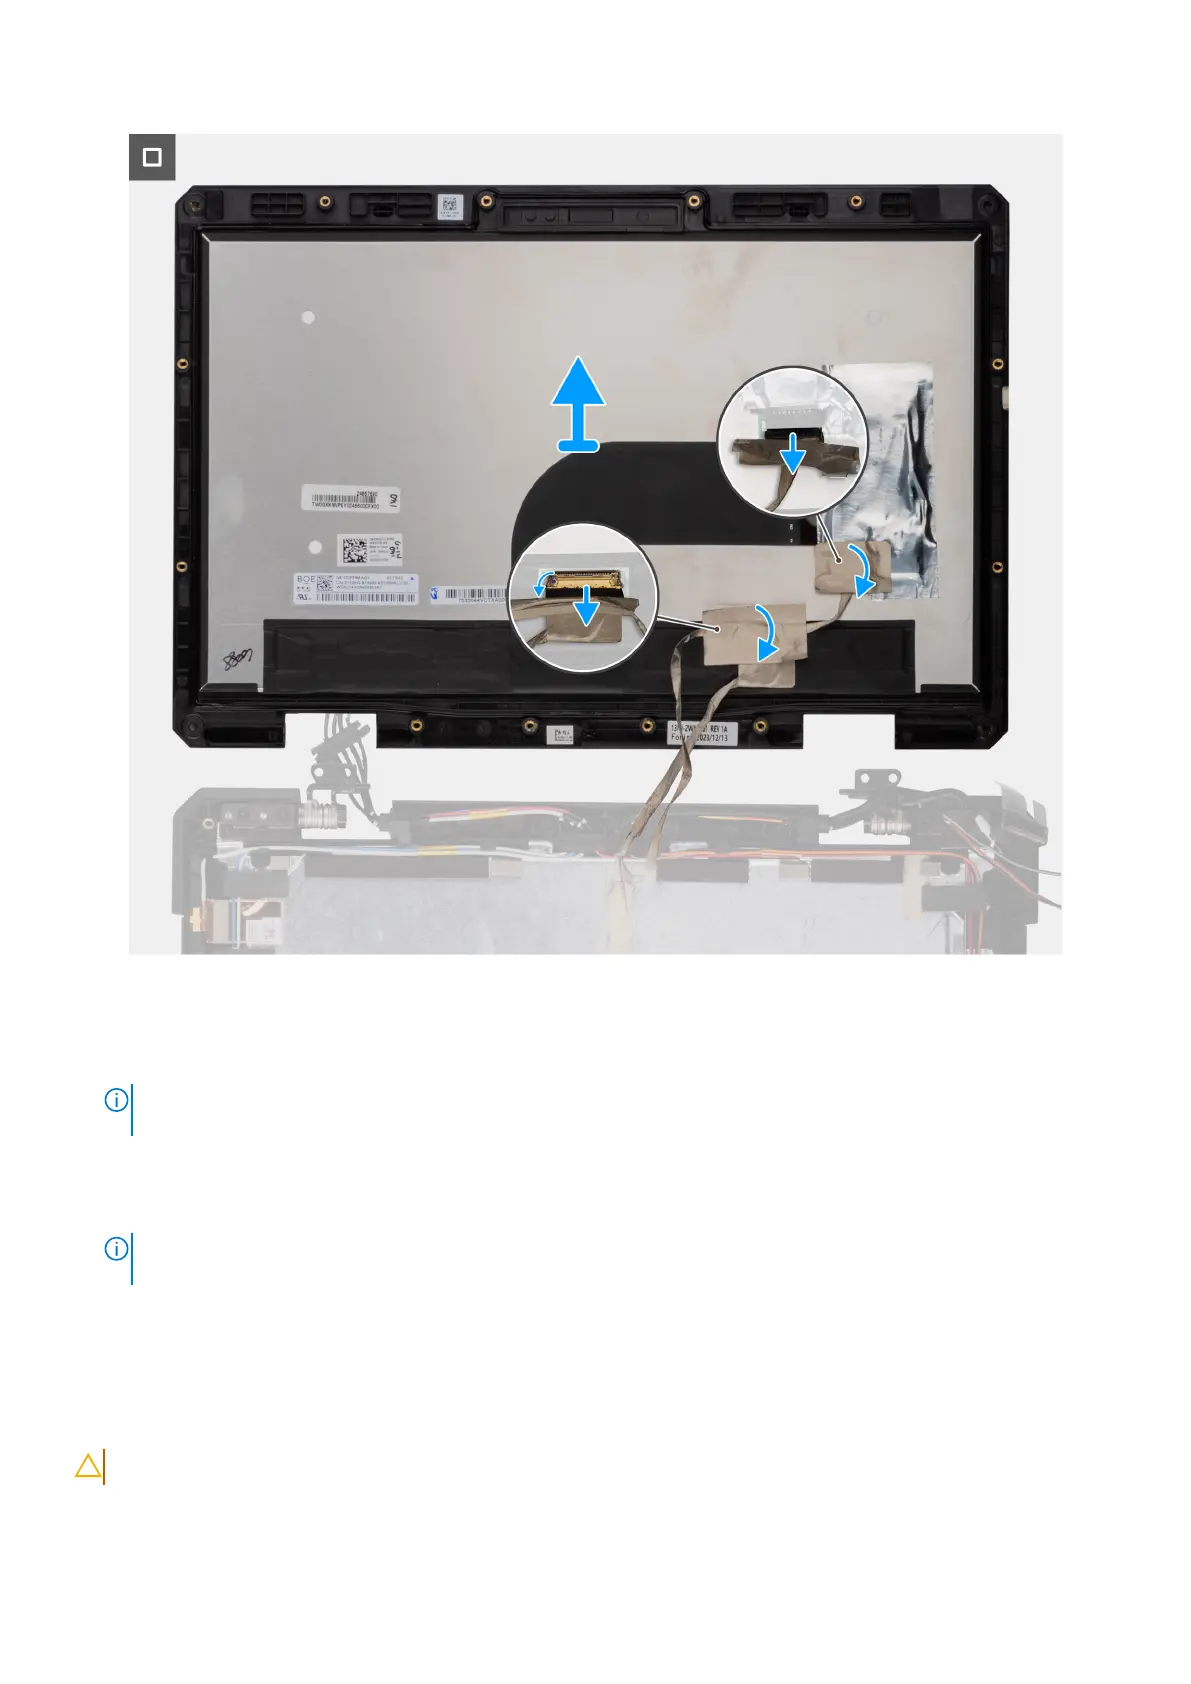
4. Flip the display-panel assembly and disconnect the eDP cable from its connector on the display-panel.
5. Disconnect the touch cable from its connector on the touch screen board.
Installing the display-panel assembly
CAUTION: The information in this installation section is intended for authorized service technicians only.
154 Removing and installing Field Replaceable Units (FRUs)