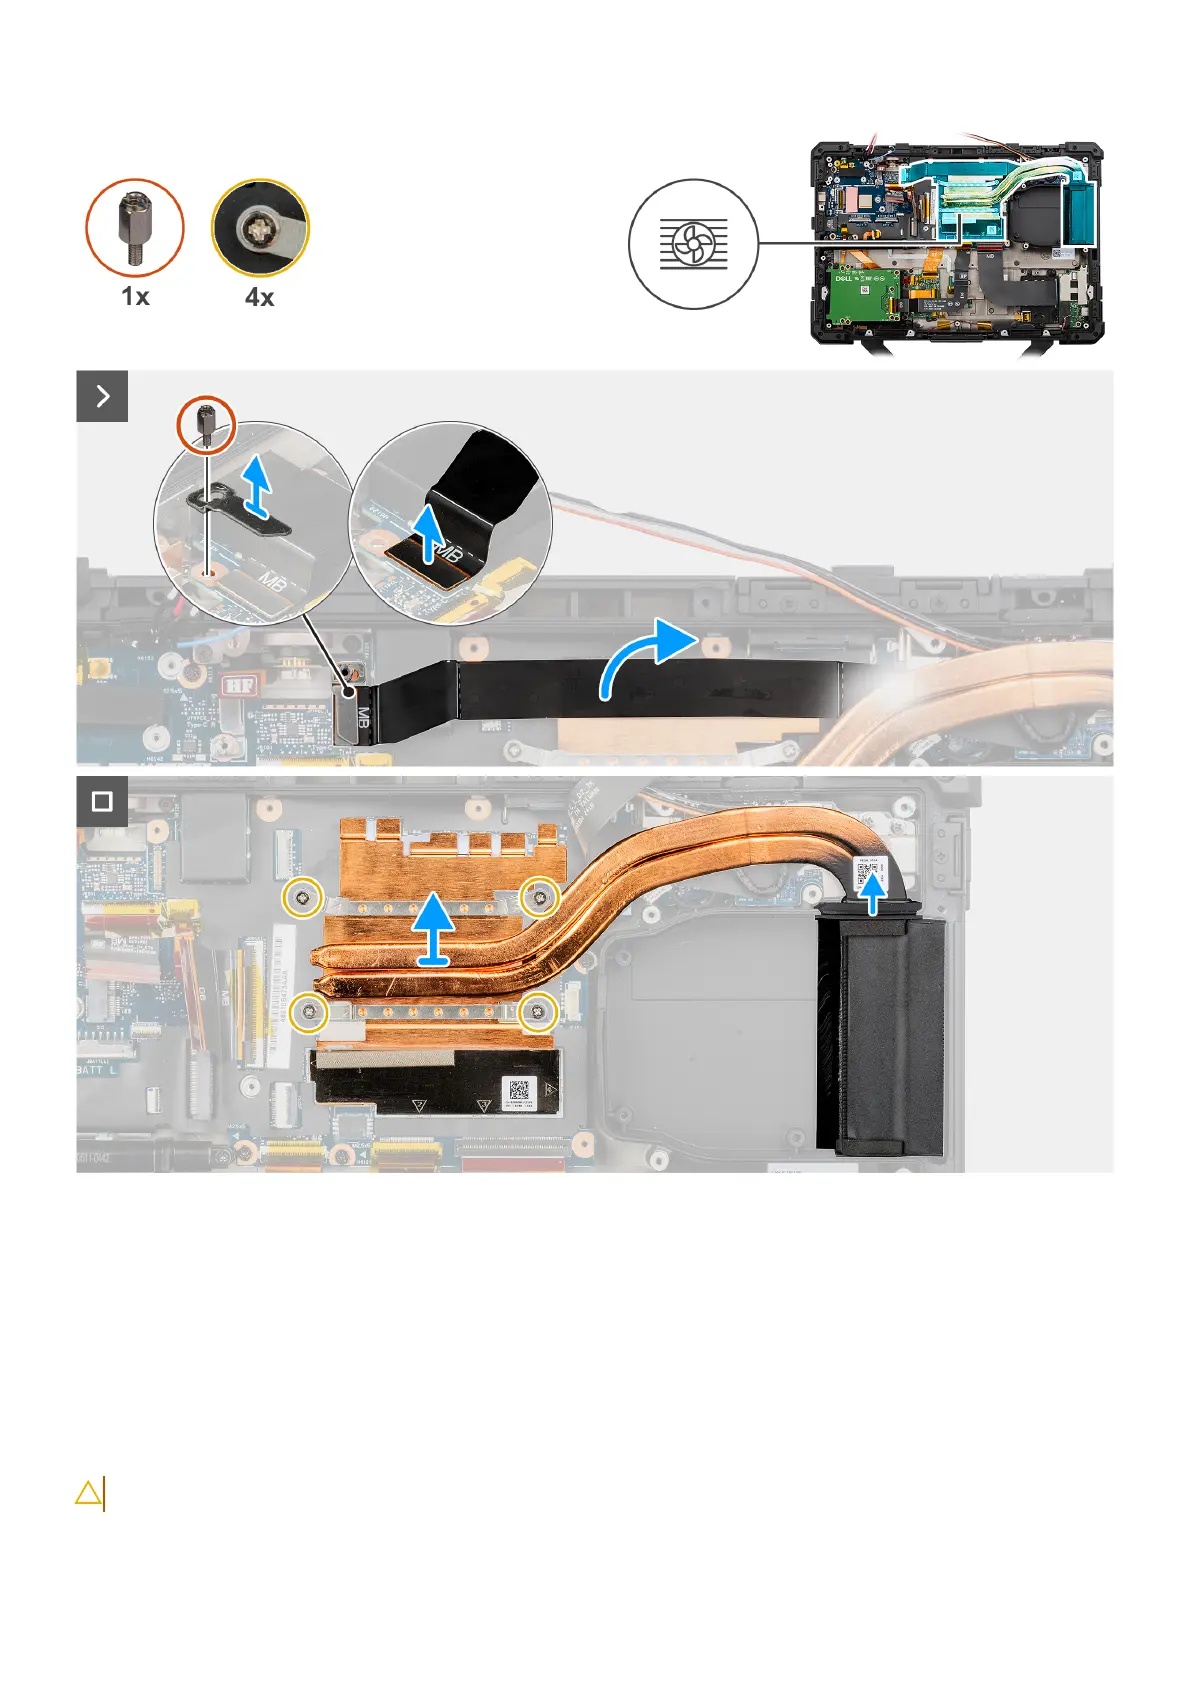
Figure 86. Removing the heat sink
Steps
1. Remove the standoff nut and remove the flat printed cable connector bracket from the system board.
2. Disconnect the left Type-C flat-printed cable connector from the system board.
3. Remove the four (captive) screws that secure the heat sink to the system board.
4. Lift the heat sink from the computer chassis.
Installing the heat sink
CAUTION: The information in this installation section is intended for authorized service technicians only.
124 Removing and installing Field Replaceable Units (FRUs)