Figure 32. Removing the keyboard (rubberized)
Steps
1. Remove the six (M2.5x5) screws that secure the keyboard to the computer chassis.
2. Pry the keyboard from the front and then rotate it counterclockwise until the keyboard-cable cover is visible, and then place
it on the touchpad.
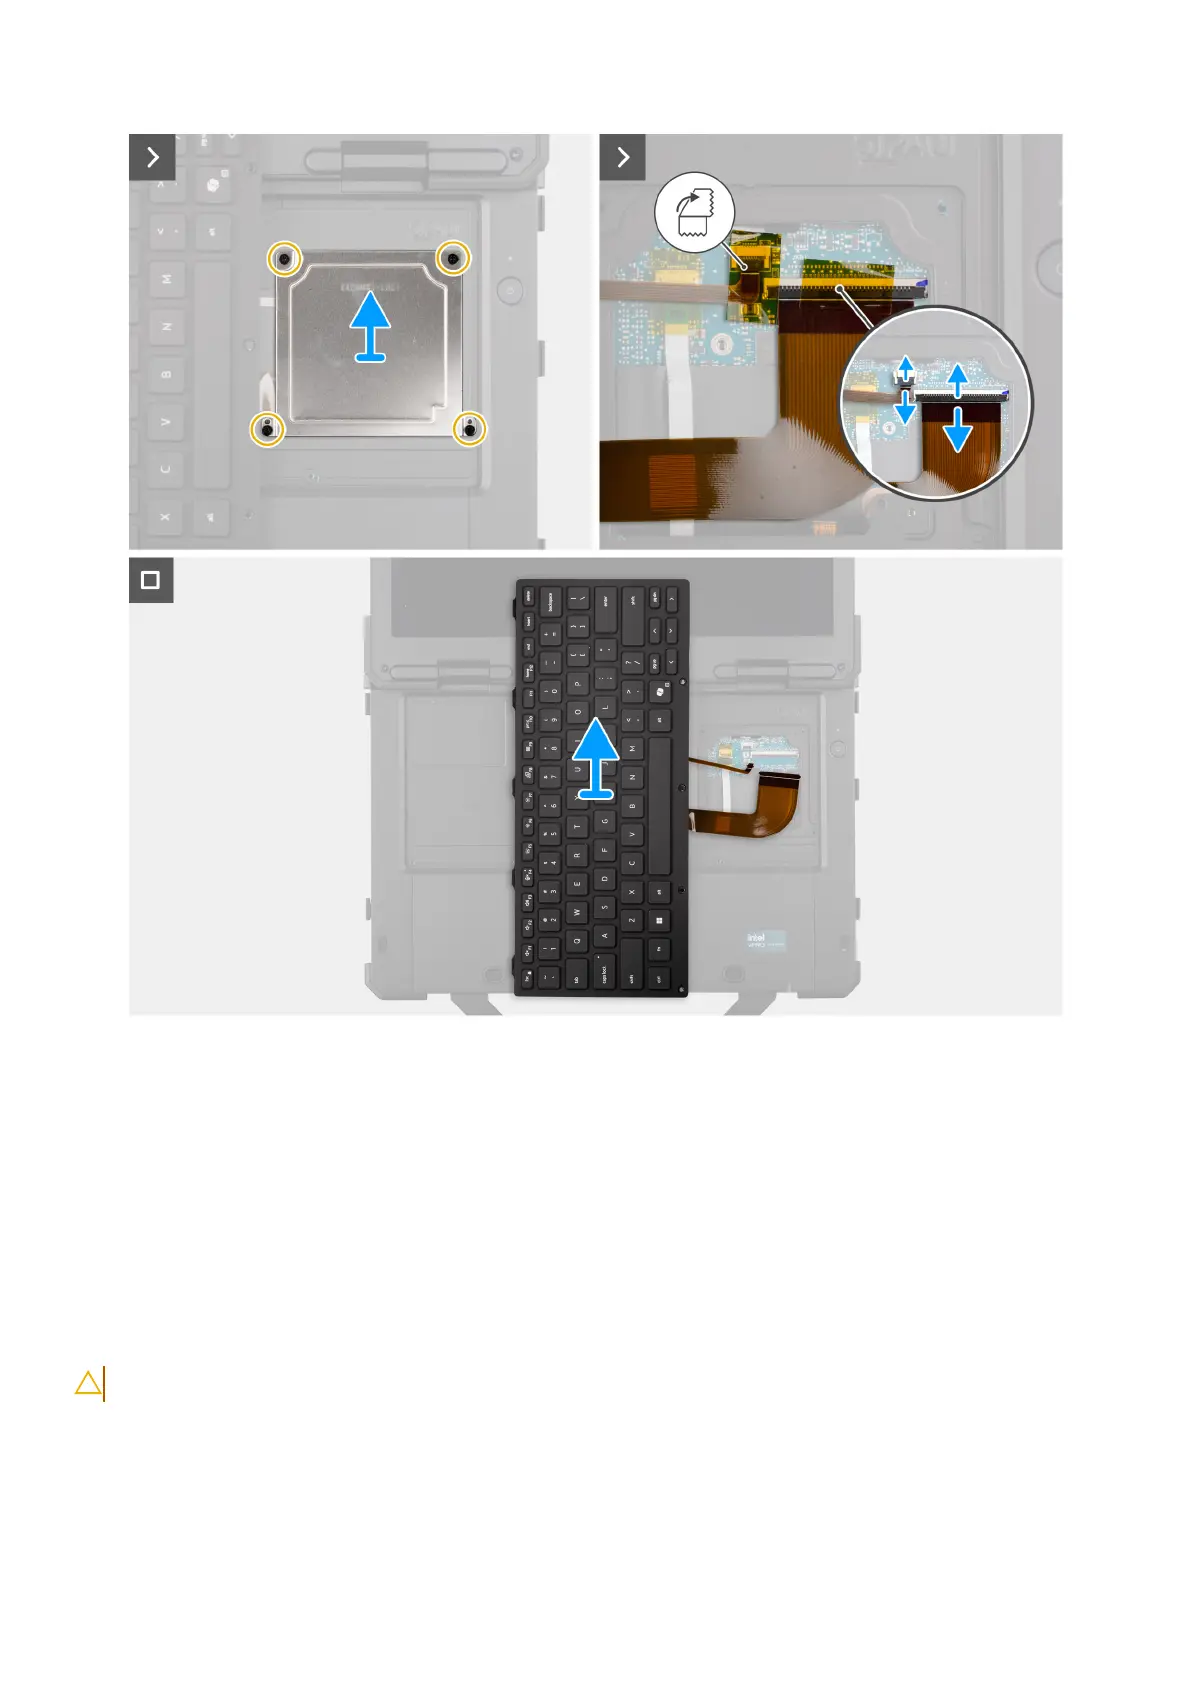
3. Remove the four (M2x3) screws that secure the keyboard cable cover to the computer chassis.
4. Disconnect the keyboard and backlight flexible printed cables from the connectors on the system board.
5. Lift the keyboard from the computer.
Installing the keyboard (rubberized)
CAUTION: The information in this installation section is intended for authorized service technicians only.
Prerequisites
If you are replacing a component, remove the existing component before performing the installation procedure.
66
Removing and installing Field Replaceable Units (FRUs)