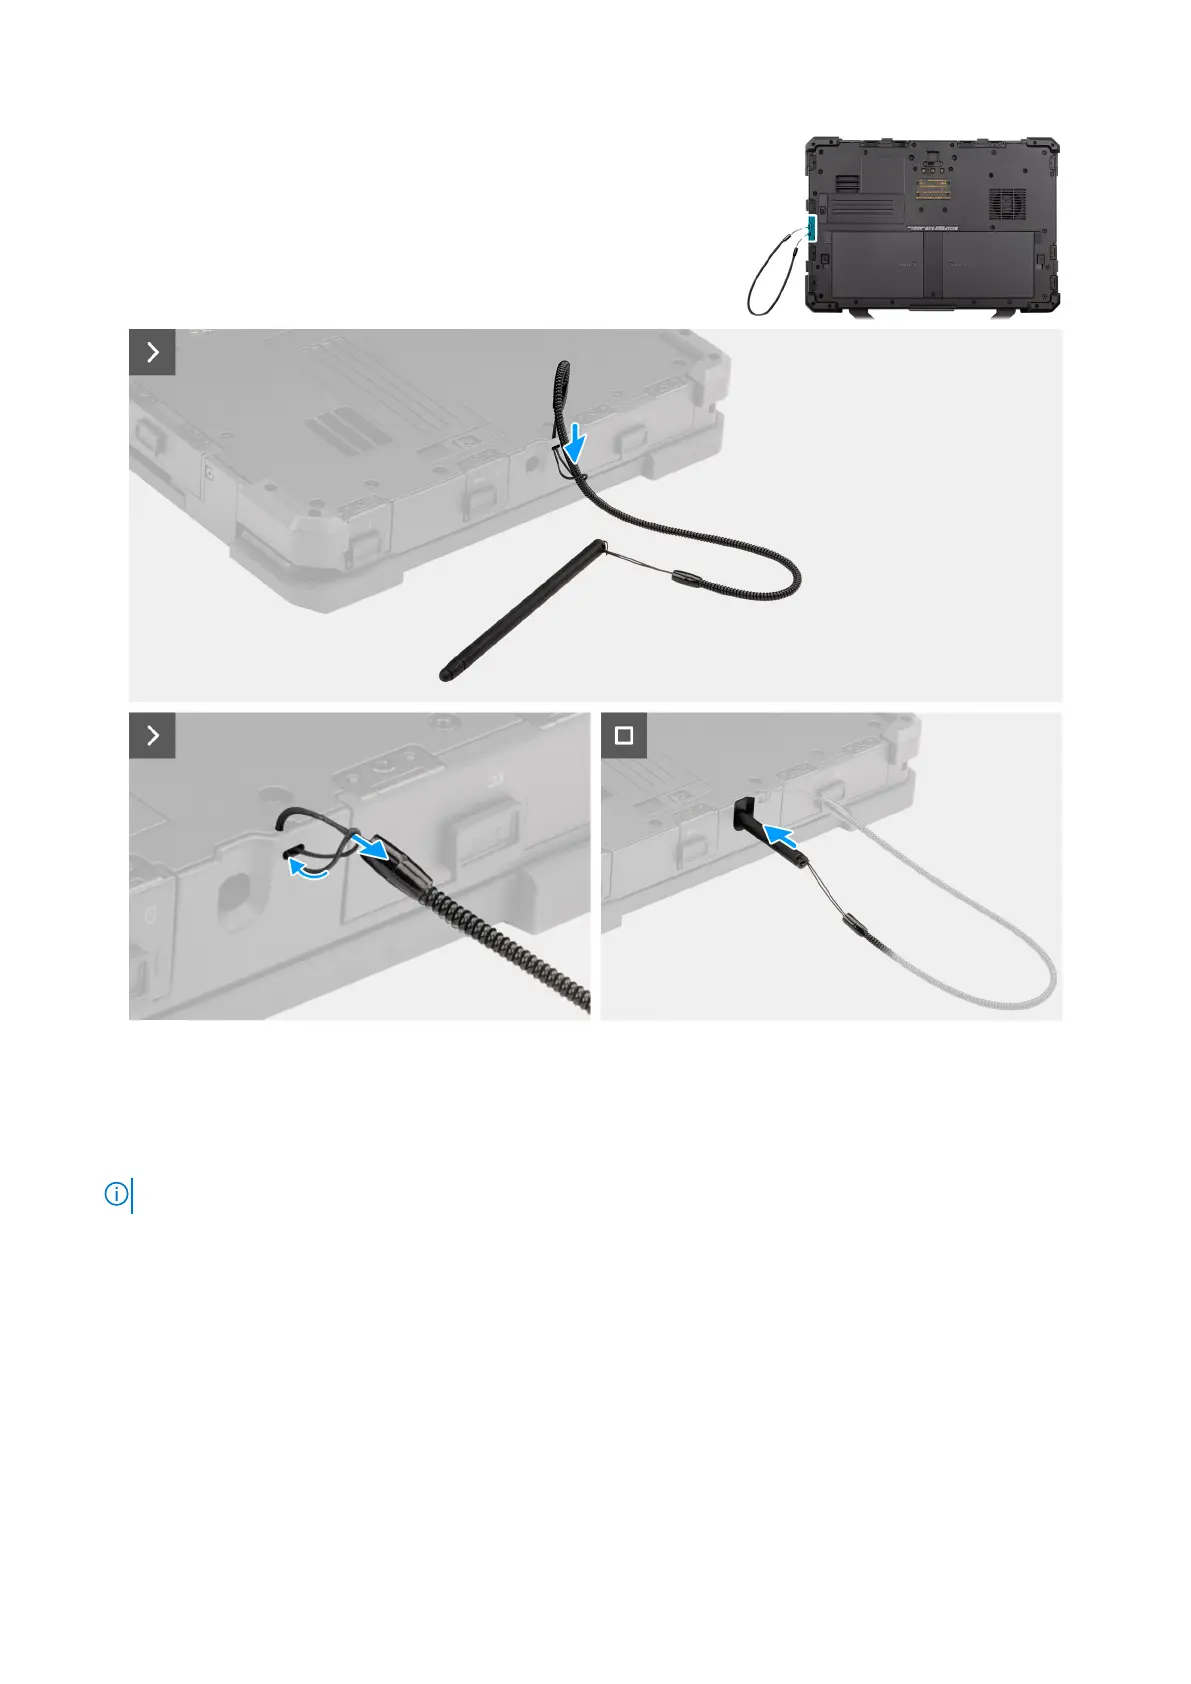
Figure 18. Installing the stylus
Steps
1. Slip the stylus through the hole to create a knot that holds the tether to the computer chassis.
2. Insert the stylus into the slot on the computer.
NOTE: When not in use, avoid suspending the stylus that is detached from its groove.
Next steps
1. Follow the procedure in after working inside your computer.
54
Removing and installing Customer Replaceable Units (CRUs)