5-20
Set Up the HDPQ Xplorer for Bluetooth Connectivity, continued
Two-step
process
(continued)
Set up the Computer Windows® 7 Settings for Bluetooth connection
Step Action
1 Enable the Bluetooth adapter on your computer.
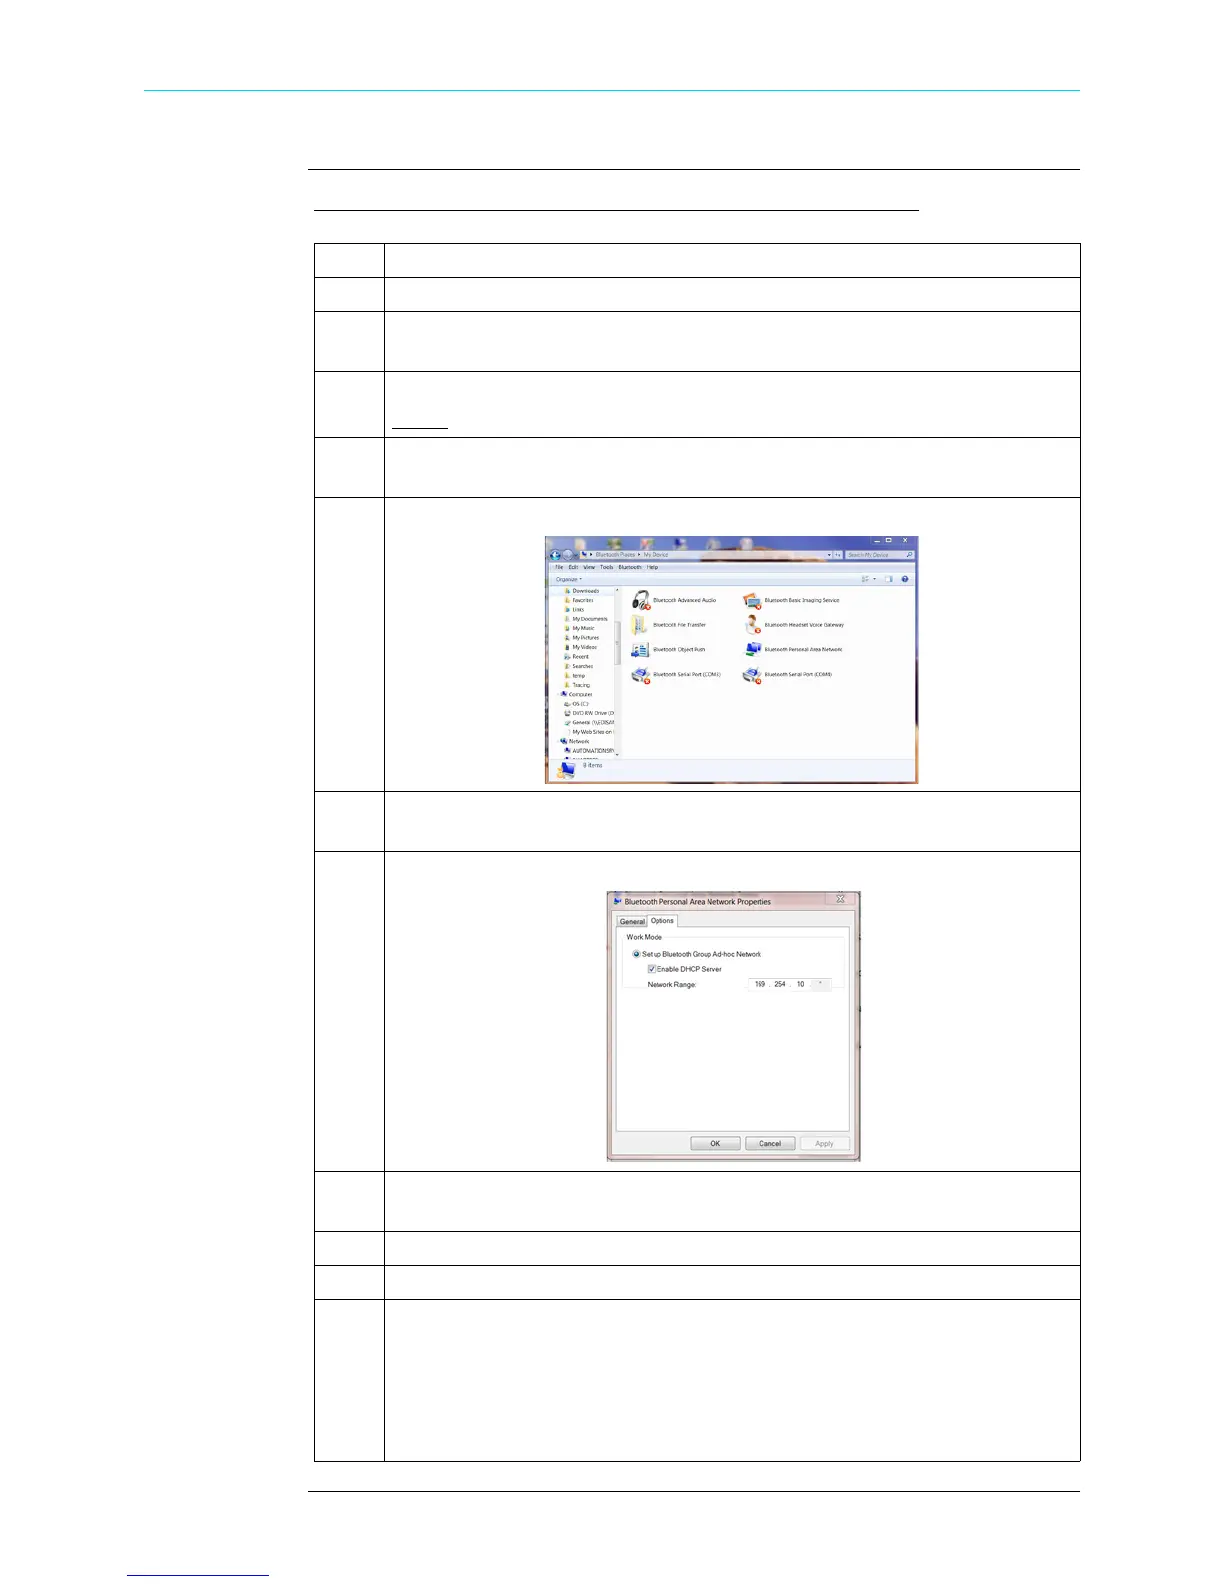
2 From the system tray, double-click on the Bluetooth icon to open Bluetooth
Places.
3 Right click on My Device to turn on Bluetooth.
Result
: The HDPQ icon should appear
4 Right-click on the HDPQ icon and select Pair, then enter the pairing code
that you used to set up the HDQP instrument for Bluetooth connection.
5 Double-click on My Device to bring up the menu below.
6 Double-click on Bluetooth Personal Area Network to bring up the network
status menu.
7 Press Properties, then press the Options tab to bring up the menu below.
8 Enable the Set Up Bluetooth Group Adhoc Network. Then click to Enable
DHCP Server. Set the Network Range to 169.254.10.*
When done, click
OK
.
9 Navigate back to the Bluetooth Places folder.
10 Right click on the HDPQ icon and select
Connect Personal BT Ad-Hoc User
.
11 The connection process should start. If successful, the HDPQ and My Device
icons will change color.
NOTE: At this point the HDPQ Xplorer should respond to a ping at IP
address 169.254.10.10 (HDPQ fixed Bluetooth address). The VNC should
also be able to connect at this address as well.
Shop for Power Metering products online at:
1.877.766.5412
www.PowerMeterStore.com
 Loading...