5-19
CH 5/ Instrument Settings
Set Up the HDPQ Xplorer for Bluetooth Connectivity
Two-step
process
Setting up the instrument for Bluetooth connection involves a two-step process. Note
this feature is limited to Windows
®
personal computers only; Android
®
and Apple
®
devices do not support PAN networks.
Set up the instrument for Bluetooth connection
As first step, you need to ensure that the instrument is equipped with a Dranetz supplied
Bluetooth external adapter in order to connect to a wireless-enabled device using the
Bluetooth networking mode. Then configure the Bluetooth settings on the instrument’s
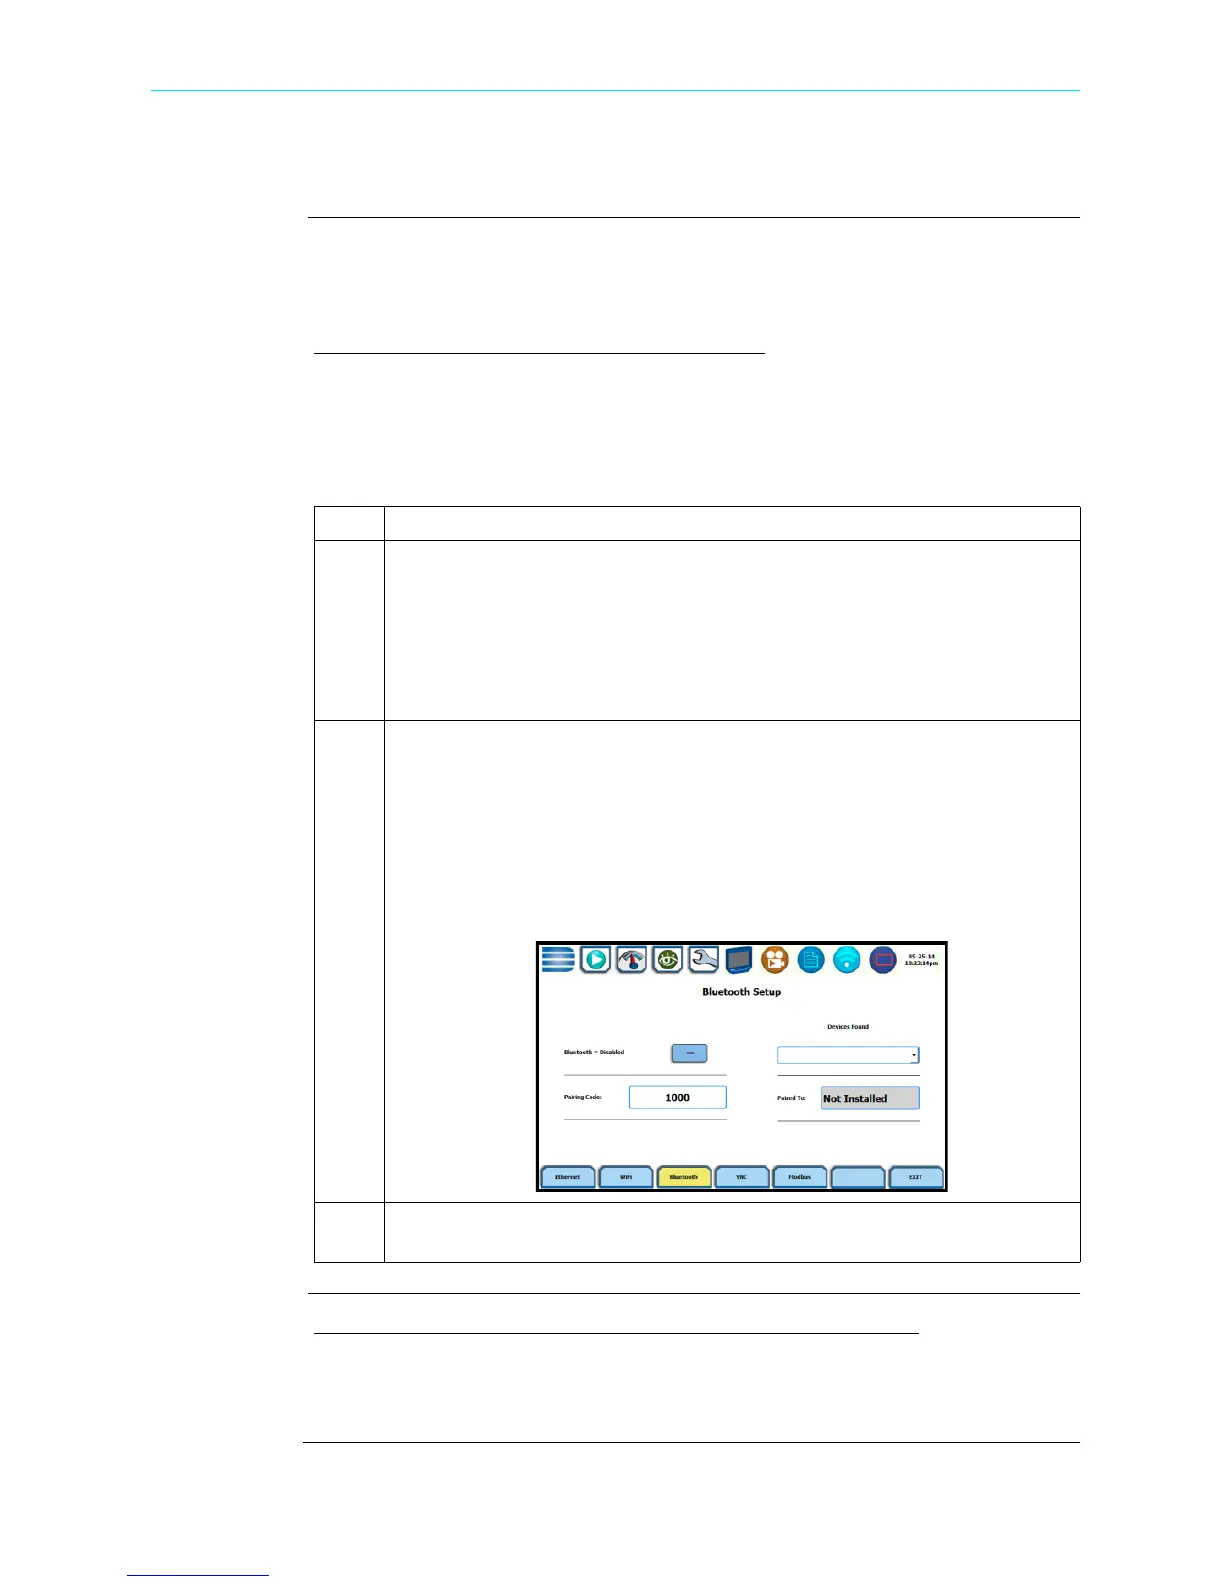
Communications Options screen, as shown below.
Set up the Computer Windows® 7 Settings for Bluetooth connection
As second step, you need to configure the Windows
®
7 settings on your computer to
properly communicate with the HDPQ Xplorer using Bluetooth connection.
Step Action
1 Make sure that the instrument is equipped with the required Bluetooth USB
adapter.
NOTE: The Dranetz Bluetooth external adapter (P/N USB-Bluetooth) is
packaged as a standard accessory with your purchase of the HDPQ Xplorer,
Xplorer-400 and Guide. It is available as an optional accessory for the HDPQ
Visa.
2
Navigate to the Communications Options screen (Instrument Settings > Setup
Communications Options). Select the Bluetooth soft key on the
Communications Options screen.
Under Pairing Code - specify the default pairing code to 1000. Press the
corresponding field and use the keyboard to enter the prescribed value. This
code or passkey will enable the HDPQ Xplorer to see the other device and
connect to it. If the pairing code is not properly set to 1000, you need to
change it as necessary.
3 Once the pairing code is set to the correct value, activate Bluetooth
connection by pressing the button to show Bluetooth = Enabled.
Shop for Power Metering products online at:
1.877.766.5412
www.PowerMeterStore.com
 Loading...