4-5
CH 4/ Setup Monitoring
Automatic Setup
procedure
(continued)
Action... Result...
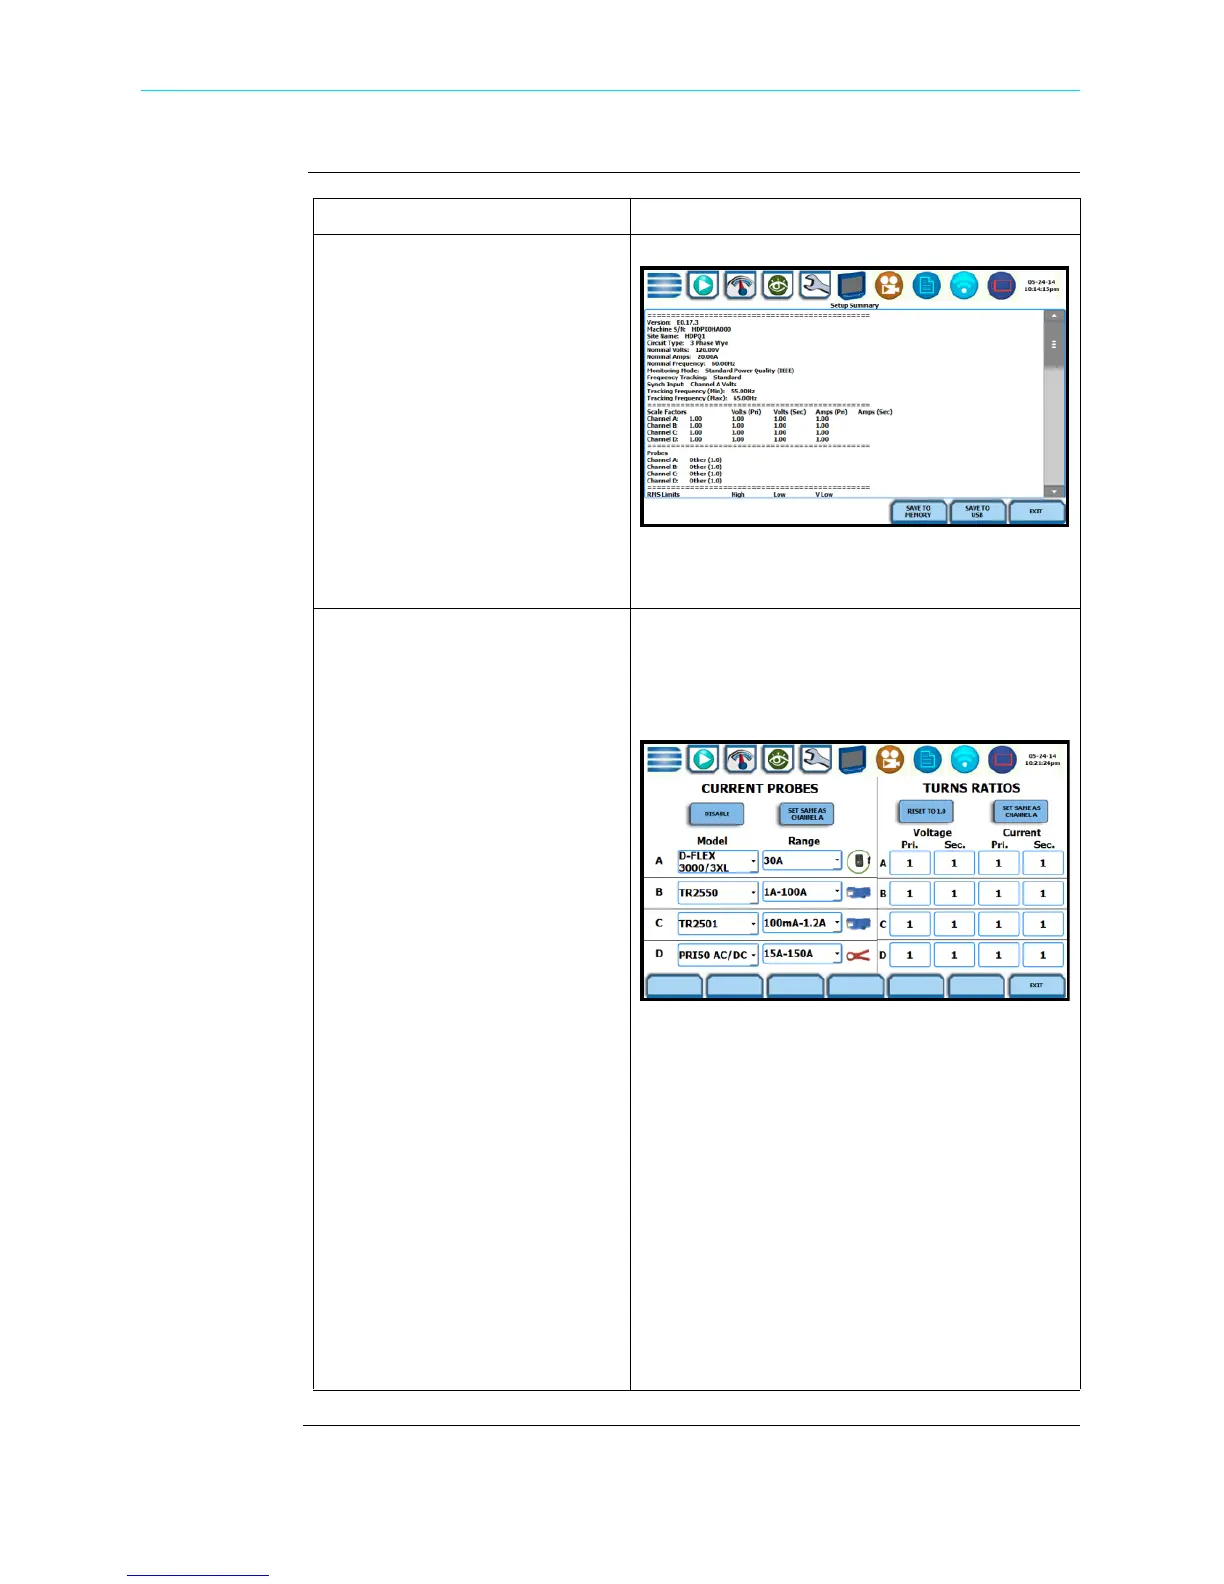
STEP 2: Summary displays the
list of parameter settings for
Automatic Setup for Power
Quality. The setup summary is
available for review before,
during and after monitoring.
• Press and drag the scroll bar to
move the page up or down.
• When done reviewing the
Setup Summary, press Exit.
The screen will return to
Automatic Setup for Power
Quality.
STEP 3: Various probe types are
available for each channel for
current monitoring.
Probe Selection
• If current will be monitored,
press the corresponding Probe
Channel/Parameter window to
display the probe types
available for each channel.
• If you want to make all
channels have the same setup
as Channel A current, press Set
Same as Channel A. The
display will change to show
only one probe selection for all
channels. Press the window
drop down arrow to display the
probe types available.
• Select your desired probe type.
• Range corresponds to the
usable input range for each
probe type.
• If the current probe that you are
using is not on the list, select
Other. Then set the Scale to
define the CT scale factor on
the current probe.
HDPQ-403
HDPQ-404
Shop for Power Metering products online at:
1.877.766.5412
www.PowerMeterStore.com
 Loading...