Wired Network Projection
130
You can send images to your projector through a wired network. To do this,
connect the projector to your network, and then set up your projector and
computer for network projection.
After connecting and setting up the projector as described here, download
and install Epson iProjection (Windows/Mac) from the following Web site.
epson.sn
Epson iProjection software sets up your computer for network projection. It
also allows you to hold interactive meetings by projecting user's computer
screens over a network. See the Epson iProjection Operation Guide
(Windows/Mac) for instructions.
gg Related Links
• "Connecting to a Wired Network" p.130
• "Selecting Wired Network Settings" p.130
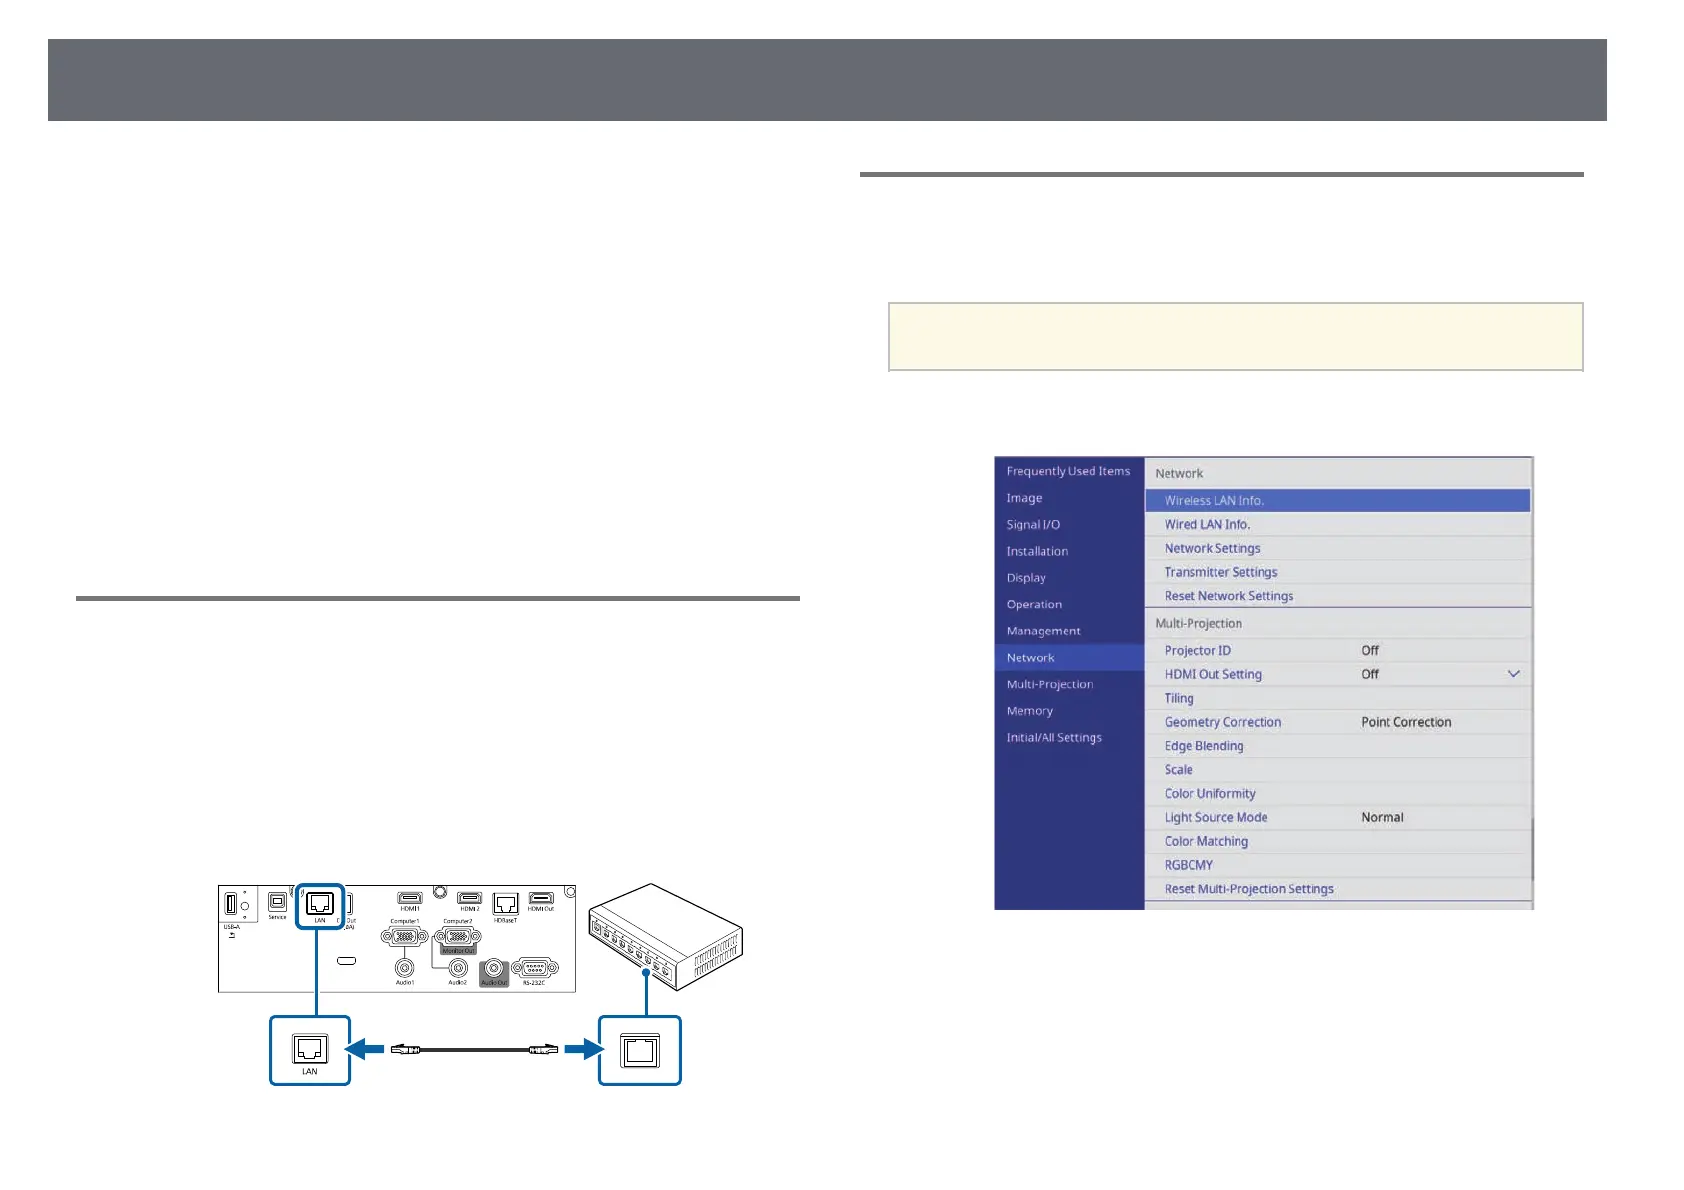
Connecting to a Wired Network
To connect the projector to a wired local area network (LAN), use a 100Base-
TX or 10Base-T network cable. To ensure proper data transmission, use a
Category 5 shielded cable or better.
a
Connect one end of the network cable to your network hub, switch, or
router.
b
Connect the other end of the cable to the projector's LAN port.
Selecting Wired Network Settings
Before you can project from computers on your network, you need to select
network settings on the projector.
a
Make sure you already connected the projector to your wired network
using the LAN port.
a
Press the [Menu] button, select the Network menu, and press [Enter].
b
Select Network Settings and press [Enter].
c
To identify the projector over the network, select Projector Name and
enter a name up to 16 alphanumeric characters long.
d
Set the Priority Control Interface setting to Wired LAN.