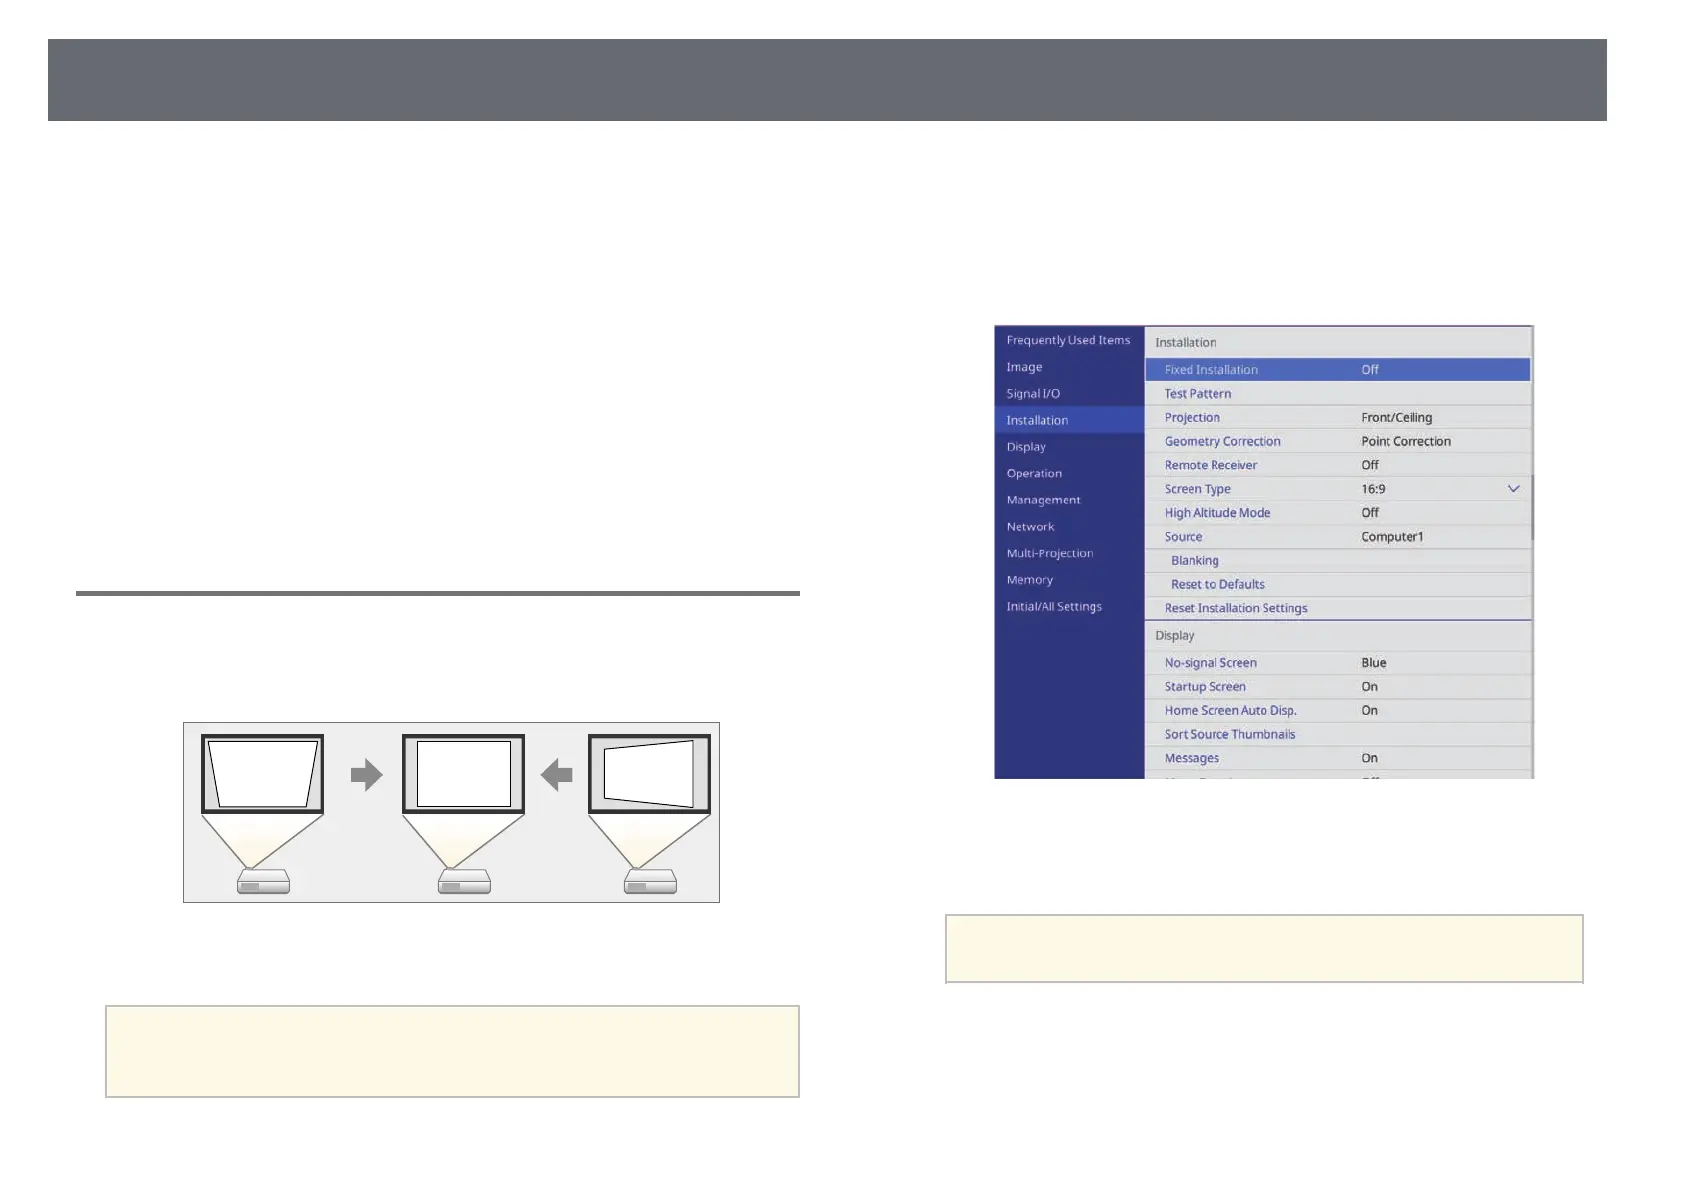
Image Shape
57
You can project an even, rectangular image by placing the projector directly
in front of the center of the screen and keeping it level. If you place the
projector at an angle to the screen, or tilt it up or down, or off to the side, you
may need to correct the image shape.
After correction, your image is slightly smaller.
For the best quality images, we recommend adjusting the installation position
of the projector to achieve the correct image size and shape.
gg Related Links
• "Correcting Image Shape with H/V Keystone" p.57
• "Correcting the Image Shape with Quick Corner" p.59
• "Correcting Image Shape with Arc Correction" p.61
• "Correcting Image Shape with Point Correction" p.63
• "Loading Image Shape Setting from Memory" p.65
Correcting Image Shape with H/V Keystone
You can use the projector's H/V-Keystone setting to correct the shape of an
image that is unevenly rectangular on the sides.
You can correct images up to 30º right, left, up, or down.
a
• If you need to change the Screen Type and Screen Position settings,
change them first.
• You cannot combine with other correction methods.
a
Turn on the projector and display an image.
b
Press the [Menu] button on the control panel or remote control.
c
Select the Installation menu and press [Enter].
d
Select Geometry Correction and press [Enter].
The Geometry Correction screen is displayed.
a
You can also access the Geometry Correction screen by pressing
the up arrow button on the control panel.
e
Select H/V-Keystone and press [Enter]. Then press [Enter] again.