8 Computer Operations
262
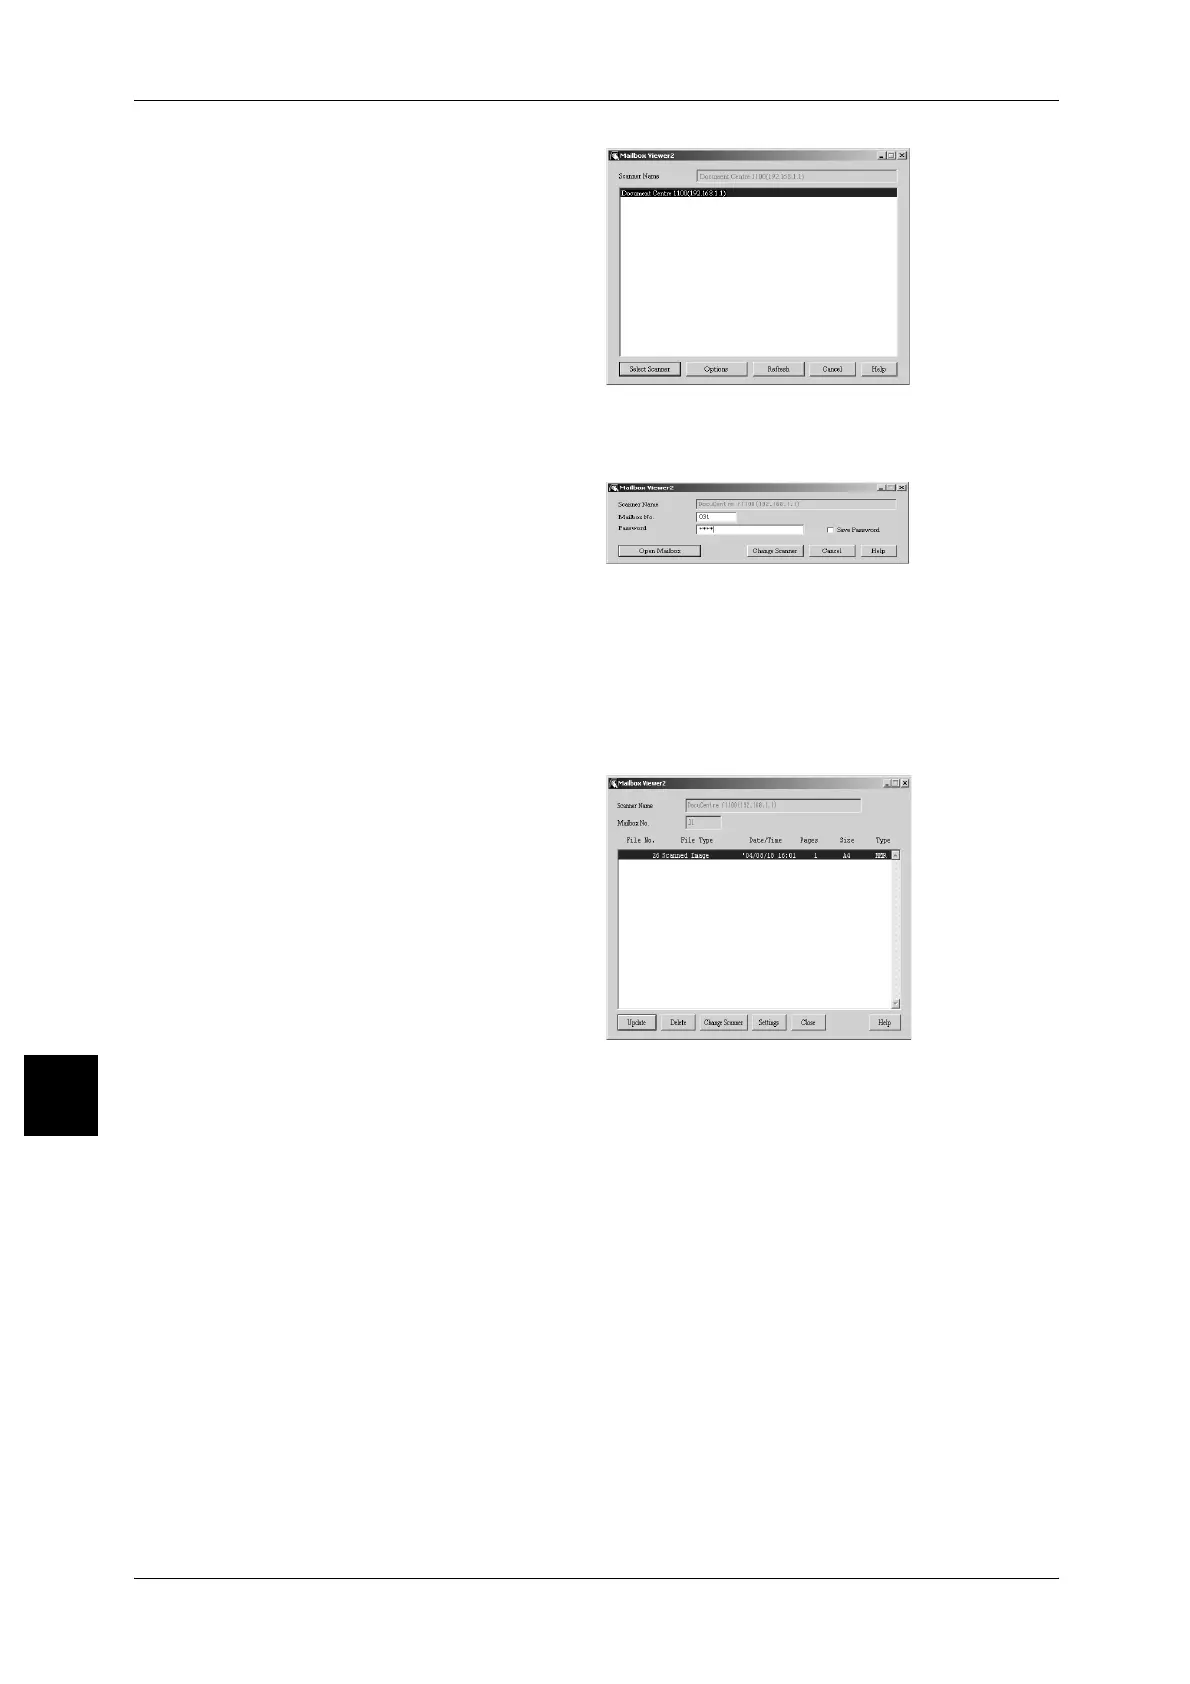
Computer Operations
8
2 From the displayed list, click the
scanner name of the machine, and
click the [Select Scanner] button.
Note • If no items are shown in the
list, click [Refresh]. The
application searches for
scanners.
• Click on [Change View] to
change the way scanner
names are displayed.
• Only DocuCentre Color devices connected to a uniform network are automatically shown in
the list. To view DocuCentre Color devices from other networks, click on [Change View] and
register an IP address and scanner name.
3 In the [Mailbox Number] field, input
the mailbox number (001 - 500)
that contains the document you
wish to import, and input a
password (up to 20 digits) into the
[Password] field.
Note • When you check the [Save Password] check box, you can skip steps 2 to 4 the next time you
select the same mailbox.
• Clicking [Change Scanner] returns to step 2, where you can reselect a scanner.
4 Click [Open Mailbox].
5 Select a document, and click
[Import].
Note • To import documents, the
[Auto Import] check box must
be checked in the [Settings]
dialog box.
• Multiple documents can be
selected to import.
For information about Mailbox Viewer2
settings, refer to "Configure the Import
Method for Scanned Documents" (P.263).
6 Clicking [Import] removes all stored documents from the mailbox, and saves them in
the specified directory.
For information about the directories to which documents are saved, refer to"Scan Settings" (P.263).
 Loading...


