90 THE HASSELBLAD MANUAL
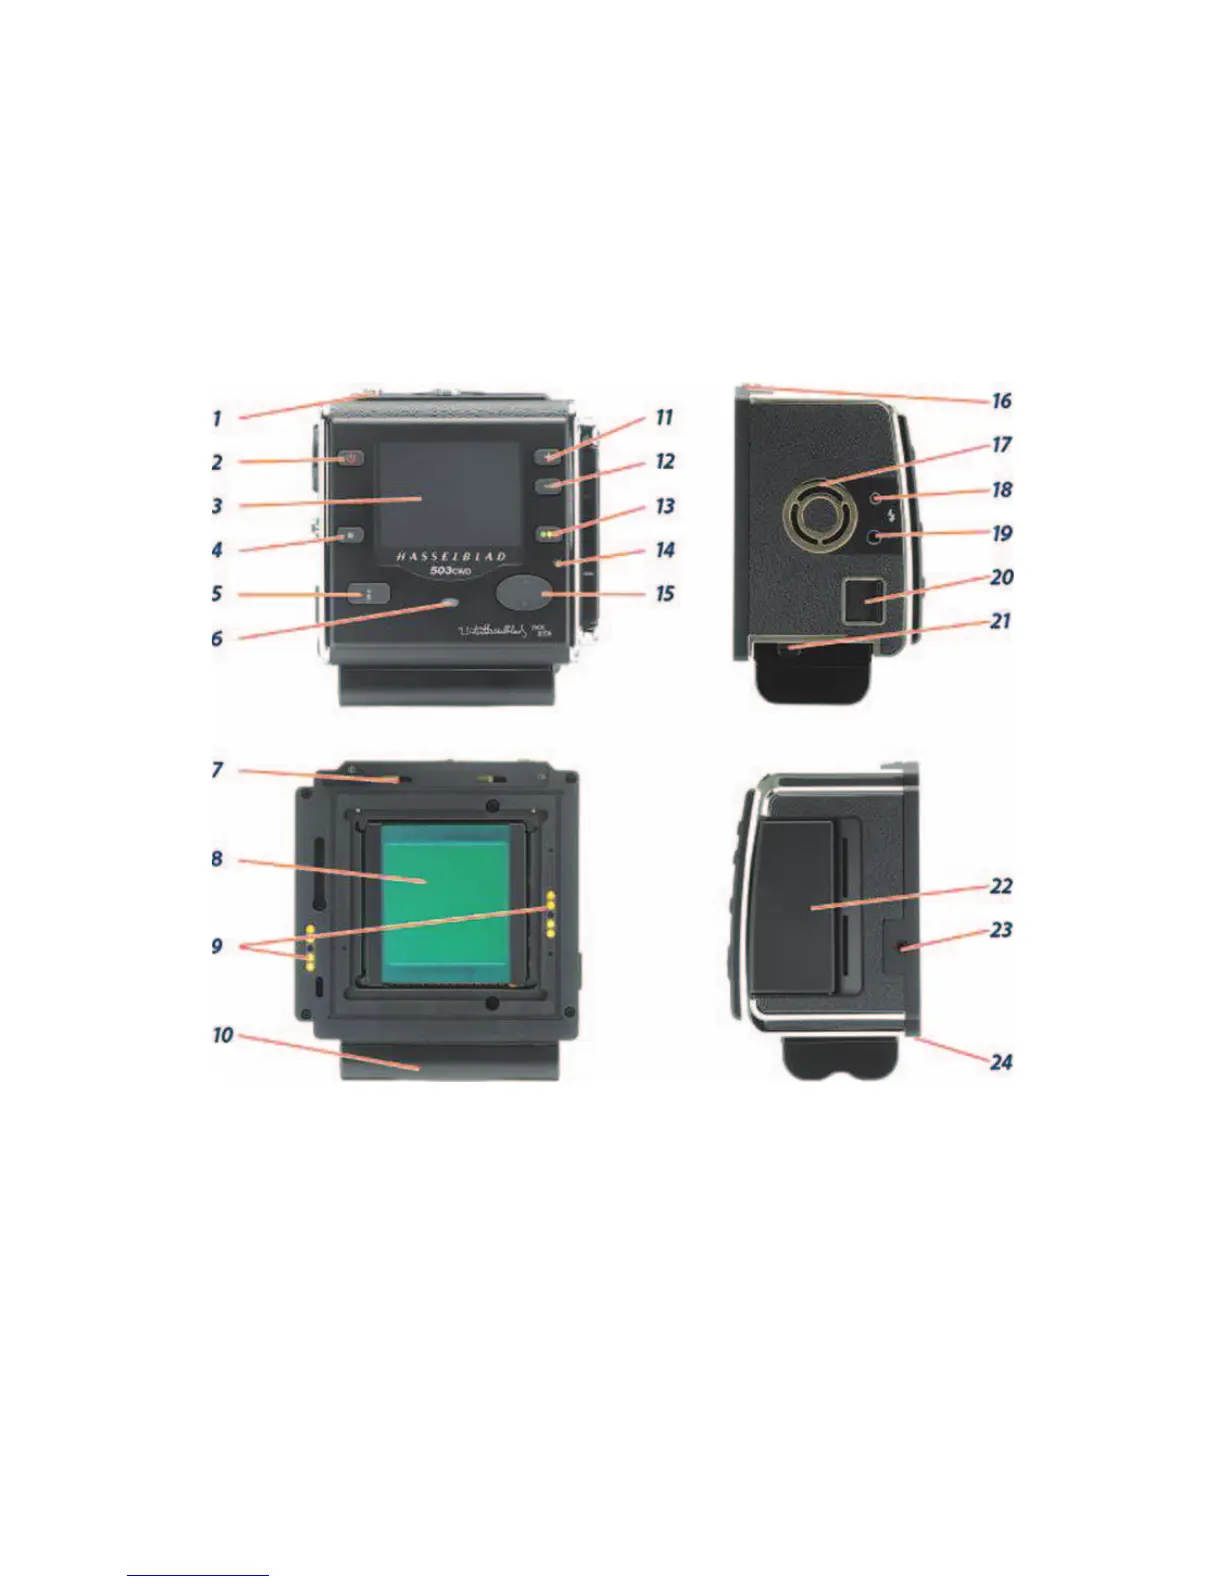
Figure 5-3 CFV back operating controls. (1) Digital back lock, must be depressed to remove or
attach digital back; (2) ON/OFF control; (3) preview screen; (4). Menu (Exit) button, opens
and closes Menu system and operates some other functions; (5) Display mode button for the
various view modes on the preview screen; (6) Ready Light indicator fl ashes green when
digital back is ready, fl ashes yellow when back is performing an operation; (7) retaining
hooks; (8) CCD and IR fi lter; (9) Databus connectors; (10). battery. (not supplied); (11) Zoom
in button to enlarge preview image; (12) Zoom out button used to also view several smaller
images; (13) Instant Approval button (also confi rmation button for some functions); (14) Ready
Light Indicator; (15) Navigation button, a four-way rocker to step through preview images
and navigate the Menu system; (16) retaining catch; (17) ventilator to keep back cool, must
not be covered; (18) Flash sync in terminal; (19) Flash sync out terminal (controls 18 and 19
used with studio fl ash); (20) FireWire connector; (21) battery retaining catch; (22) CF card slot
cover; (23) Winder EL terminal for connecting to an EL model or a CW winder; and (24) digital
back support slots for magazine support hooks.
Figure 5-3. All the information about creating the digital image applies to H3D and H3DII cam-
eras and CF and CFV digital backs unless deviations and differences are specifi cally mentioned.
Before you proceed further you may want to check whether your back speaks your lan-
guage and if not, change it. Press the Menu button. Press the navigating control up or down to
 Loading...