94 THE HASSELBLAD MANUAL
(a)
(b)
(c)
(d)
(e)
(f)
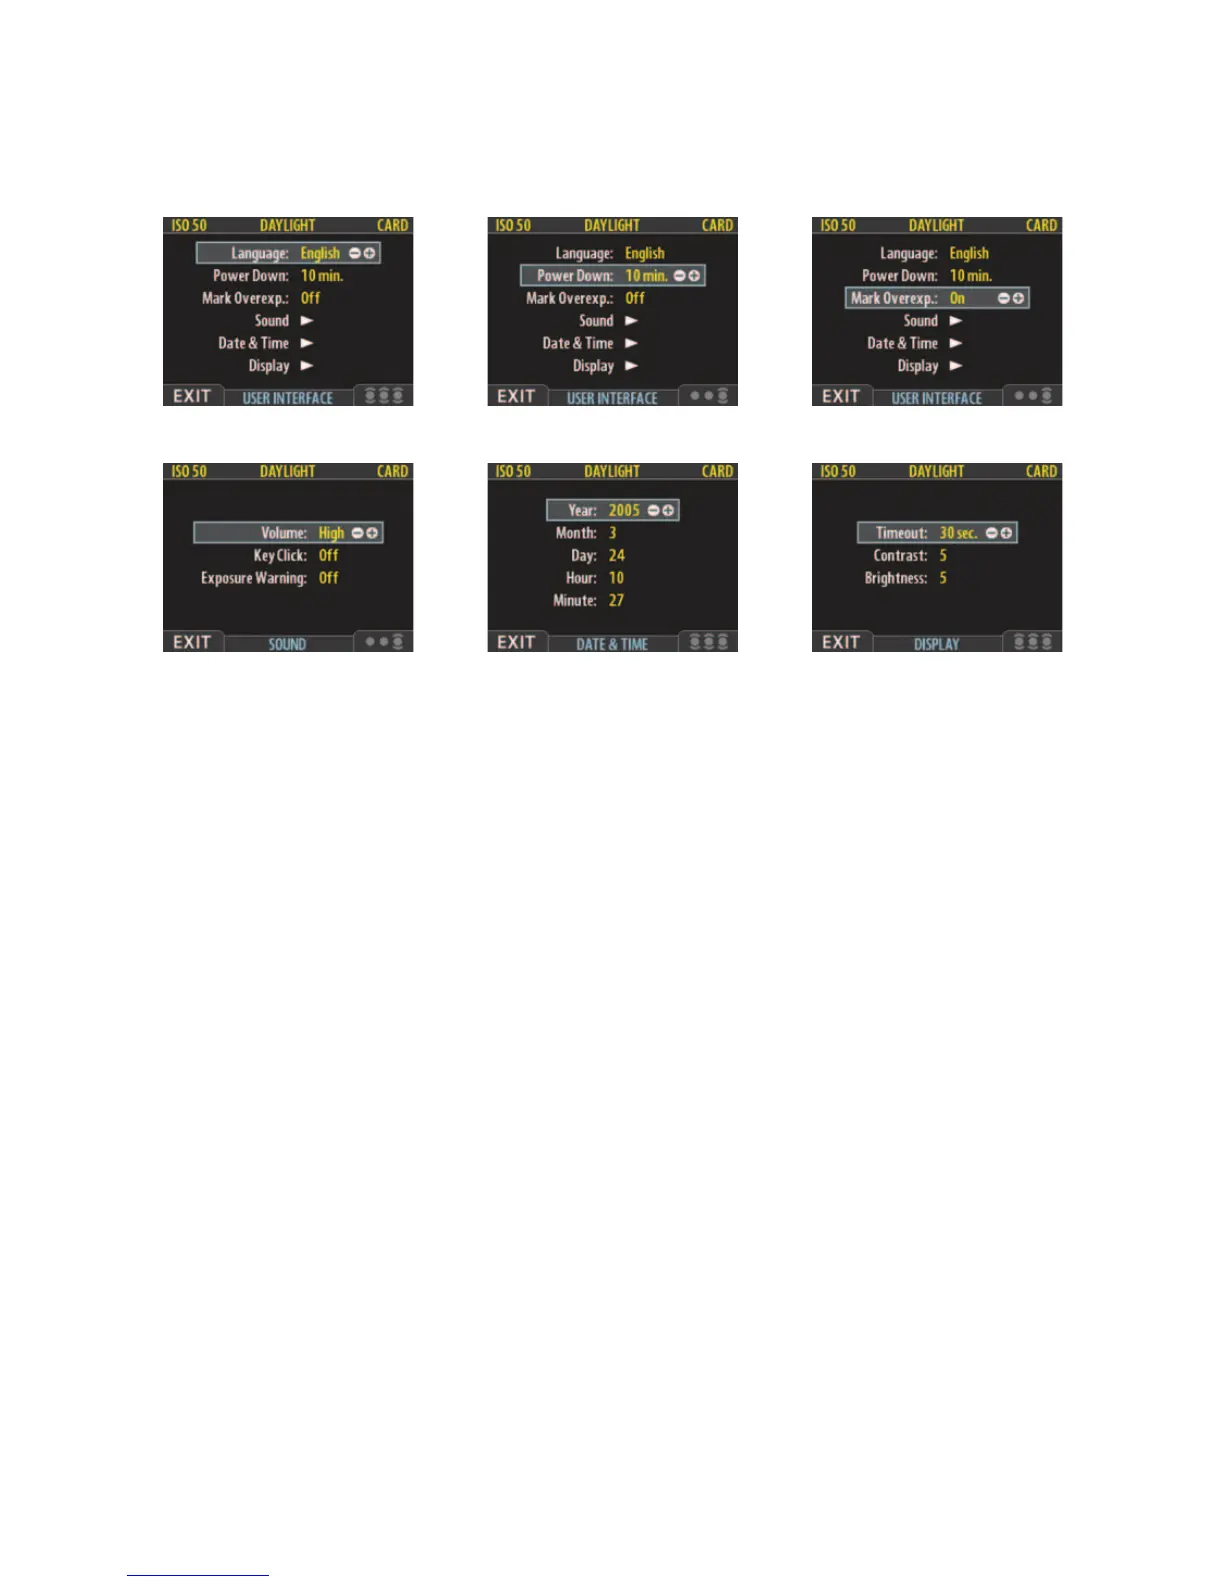
Figure 5-7 The main menu settings in the User Interface. By changing the User Interface you
can control the way the digital back interacts to suit your working style. Main menu settings
include Language (seven different languages to choose from); Power Down to power down
the back after a certain time period to save battery power, which is set to Never, the default
setting; Mark Overexp. to highlight overexposed pixels on the preview screen; Sound to let
you know about the exposure by means of a sound signal; Date and Time to be marked on
each shot and to label batches; and Display to set the display time out from 2–30 seconds and
to set the contrast and brightness of the preview screen.
the digital back will reset all the custom settings that have been made to the default settings
at the factory. Press the OK button and then the Exit button.
The H3DII Custom Options
These options can be seen in Figure 5-8.
The H3DII camera offers some new custom options: Copy to I Bank, I-B connection, Tilt
Sensor, Menu Ctrl., and Display. These options are reached by going to Settings. The navigat-
ing control then brings up the options User Interface, Camera, About, Default, and the new
Custom Options is reached with the navigating control.
1. Copy to I-Bank: Choose whether you want to copy only fi les from the active batch or all fi les
from the card. 2. I-B Connection: Gives you the option of copying fi les into the present batch
or creating a new one when copying to the Image Bank. 3. Tilt Sensor: Sets the viewing orien-
tation of capture when they appear in Phocus or FlexColor avoiding unintentional changes in
orientation when cameras are pointed straight up or down. The settings can be locked at Auto
or locked at 0, 90, 180, or 270 degrees. 4. Menu Ctrl.: Can be set to make the front and rear con-
trol wheels active or inactive when navigating the sensor menu. If set to ACTIVE, a double click
on the release button activates the sensor unit menu. Navigating up/down/sideways is made by
using the control wheels. 5. Display: Provides three options: Display ON by Half Press, Display