9 CHANNEL 2.4GHz AIRCRAFT COMPUTER RADIO SYSTEM
116
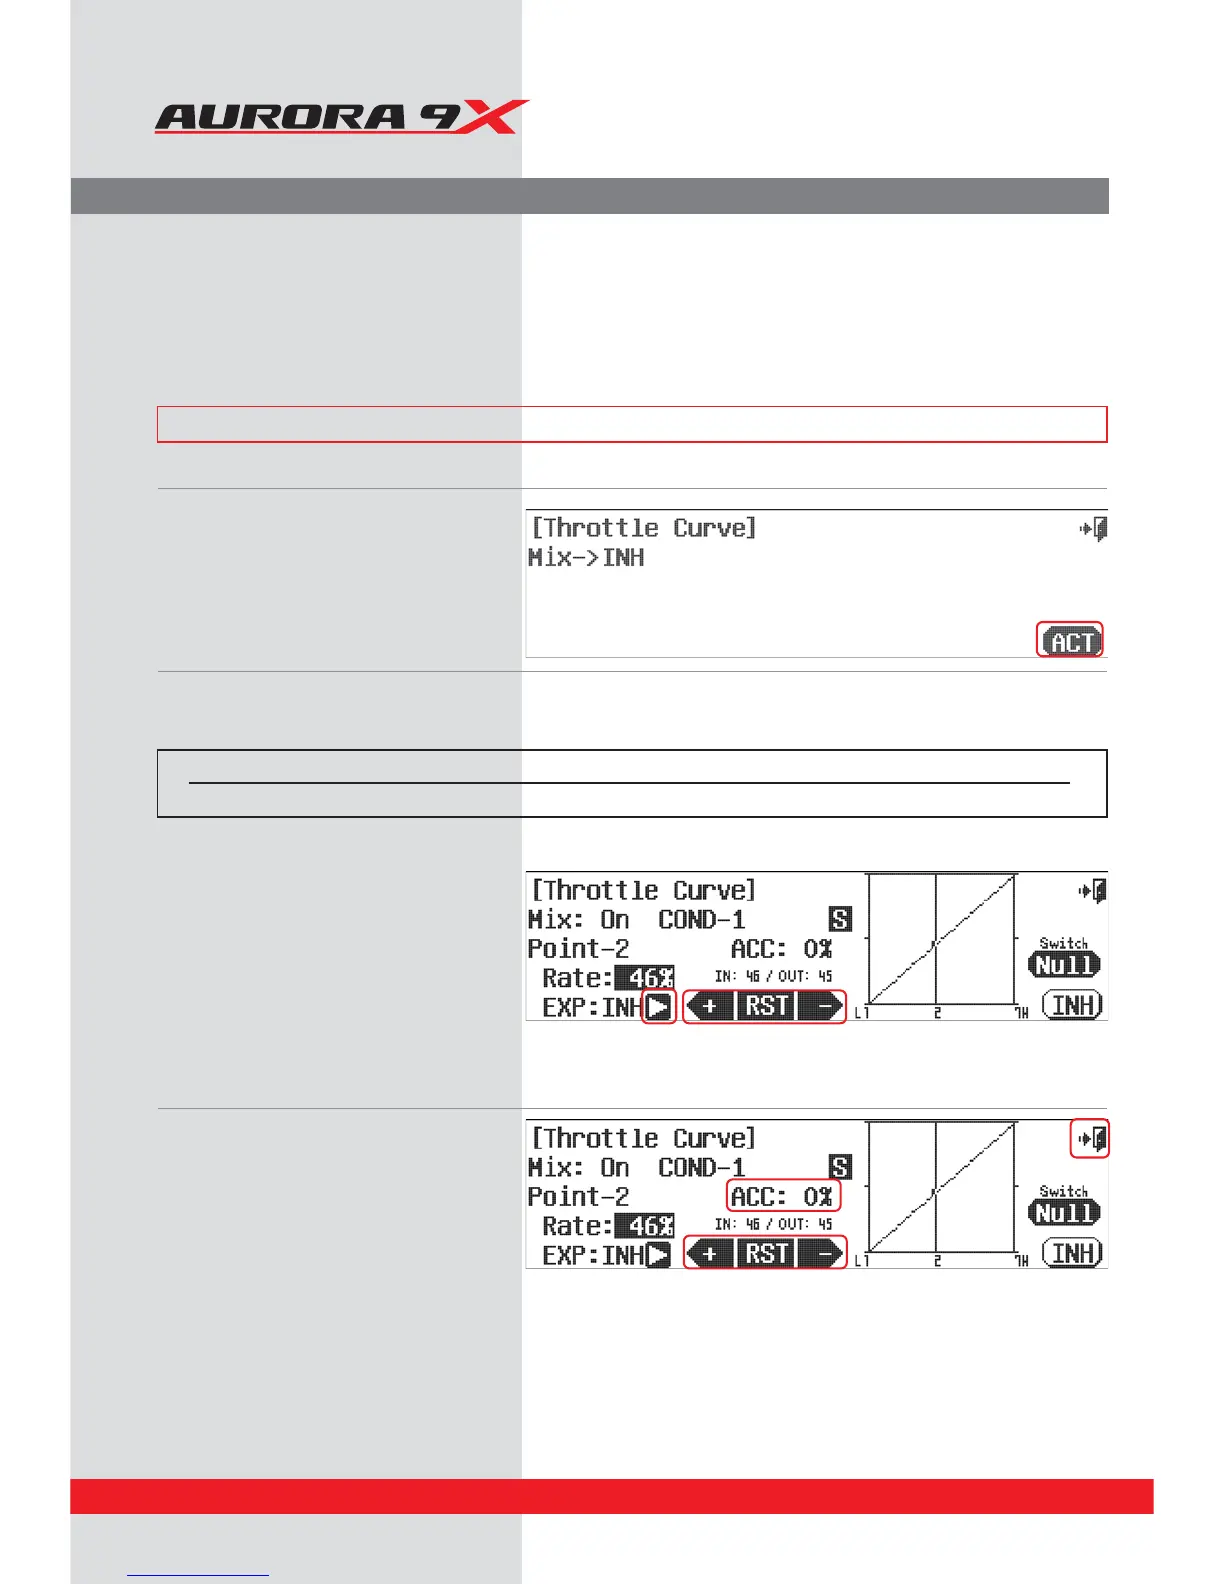
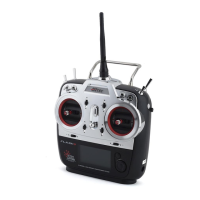
T.Curve (ACRO)
a. Press T. Curve in the model menu.
b. Press ACT to activate the throttle curve menu.
- Note how the throttle movement is shown on the graph as a percentage value, when the throttle is advanced and lowered.
d. The point is created after pressing RST in the
desired position by Throttle stick movement. If
created point is changed. If you want to change
the corrected point, adjust the +RST- icon while
the throttle is positioned on the point..
e. Inhibit (turn o), or activate (turn on) a point by
using the throttle to place the graph line
through the point you wish to change,
press +RST- .
f. Add an exponential curve from one point to
another by pressing the arrow next to the
EXP: INH icon and have it switch to EXP: ACT.
This activates the expo option between it,
the prior and the next point.
Use the +RST- icons to add a value creating
a curve.
g. Change the activation speed with the ACC or
acceleration feature. Again, using the throttle to
place the graph line through the point you
wish to change.
h. Select the Exit icon to return to the model menu.
Throttle Curve Adjustment.
The throttle curve function allows you to modify the normally linear servo rate movement using seven dierent points
along the curve that can accept a movement value.
There are many options for the throttle curve feature. It can be one of the most complicated features of the Aurora 9X.
You can choose to use many or as few of the functions on this menu as you wish too.
### This function can be inuenced by the ight condition feature ###
Switch type Function VR adjustment
2 or 3 position Multiple Values Fine tuning control choice
Switch Option
c. To select a 2 or 3 position switch that will allow multiple mix values, press NULL and follow the switch activation process.