HT2000H_en_n.doc Page 130 of 167
Figure 103: Damage to the syringe needle
• Verify the specifications of the syringe with that supplied in Appendix B – Consumables. In
particular, check that the needle used has a tip suitable for the septum to pierce.
• Verify suitable septa were used.
• Check that there are no obstacles inside the vial(s) (such as an insert).
• Inspect the syringe to check for abnormalities (see paragraph 8.15.1 “Syringe inspection “).
8.15.1 Syringe inspection
Before installing a syringe inside the syringe warmer assembly (see paragraph 9.1.5 “Syringe
replacement in the syringe warmer assembly”):
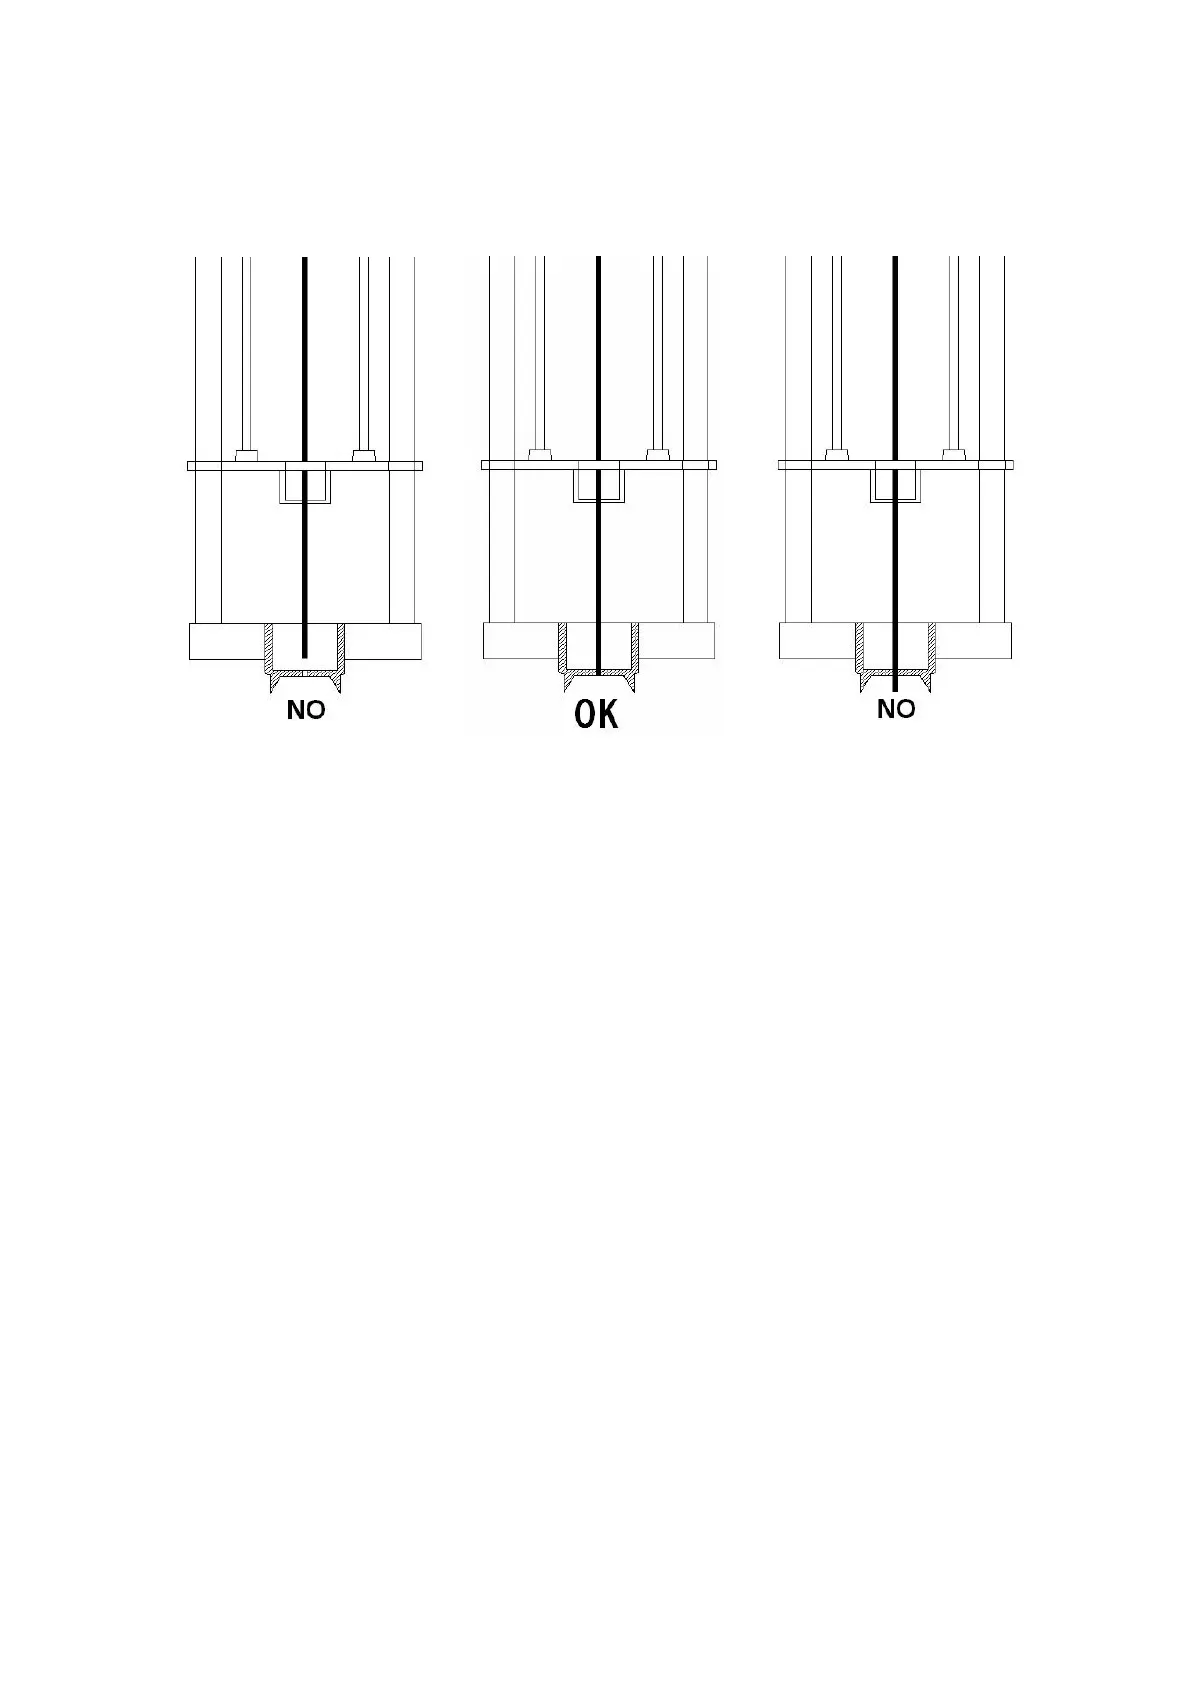
• Roll the syringe over a clean flat surface. If the tip of the needle moves in a circle,
straighten it by bending it carefully near the connection point to the barrel and check it
again (see figure below).
• Check the needle to ensure it is free from burrs and ridges. These can abrade pieces of the
septum and leave particles inside the vial. The ridges can be see under 10X magnification.
If there are ridges, polish the needle by pulling it through a folded piece of fine emery paper
between your finger and thumb until the ridges are gone. Ensure the tip of the syringe is
not damaged.
• Check the syringe plunger by sliding it up and down a few times. It should move easily
without sticking or binding. If it sticks, remove it and clean it using a suitable solvent.