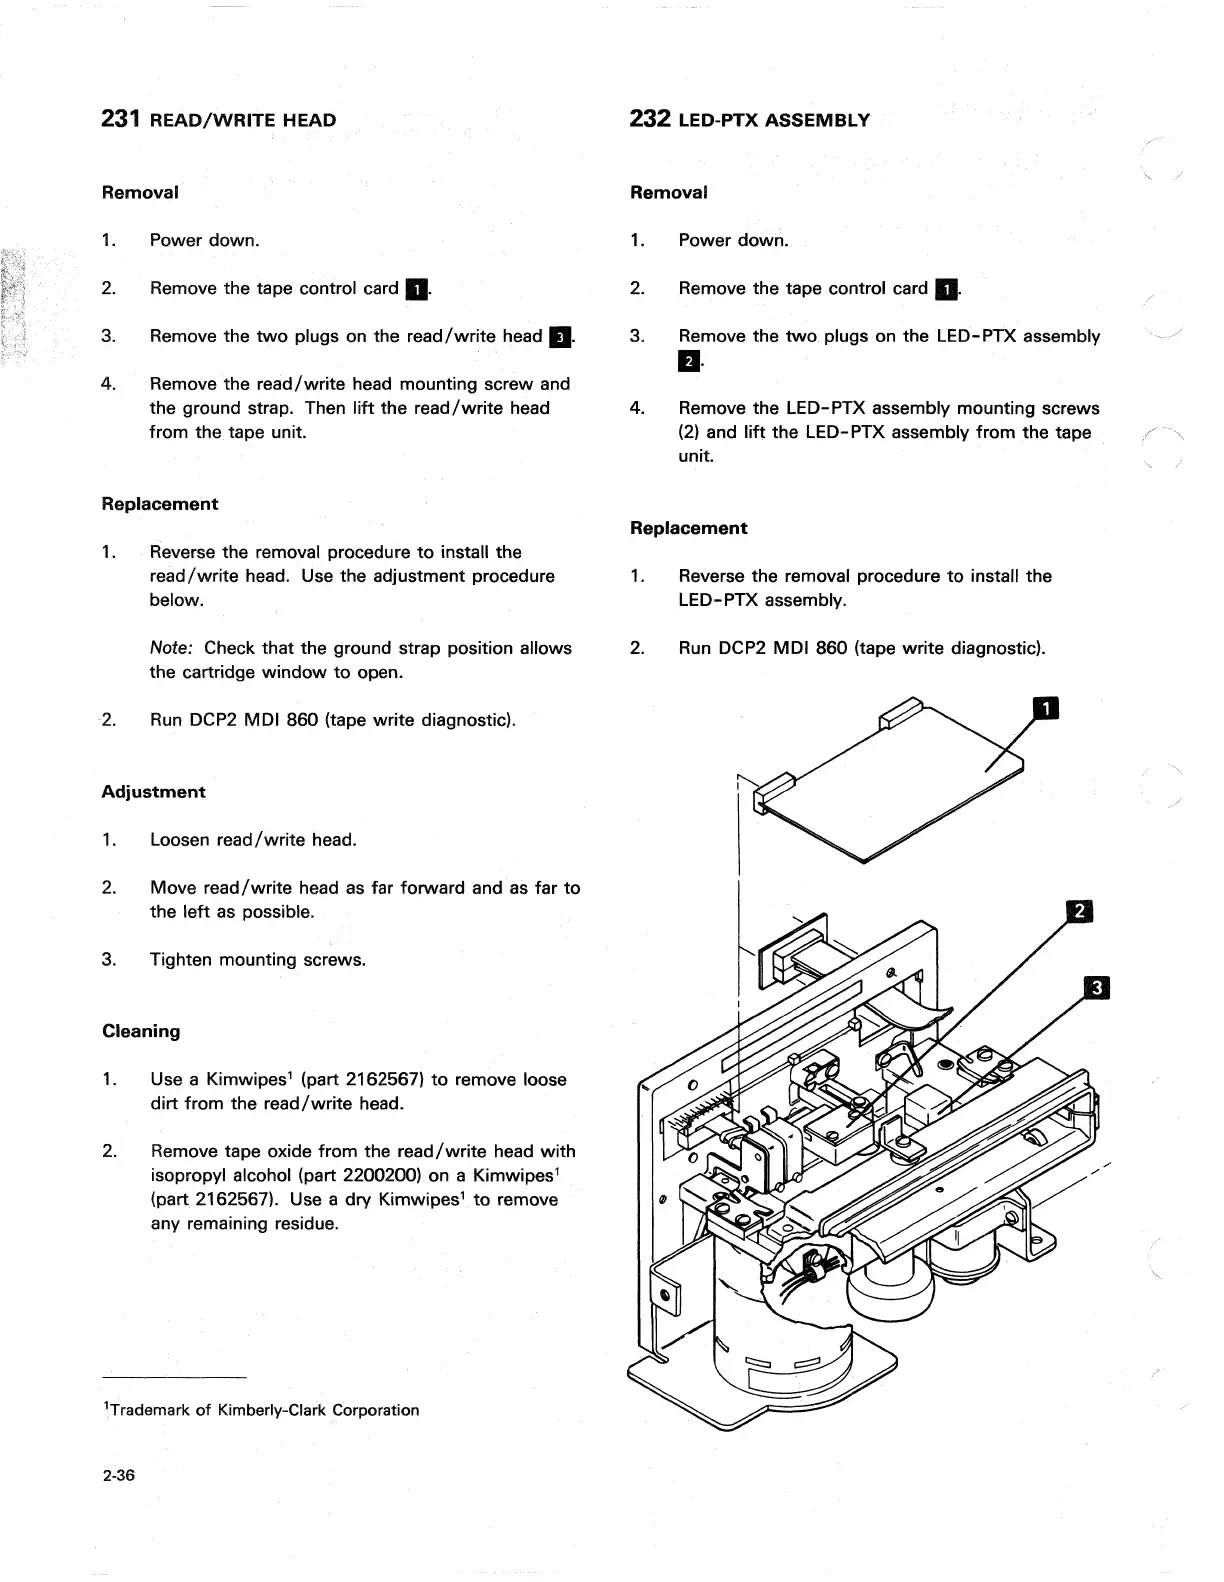
231
READ/WRITE
HEAD
Removal
1.
2.
3.
4.
Power down.
Remove the tape control card
II.
Remove the
two
plugs on the
read/write
head g.
Remove the
read/write
head mounting screw and
the ground strap. Then
lift
the
read/write
head
from the tape unit.
Replacement
1. Reverse the removal procedure
to
install the
read/write
head. Use the adjustment procedure
below.
Note: Check that the ground strap position allows
the cartridge
window
to
open.
2.
Run
DCP2 MDI 860 (tape write diagnostic).
Adjustment
1.
Loosen
read/write
head.
2.
Move
read/write
head
as
far forward and
as
far
to
the left
as
possible.
3.
Tighten mounting screws.
Cleaning
1.
Use a Kimwipes' (part 2162567)
to
remove loose
dirt from the
read/write
head.
2.
Remove tape oxide from the
read/write
head with
isopropyl alcohol (part 2200200) on a Kimwipes'
(part 2162567). Use a dry Kimwipes'
to
remove
any remaining residue.
'Trademark
of
Kimberly-Clark Corporation
2-36
232 LED-PTX ASSEMBLY
Removal
1.
2.
3.
4.
Power down.
Remove the tape control card
II.
Remove the
two
plugs on the LED-PTX assembly
II·
Remove the LED-PTX assembly mounting screws
(2)
and lif!: the LED-PTX assembly
from
the tape
unit.
Replacement
1.
2.
Reverse the removal procedure
to
install the
LED-PTX assembly.
Run
DCP2 MDI 860 (tape write diagnostic).
/
'"