3. From the associated Series List select one or more series, using the Shift or Ctrl keys, or select the
Select All option button.
4. Type in a new patient name and treatment ID or use the system default (patient's initials).
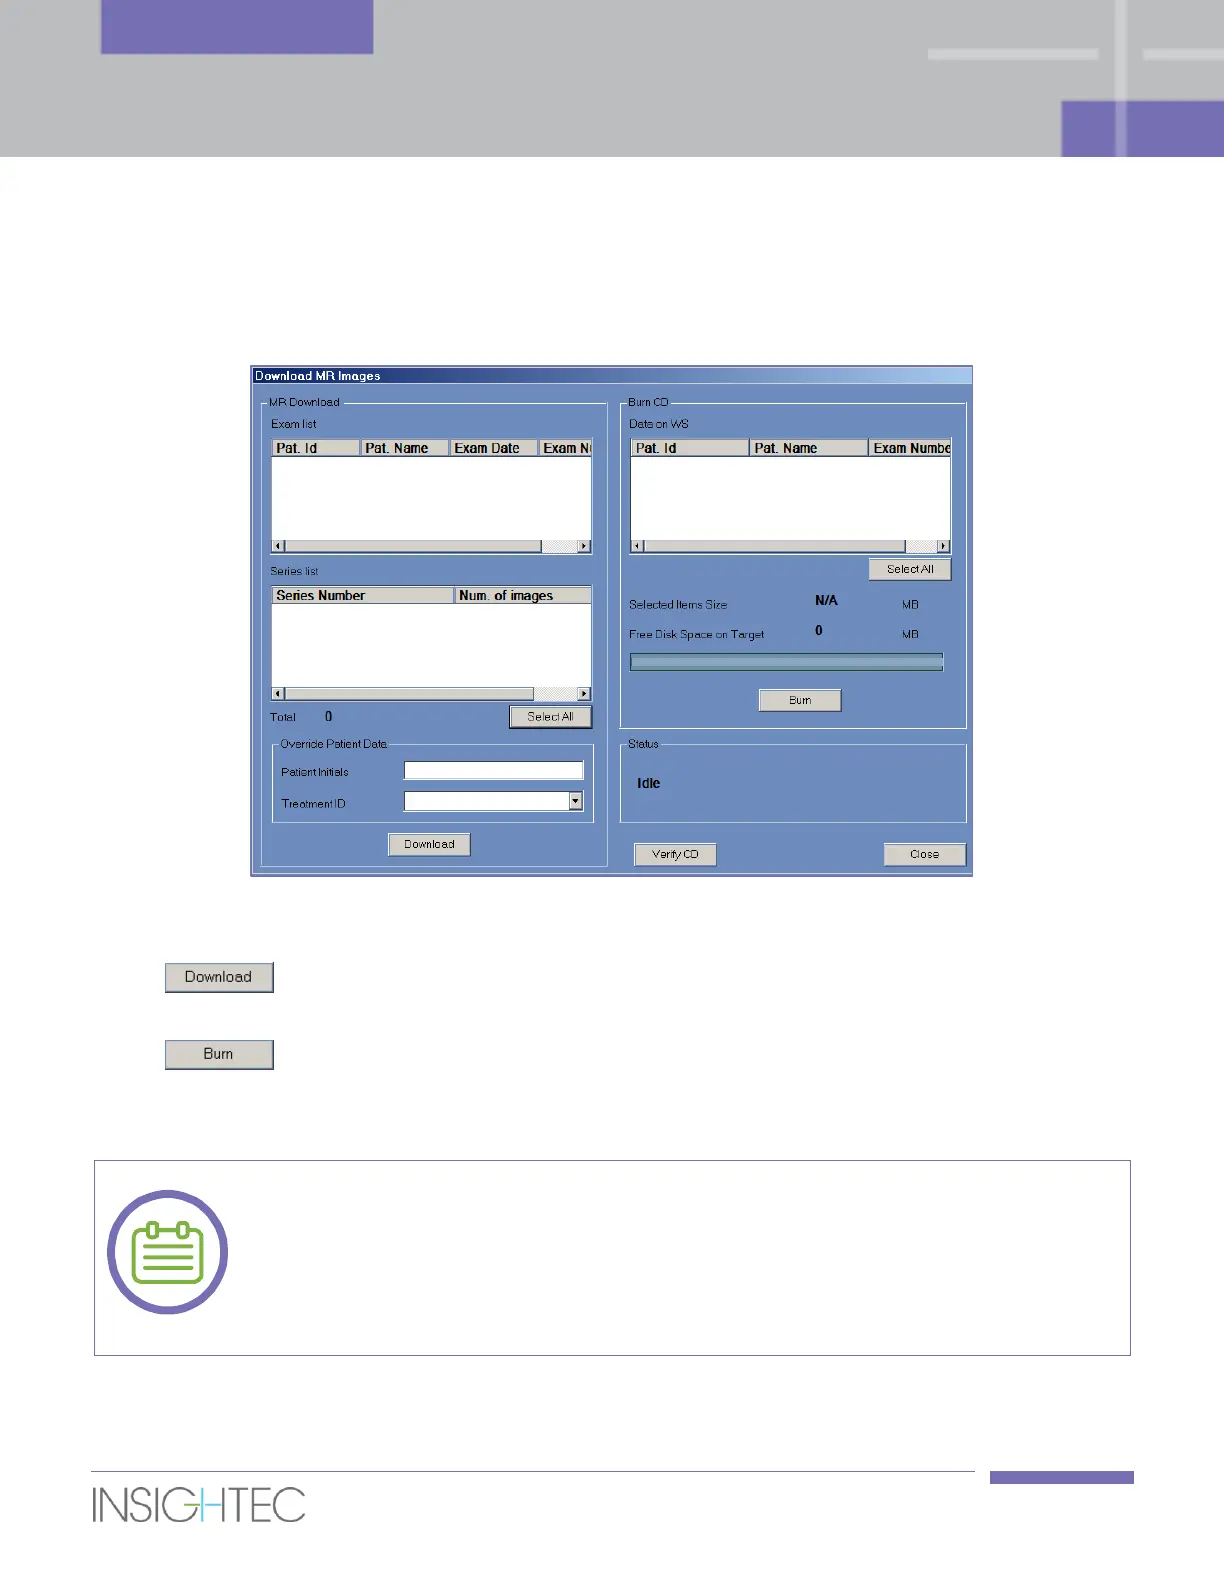
Figure 11-4: Download MR Images Screen
5. Click the Download button to copy the images to the Exablate system; the images will
be stored on the workstation and will appear in the Data on WS list.
6. Select the patients from Data on WS list and click the Burn button to export the images
to a CD or to a USB device. The export process can be viewed in the Status Bar (see Figure 11-1).
7. The CD-R is automatically ejected from the CD drive when the data export is complete.
The treatment files must come from an Exablate console. When treatment files are
recorded on a different console, the patient’s name and ID are not displayed to retain
privacy.
[N-49]