3.2. Probe Preparation for Treatment
For this stage, a new treatment kit is required.
Use only powder-free gloves when handling the probe; powder particles may absorb the US energy and
damage the rectal wall.
Verify that there is no balloon already covering the probe. If there is, refer to the Cleaning
and High-Level Disinfection Procedure in Appendix C and continue after cleaning the
system.
[N-6]
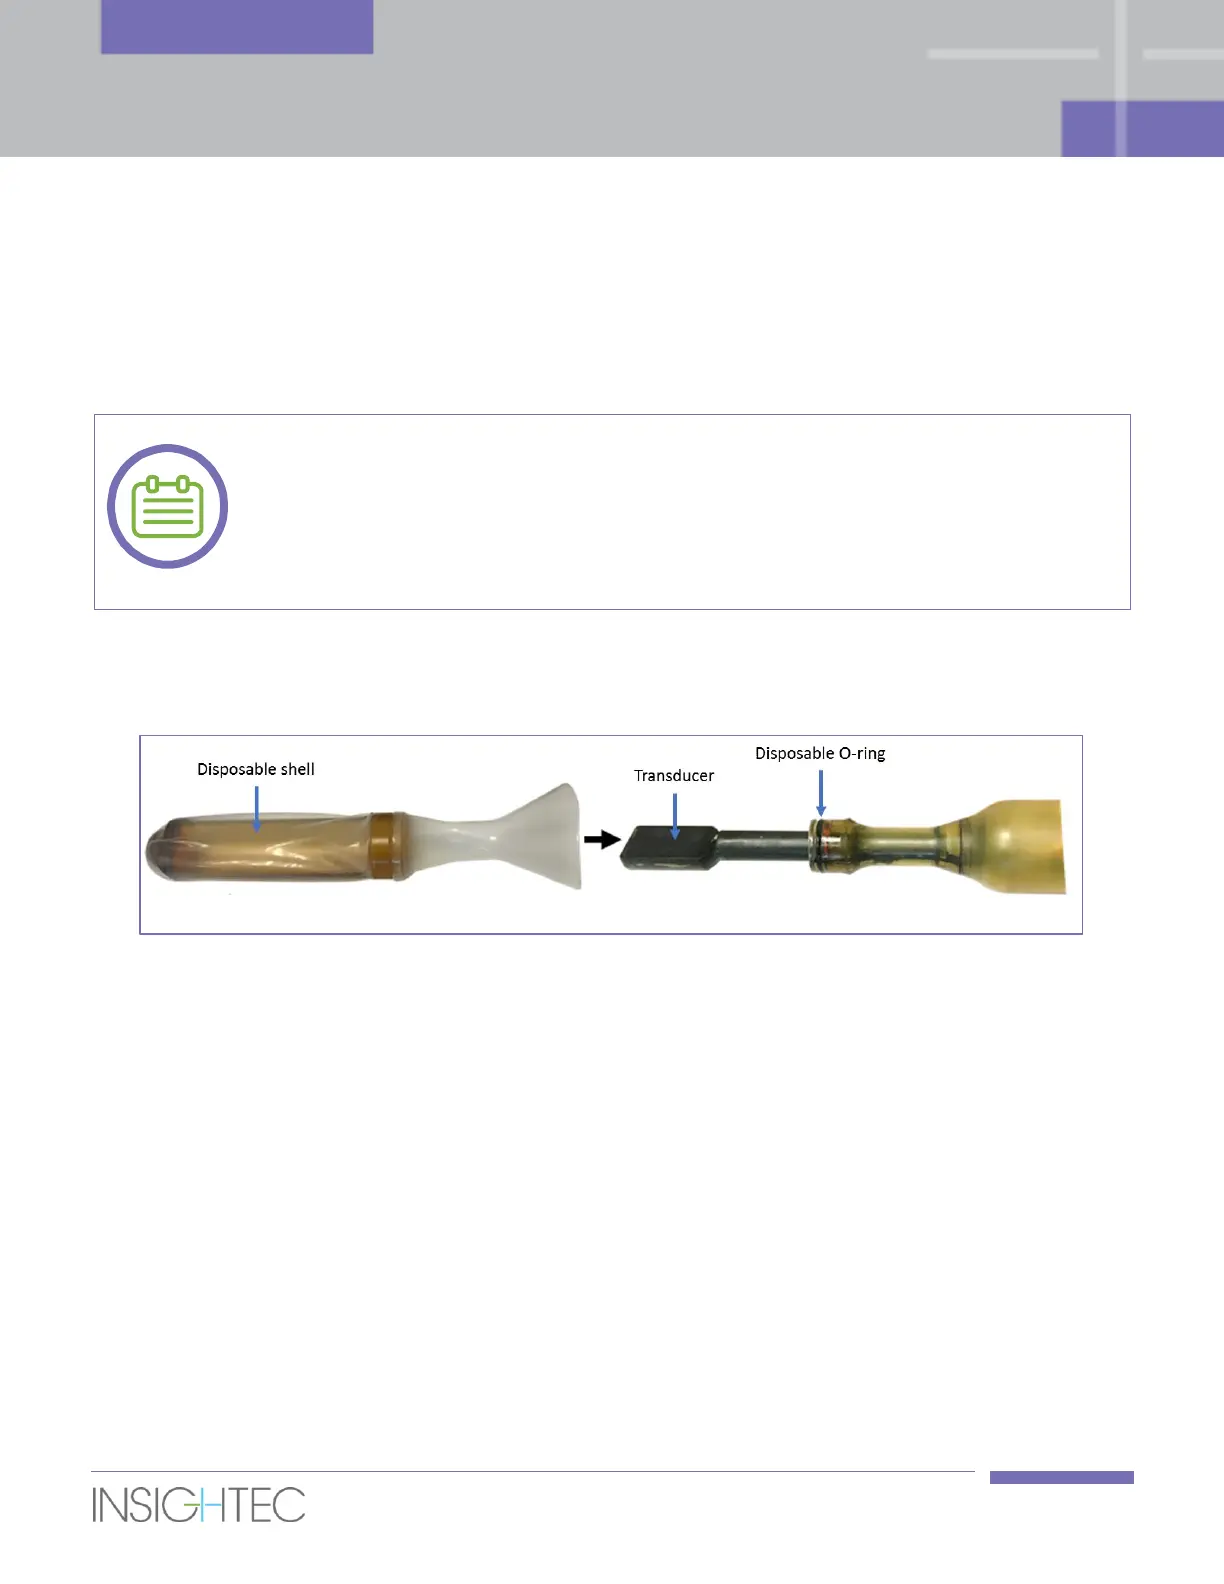
1. Place a new disposable (white) O-ring over the groove in the probe (see Figure 3-4).
2. Gently Place a new disposable shell assembly (see Figure 3-4) over the probe.
Figure 3-4: Probe Disposable Shell and Transducer
3. Both the disposable shell assembly and the base of the probe have small holes that must exactly overlap
once the shell is on the probe. Fold the endorectal balloon back over the probe to allow for visibility.
Carefully align both holes.
4. Insert a locking pin through the hole in the disposable shell and push it down till it sits flat against the
shell. Verify that the disposable shell is properly locked to the probe.
5. Pull the flipped part of the endorectal balloon over the neck of the probe. Care must be taken to ensure
the cord attached to the locking pin exits the endorectal balloon towards the motion unit and does not
touch the patient.
6. Cover the motion unit and positioner with the disposable motion unit cover (supplied in the treatment
kit).
7. Cover entire probe cable with the disposable probe cable drape.