Micromate Operator Manual – 721U0201 Revision 6 115
14.2.2. Hard Surface Installations
When the geophone is to be installed on a hard surface such as rock, concrete or solid ice, the
preferred installation method is to bolt the geophone directly to the surface. This will provide the
best coupling. If bolting the geophone to the surface is not practical and the anticipated vibration
level is low, refer to the ISEE field practice guidelines for blasting seismographs for the suggested
limits, the use of a sand bag may be acceptable.
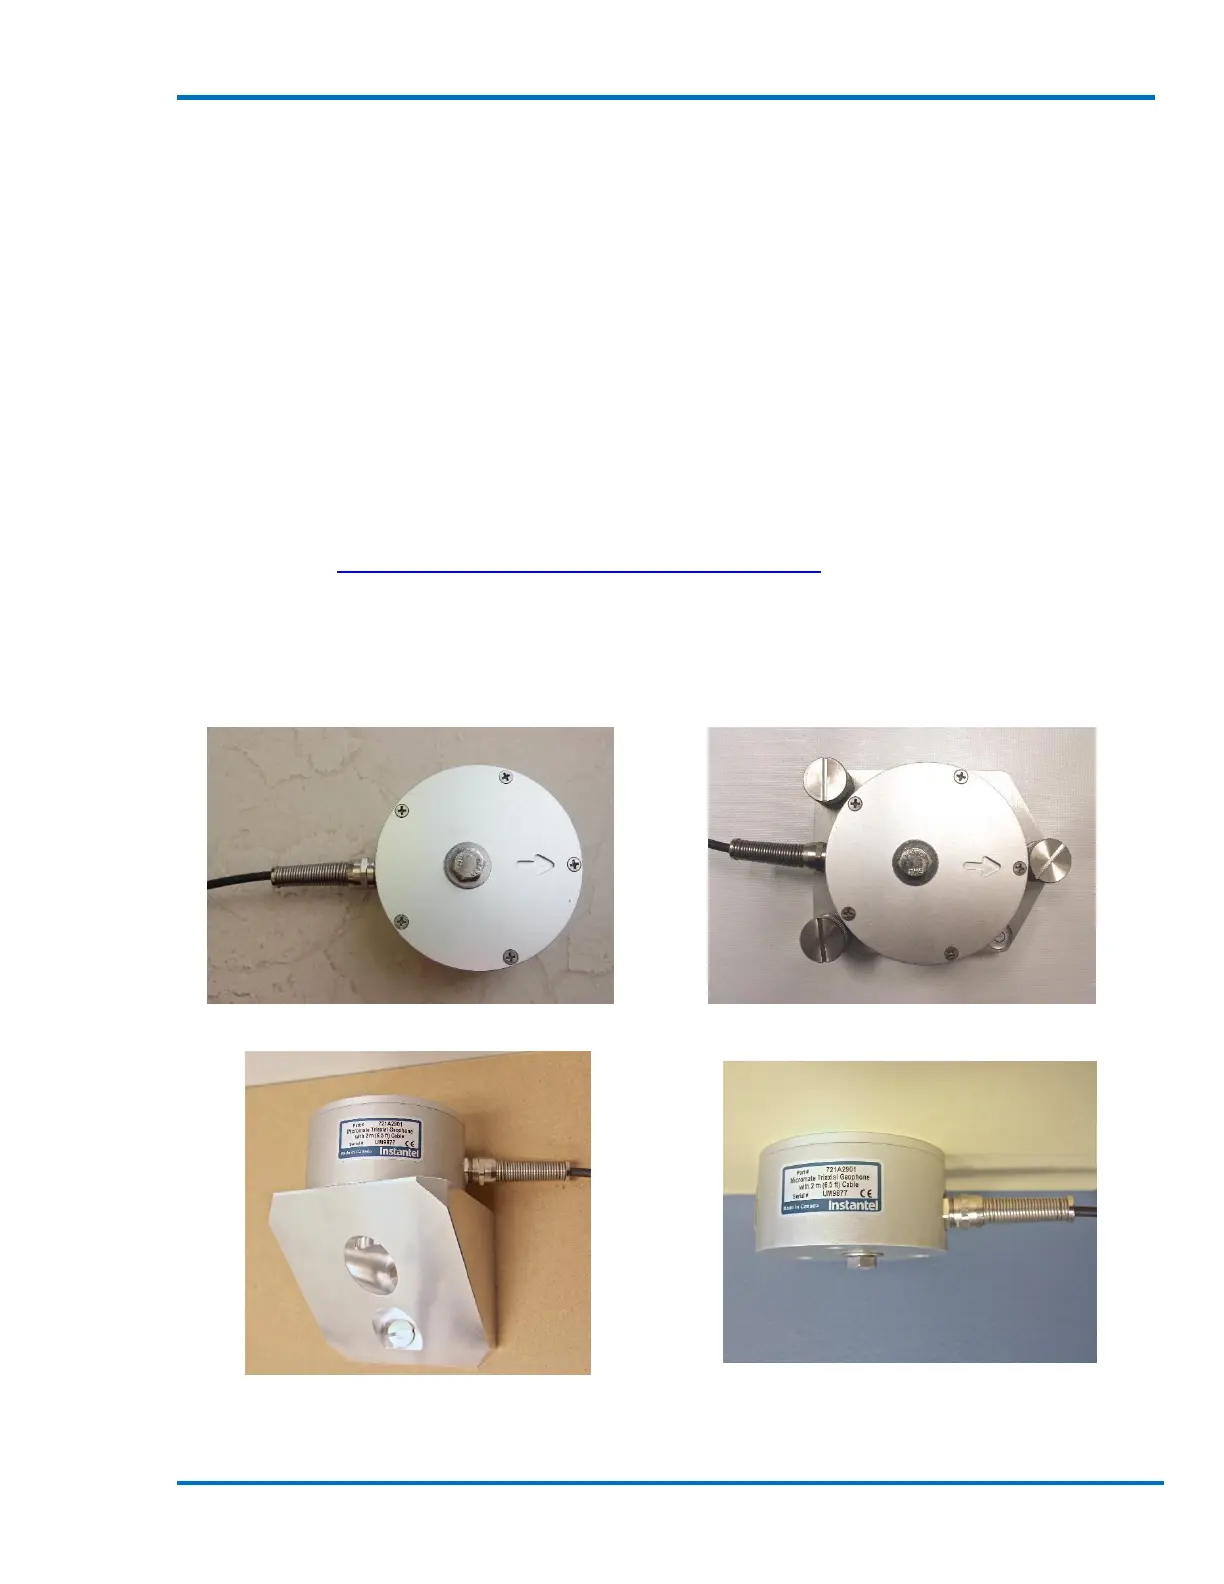
a. Bolting the Geophone Directly to a Surface
The preferred method for hard surfaces installation is to bolt the geophone directly to a surface
using the thru-hole in the center of the geophone. If the geophone cannot be kept level with this
single bolt, an optional leveling plate is available. If the hard surface is in the vertical orientation an
optional wall mount kit is also available.
1) Drill a hole into the surface to be monitored. Insert a 6.4 mm (¼ inch) bolt or threaded rod.
Refer to Section 19.6 Torque Specifications and Guidelines
2) The bolt or threaded rod must extend at least 65 mm (2.5 inches) above the surface to
accommodate the geophone.
3) Place the geophone on the bolt with the arrow pointing at the vibration source.
4) Place a washer, lock washer and nut on the bolt and carefully secure the geophone. Do not
over tighten the bolt.
Geophone Bolted to a Floor Geophone Mounted with a Leveling Plate
Geophone with Wall Mount Bracket Geophone Mounted to the Ceiling