Affinity Additional Information Page 341
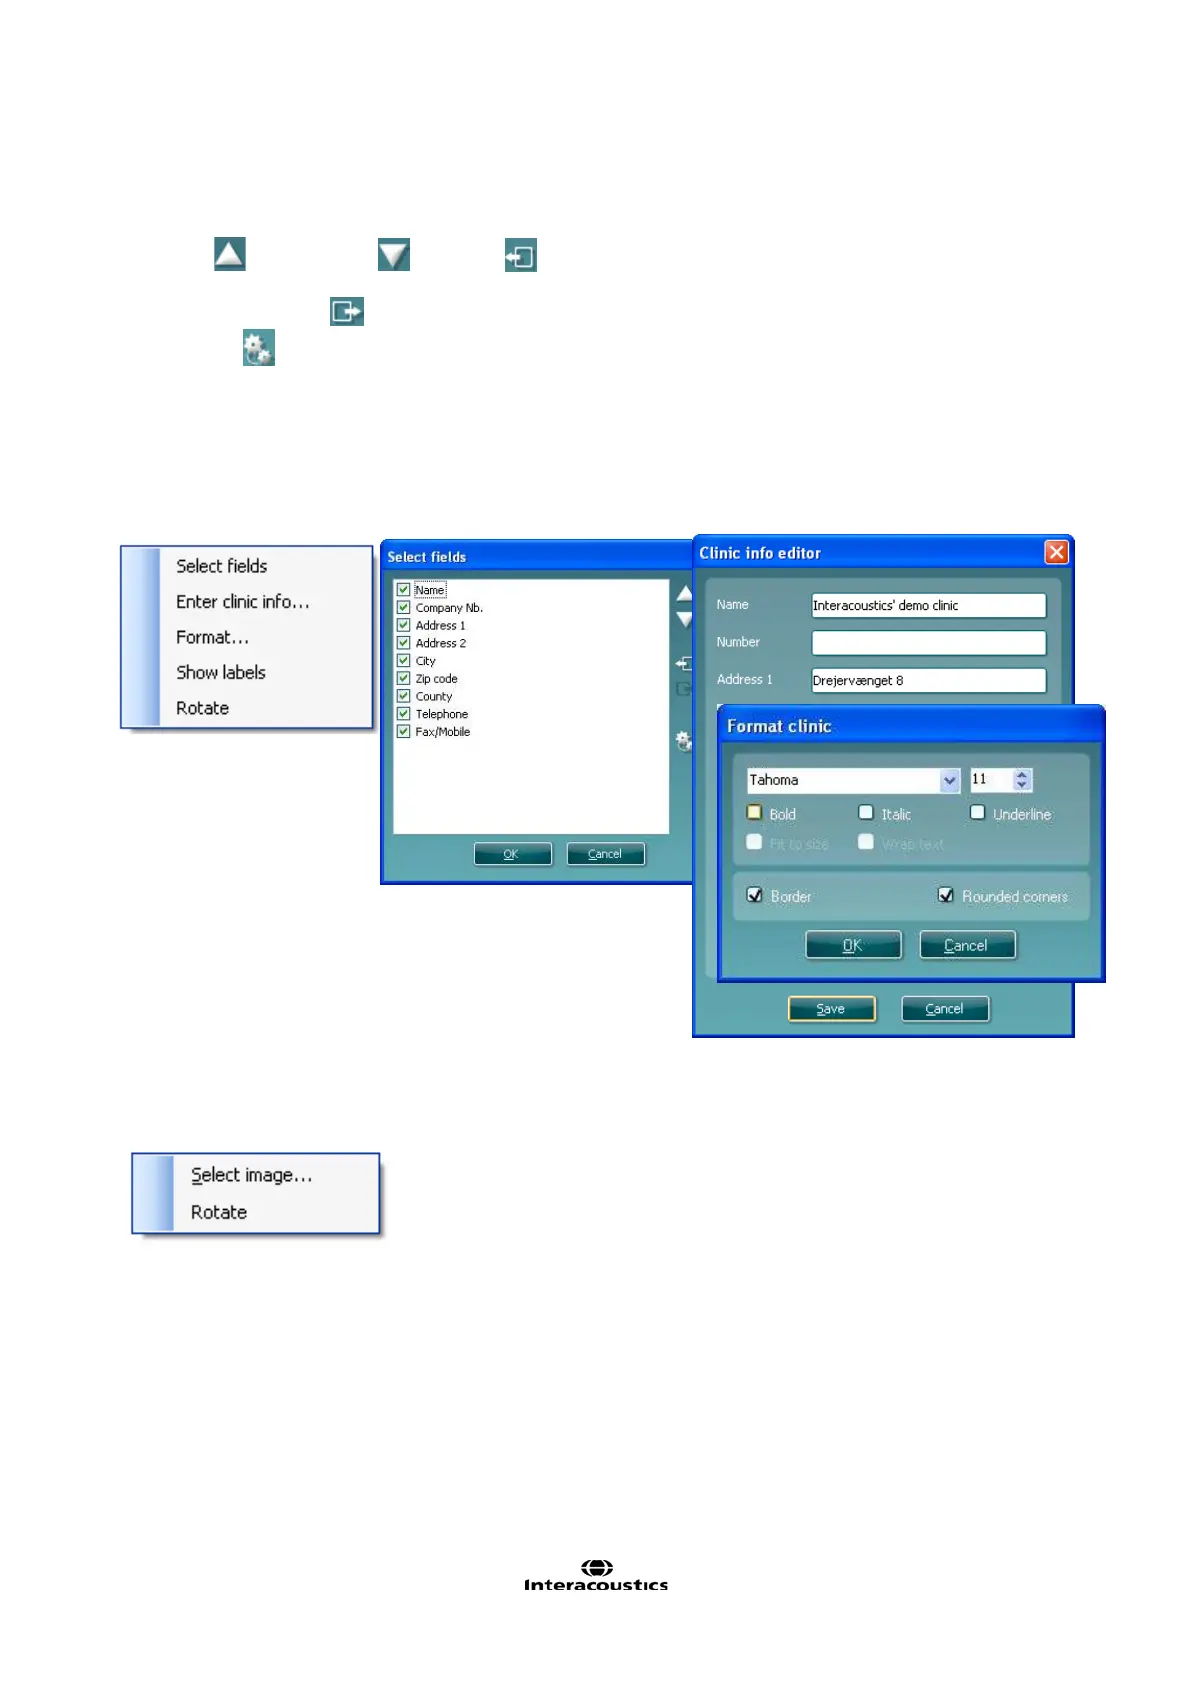
2 Clinic information.
a. Select fields pops up the Select fields window where you select which items are to be shown in the
clinic information element. You can change the order of the items by selecting one and pressing the
up
or down arrows . Pressing will create a new empty field that can be named and shown
in the template. Change a field’s name by selecting it, waiting for 1 sec and then left clicking on the
name. Pressing
will remove user created fields when selected.
Press to restore the manufacturers’ default fields.
b. Enter clinic info… opens the Clinic info editor window. Here you can type and save the clinic
information specifically for the selected print template. The Create date item cannot be changed as it
will always show the current date and time.
a. Format… Here you can change the the font, font size and formatting, and the appearance (borders)
of the Clinic information area.
c. By selecting Show labels, the Clinic information fields can be toggled on and off.
d. Selecting Rotate makes the element rotate 90 degrees clockwise.
3. Logo.
a. Select image opens a window from where you can browse to find the image stored on your PC that
you want to include in the template.
b. Selecting Rotate makes the element rotate 90 degrees clockwise.
3. Text. This element allows you to add additional text, e.g. footnotes on your template.
a. Enter text opens the Enter Text window. Here you can type in freetext and choose the font type,
size and formatting.
b. Selecting Rotate makes the element rotate 90 degrees clockwise.