4. Attach the mounting bracket to the QFX5100-96S switch using ten mounting screws
(and cage nuts and washers if your rack requires them).
5. Repeat this procedure for the mounting bracket on the opposite side of the switch.
Tighten all screws.
6. Use two people to attach the brackets to the posts.
a. Have one person grasp both sides of the switch and lift it into place.
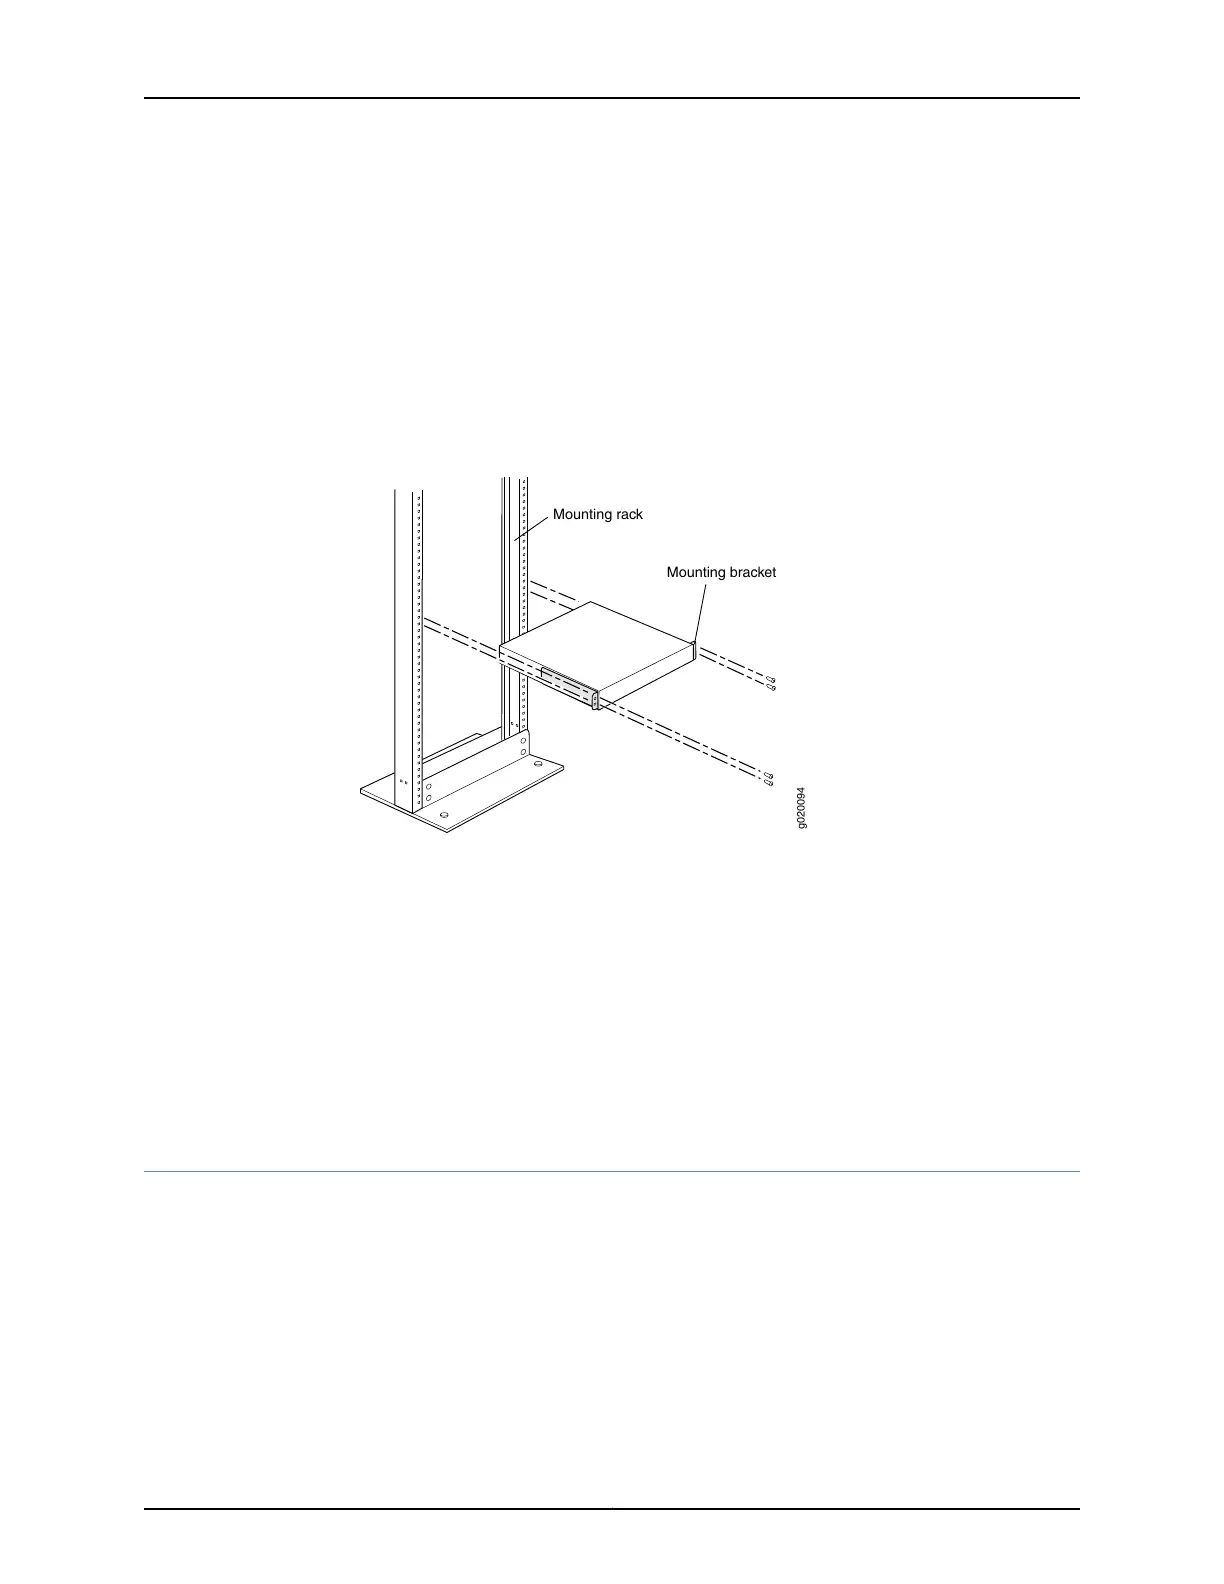
b. Ensure that the switch is level. See Figure 53 on page 165.
Figure 53: Mounting the Switch on Two Posts in a Rack
g020094
Mounting rack
Mounting bracket
c. Have the second person use the four mounting screws (and cage nuts and washers
if your rack requires them) to screw the mounting bracket to the rack.
7. Attach a ground cable to earth ground and then attach it to the chassis grounding
points, as described in “Connecting Earth Ground to a QFX5100 Device” on page 170.
Related
Documentation
Rack-Mounting and Cabinet-Mounting Warnings on page 251•
• Connecting AC Power to a QFX5100 Device on page 171
• Connecting Earth Ground to a QFX5100 Device on page 170
Virtual Chassis Fabric Installation Overview
For best results, ensure you review and understand the Virtual Chassis Fabric (VCF)
configuration options. These configuration options are explained in Understanding Virtual
Chassis Fabric Configuration. Do not interconnect the switches with cables until directed
in the procedure.
165Copyright © 2016, Juniper Networks, Inc.
Chapter 11: Installing the Switch