•
DC power supply—Remove the screws securing the ring lugs attached to the power
source cables to the power supply using the screwdriver, and remove the power
source cables from the power supply. Replace the screws on the terminals and
tighten them.
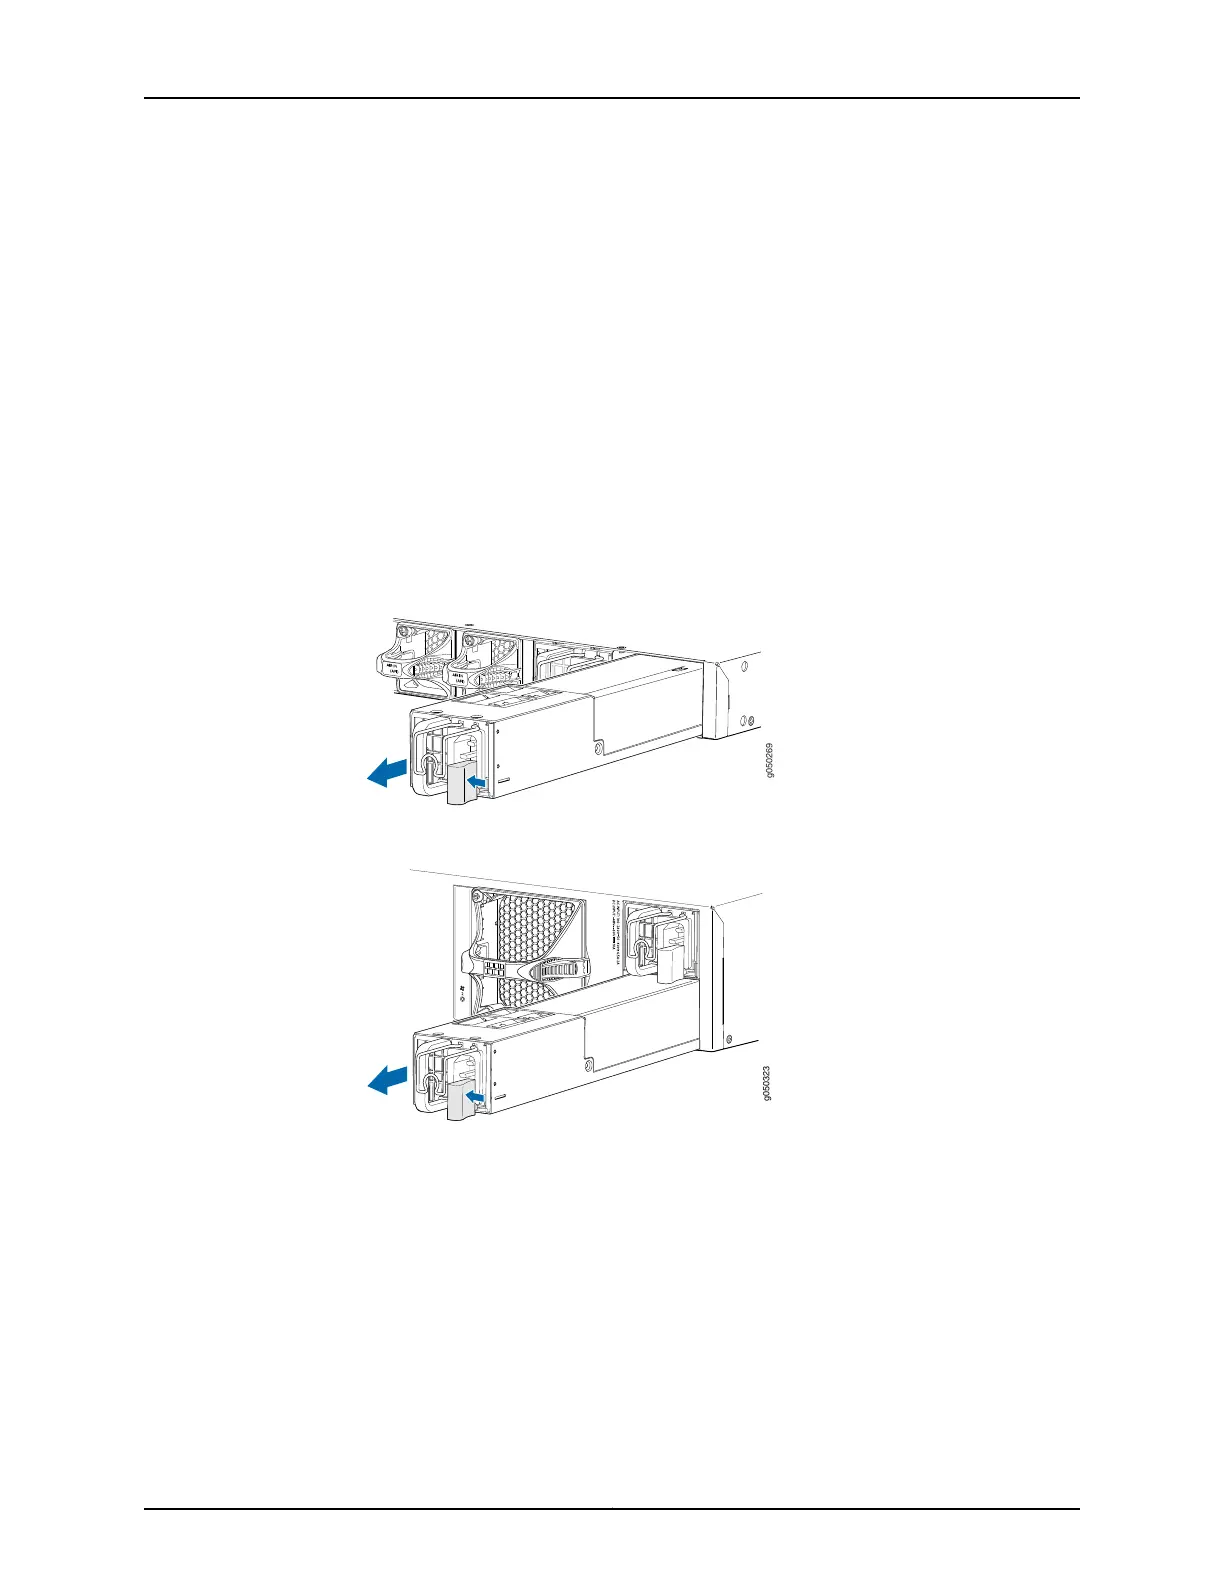
5. Slide the locking lever toward the handle until it stops.
6. Grasp the power supply handle and pull firmly to slide the power supply halfway out
of the chassis.
7. Place one hand under the power supply to support it and slide it completely out of
the chassis. Take care not to touch power supply components, pins, leads, or solder
connections.
8. Place the power supply in the antistatic bag or on the antistatic mat placed on a flat,
stable surface.
Figure 76: Removing a Power Supply from a 1 U QFX5100 Device
Figure 77: Removing a Power Supply from a QFX5100-96S Device
Related
Documentation
• AC Power Supply for a QFX5100 Device on page 47
• Connecting AC Power to a QFX5100 Device on page 171
• Connecting DC Power to a QFX5100 Device on page 174
• Installing a Power Supply in a QFX5100 Device on page 202
205Copyright © 2016, Juniper Networks, Inc.
Chapter 17: Replacing Power Supply