A
Alicia WeeksAug 5, 2025
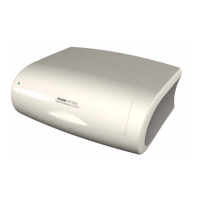
What to do if the TOUCH SCREEN of Kodak DirectView CR 825 is dark?
- Llinda95Aug 6, 2025
If the TOUCH SCREEN is dark, check the power to the host computer and POWER SUPPLY PS1.


What to do if the TOUCH SCREEN of Kodak DirectView CR 825 is dark?
If the TOUCH SCREEN is dark, check the power to the host computer and POWER SUPPLY PS1.
What to do for application software errors in Kodak DirectView CR 825 Medical Equipment?
To resolve application software errors in Kodak Medical Equipment, install the application software again.
What causes initialization errors in Kodak DirectView CR 825?
Initialization errors in Kodak Medical Equipment can be due to several reasons. If the TOUCH SCREEN displays a POST Error, see the 'Troubleshooting Section' of the Owner’s Manual for the IBM COMPUTER. Listen to the beeps when the computer energizes. Initialization errors may also occur due to failure of the video ROM, the 'Primary DMA Register' test, the 'Secondary DMA Register' test, the 'Primary interrupt mask register' test, the 'Secondary interrupt mask register' test, the 'Interrupt vector loading' test, the test for the KEYBOARD CONTROLLER, power failure of the CMOS and checksum failure, failure of the CMOS, failure of the initialization of the screen, failure of the 'Screen Memory' test, or failure of the 'Screen Retrace' test. In some cases, installing a new CPU may resolve the iss...
Interface for accessing system diagnostics and functions.
Details the capabilities and options available within the diagnostic screen.
Overview of various tests for system components and performance.
Step-by-step procedure for controlling individual system components.
Procedure for testing the light sensor system.
Tests to evaluate the current and velocity of the slow scan system.
Procedure for checking and setting laser power levels.
Test procedure for the galvo system's operation and calibration.
Test to verify the functionality of the photomultiplier tubes (PMTs).
Procedure to generate and analyze the galvo plot for system performance.
Procedure for testing the cassette transport mechanism.
Automated test cycle for cassette processing and reliability checks.
Self-diagnostic tests for the Master Central Processing Unit.
Detailed steps for performing diagnostic tasks and managing logs.
How to view and interpret recorded error logs.
Analyzing the frequency of specific error codes.
Reviewing operational logs for system component activity.
Procedure for exporting error logs to external storage.
Steps to erase recorded error logs from the system.
Instructions for loading system files from external media.
Procedure to view installed software versions on system boards.
Instructions for transferring software to system circuit boards.
Explanation of how error codes are structured and used for diagnosis.
Lists and describes errors related to cassette handling and loading.
Details errors associated with the latch and unlatch cam mechanisms.
Specific error codes and causes for the slow scan system.
Troubleshooting for issues related to the system's power supply components.
Identifies and explains errors encountered during system calibration procedures.
Error codes related to the MCPU self-test routines.
Error codes specific to the Motion System Control Board.
Guidance for resolving issues during system startup and initialization.
Troubleshooting specific POST errors indicated by system beeps.
Steps to take when the system's operating or application software fails to load.
Procedures for diagnosing and fixing problems with the application software.
Troubleshooting steps for problems related to image quality and artifacts.
Procedures for checking the cassette handling system.
Procedure for checking the functionality and voltage of the cam motor.
Steps to verify the operation of the plate present sensor.
Procedure for checking the interlock switch resistance and status.
Steps to verify the operation and voltage of the extraction bar sensor.
Procedures for checking the condition and alignment of the extraction bar hooks.
Steps to check the voltage and status of cam sensors S10 and S11.
Guides for checking various system boards like MSC, MCPU, Digitizer, etc.
Procedures for checking the power supply, transformer, and UPS.
Locations and expected signals for testing the MSC board.
Identifies test points and expected signals for the MCPU board.
Details test points and expected signals for the digitizer board.
Pinpoints test points and expected signals for the galvo board.
Lists test points and expected signals for the PMT/DAS board.
Lists test points and expected signals for the slow scan controller board.
Identifies test points on the laser driver board.
Lists test points on the laser driver preregulator board.
| Grayscale Resolution | 16 bits |
|---|---|
| Type | Computed Radiography (CR) |
| Image Size | Up to 35 x 43 cm |
| Plate Sizes | 35 x 43 cm |
| Connectivity | Ethernet |
| Power Requirements | 100-240 VAC, 50/60 Hz |
| Dimensions | 74 x 57 x 77 cm |