Konica Minolta 240f 8-25
8.1 Registering destinations
8
Setting a folder and printer
Register the shared folder and printer to use with the Scan to Printer function.
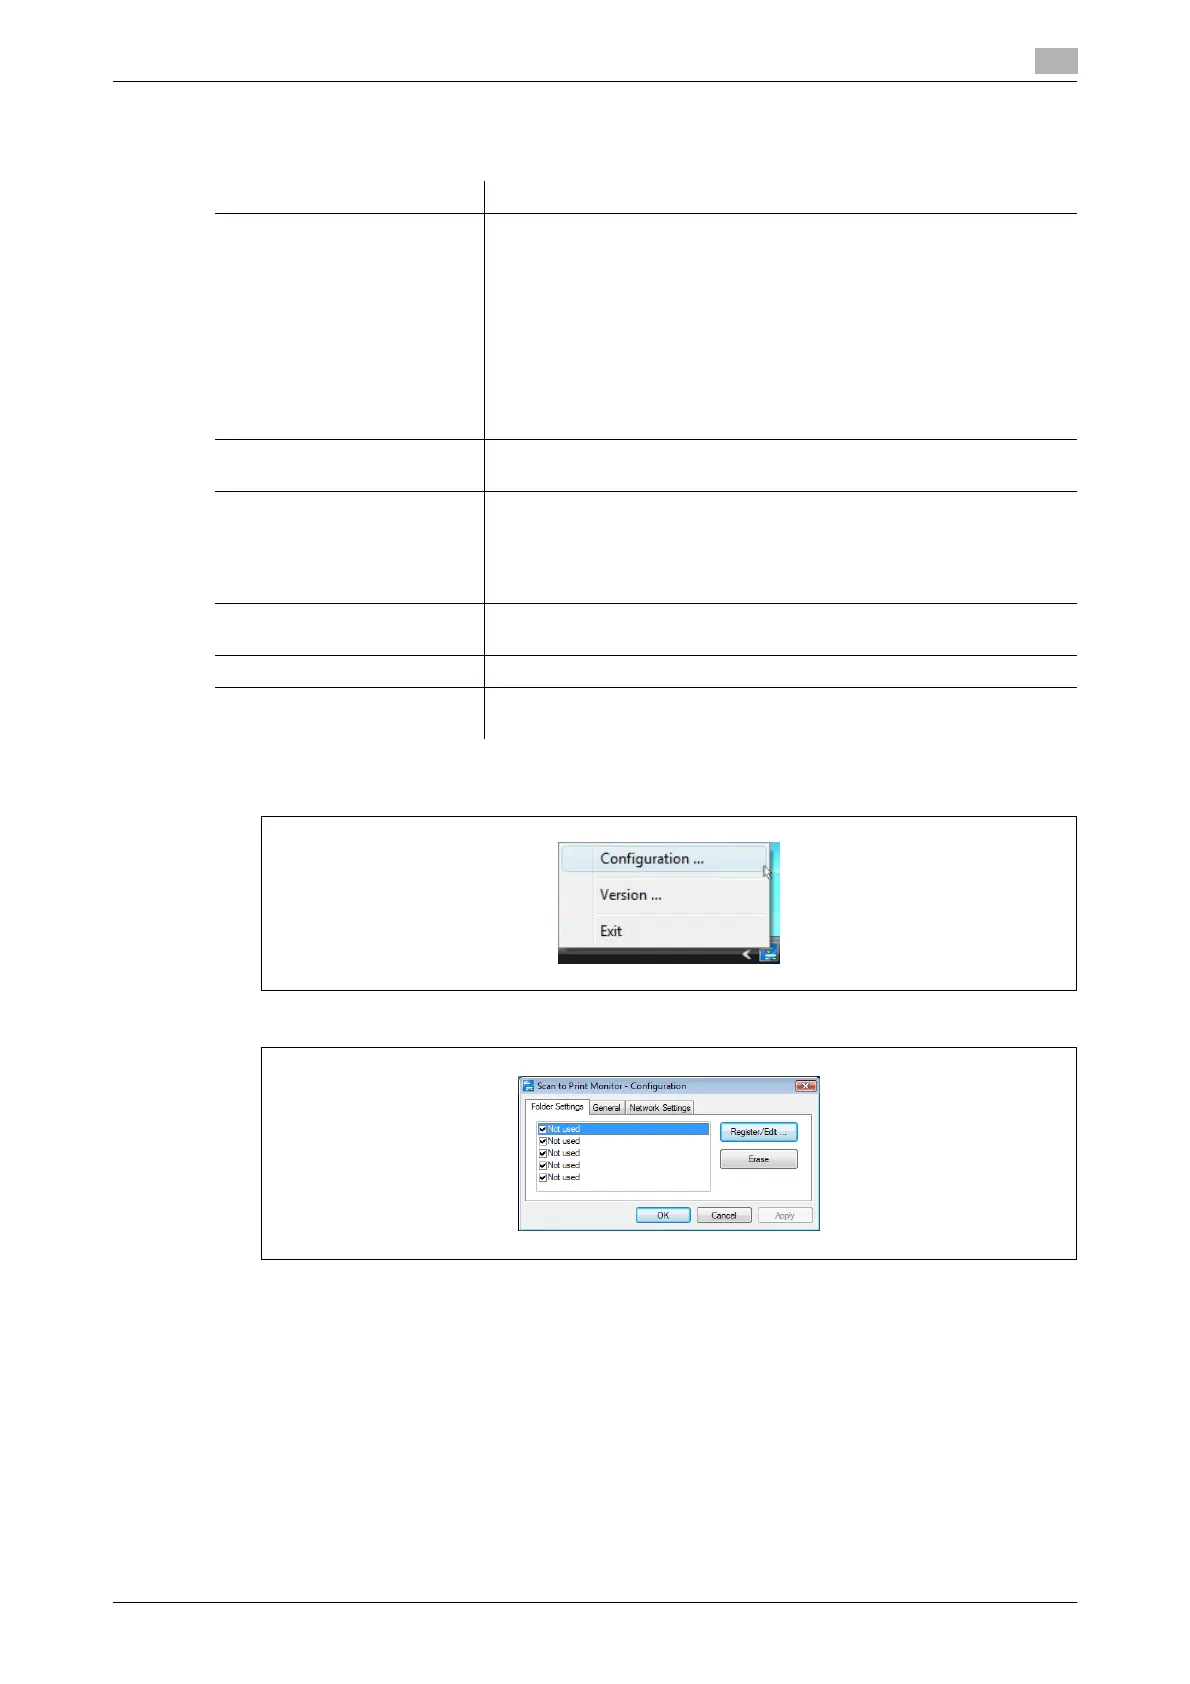
1 Right-click the task tray icon of the Scan to Print Monitor, and select "Configuration".
2 Select the [Folder Settings] tab.
3 To register a new printer, select an unregistered item, and click [Register/Edit].
% If the message "Cannot connect to the server." is displayed, specify the "Network Settings" first.
For details, refer to page 8-28.
% To change registered information, select the item you want to change, and click [Register/Edit].
Item Description
Shared Folder Specify the shared folder to use for the Scan to Printer function.
Scanned document data is saved in this folder, and is then forwarded
to the printer by the Scan to Print Monitor function.
d
It is necessary to create a Scan to Printer shared folder that is
separate from the folder used for the Scan to Folder function.
Be sure that the shared folder allows "Full control" at "Per-
missions for Everyone" in security setting.
Printer Register the printer.
You can register a printer installed in the computer you are using.
Margin With some printers, the document may be reduced when printed to
avoid the margin where printing cannot be performed. You can register
that margin to prevent the document from being reduced.
For details on the margin value, see the instruction manual for the print-
er you are using.
Name This is the button name displayed on the panel.
Up to 24 characters can be entered.
Account Register an account when it is required to access the shared folder.
Password Register a password when it is required to access the shared folder.
Only ASCII characters are available.
 Loading...