Applications 8-41
Applications
Image Shift (continued)
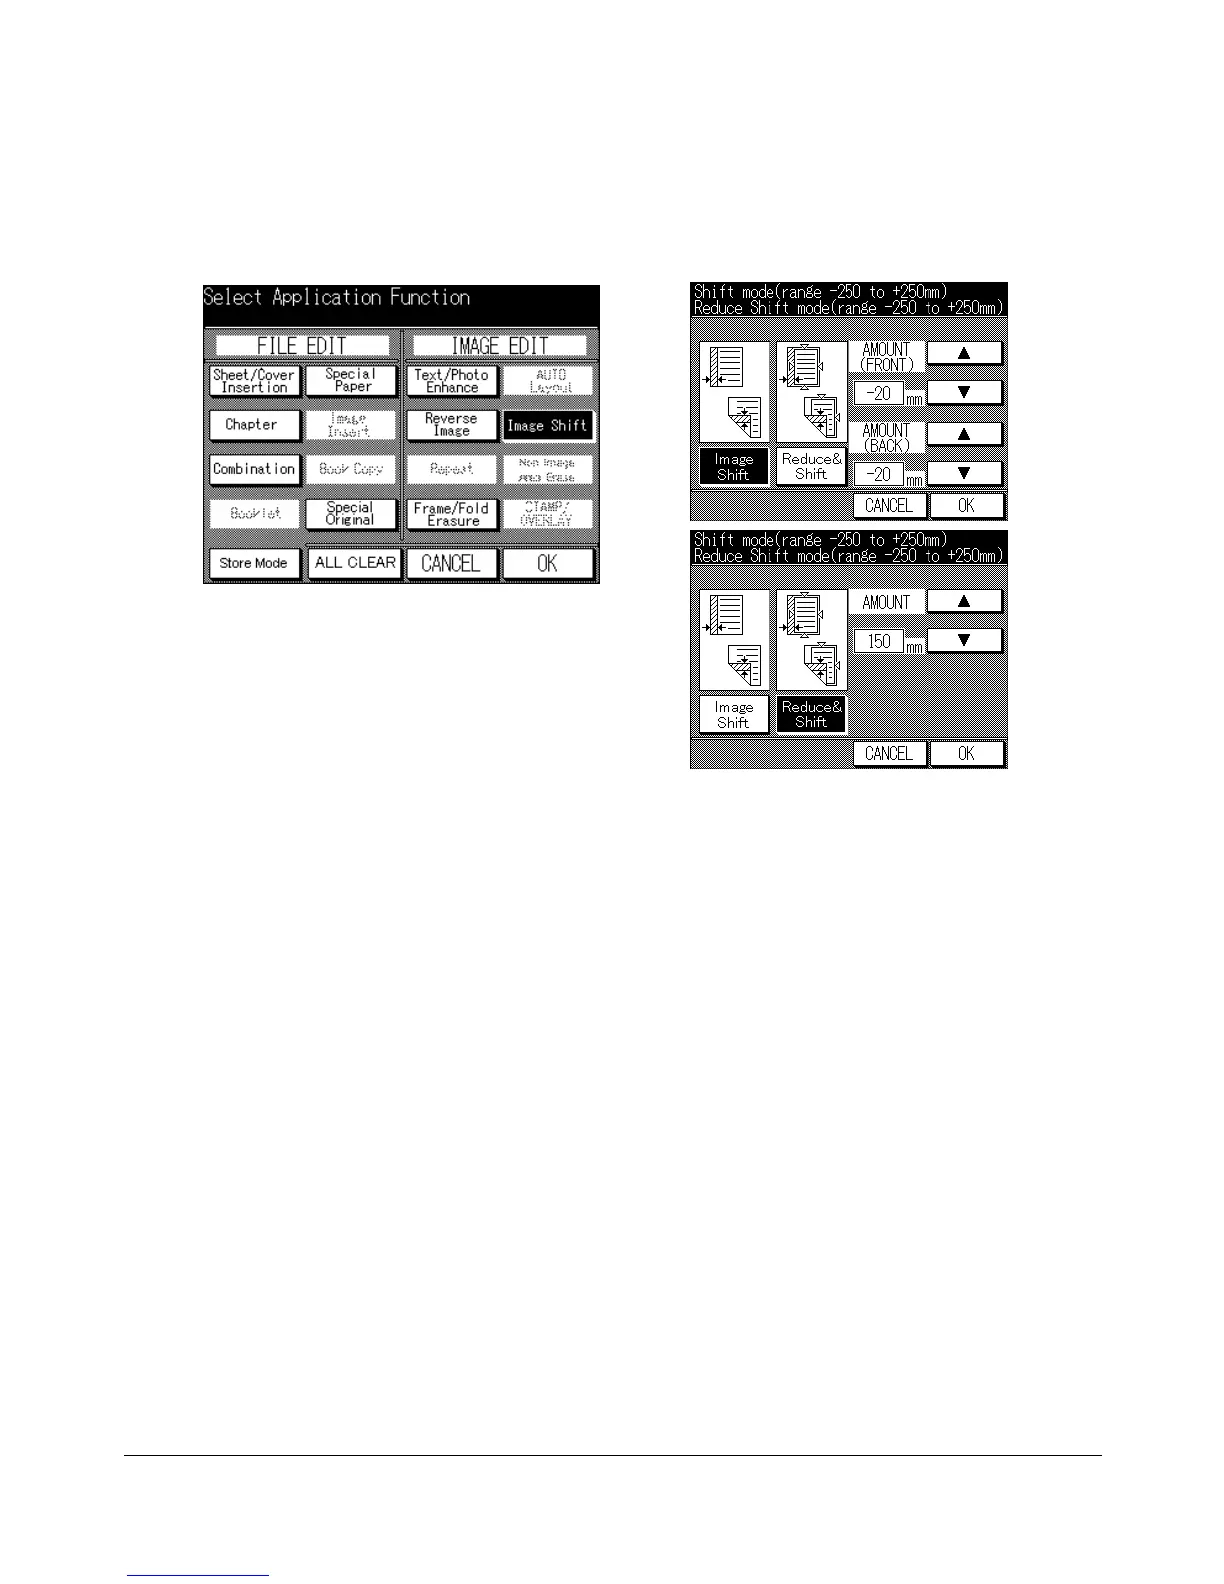
Application Selection Screen
Image Shift Setting Screen
1 Press [APPLICATION] on the control panel to display the Application Selection
Screen.
2 Touch Image Shift to display the Image Shift Setting Screen.
3 Touch Image Shift or Reduce & Shift.
4 If selecting Image Shift mode in step 3, touch the upper or lower arrow key next to
AMOUNT (Front) and AMOUNT (Back) to select the desired shift amount (–250mm
~ +250mm in 1mm increments). The arrow keys next to AMOUNT (Back) functions
only for duplex copying.
NOTES:
1 In Reduce & shift mode, the amount of front and back cannot be selected individually.
2 If double-sided originals already have a binding margin, shift the image of the pages having the right
margin only.
5 If selecting Reduce & Shift mode in step 3, touch the upper or lower arrow key next
to AMOUNT to select the desired shift amount (–250mm ~ +250mm in 1mm
increments).
6 Touch OK to complete the setting and return to the Application Selection Screen.
7 Make additional application selections, or touch OK to return to the Basic Screen.
8 Enter the desired print quantity from the control panel keypad.
9 Position original(s) FACE UP in document feeder or FACE DOWN on platen glass.
Option: Press [CHECK] to view the selection, and make the Proof copy, if desired; then touch EXIT to return
to the Basic Screen. See p. 6-29 to p. 6-30.
10 Press [START].
After copying is completed, press [AUTO RESET] to release the mode and reset the
machine.





 To Next Page