Synergy Software
Laborie NXT Pro Owner’s Manual LBL-00146 [C], MAN2010 56
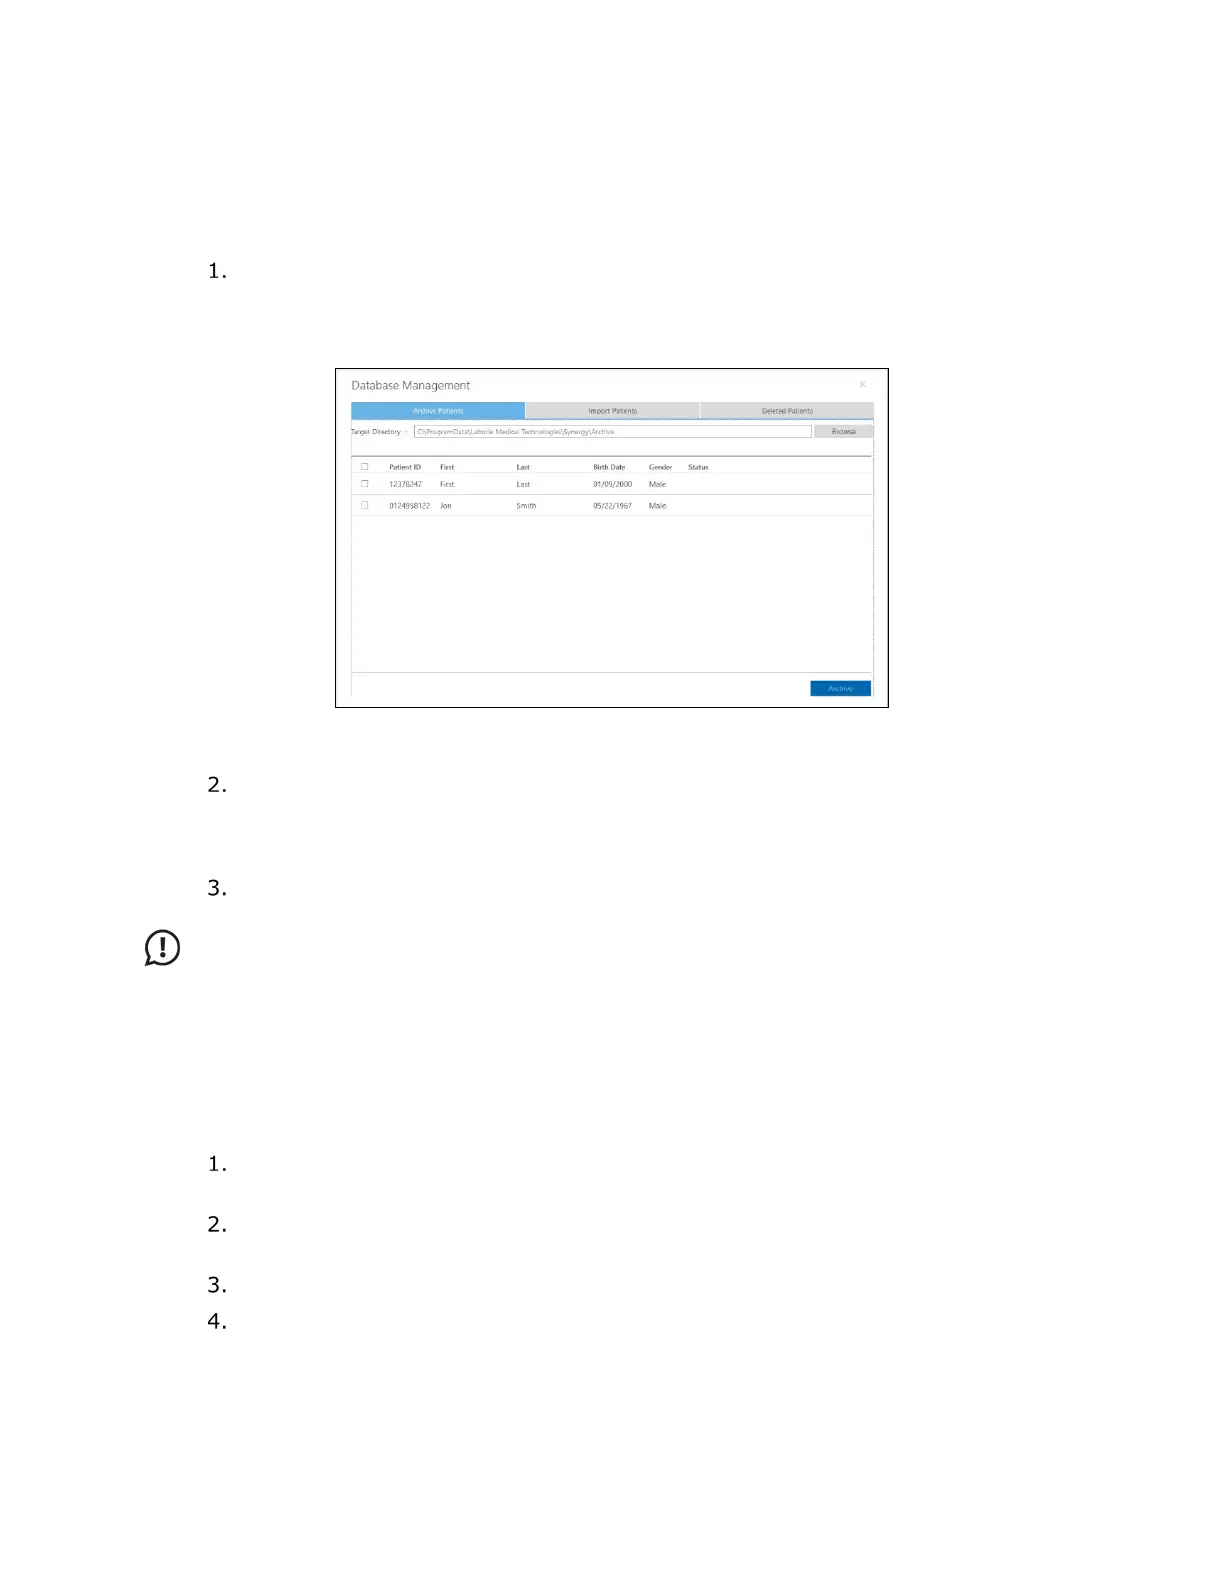
4.3.3.1 Archiving Patients
You can archive patient data into an encrypted file on the computer system or on an
external hard drive. Follow the instructions here for archiving patient data:
Select the patients for archiving. All patients available in the database will appear
in this window. To select patients individually, select the corresponding
checkboxes. To select all patients, select the checkbox located on the column
header row at the top of the table (
Figure 43).
Figure 43: Database Management—Archive Patients Tab
Ensure that the Target Directory is pointing to the desired location for patient
archive. To select a different location, click the Browse button. Click OK to save
changes or click Cancel to exit. By default, each time patients are archived, a new
folder will be created in the selected location.
Click the Archive button. A message window opens to confirm a successful
archive. Archive status will also be displayed in the Status column.
IMPORTANT: After a patient is archived, data associated with the patient cannot be
updated through EMR data transfer until the patient is restored.
4.3.3.2 Importing Archived Patient Data
You can import archived patient data into Synergy if that patient data is not already present
in the database. Synergy does not permit the duplication or overwriting of patient
information.
In the Database Management window, select the Import Patients tab (Figure
44).
Click the Browse button and then select an archived folder. All patients archived
in this folder will be displayed in the Database Management window.
Select patients for import by selecting the corresponding checkboxes.
Click the Import button. A message window opens to confirm a successful import.
 Loading...