Synergy Software
Laborie NXT Pro Owner’s Manual LBL-00146 [C], MAN2010 67
station, or the required information must be manually typed in the Consumable
Traceability window.
a. To use the scanner, hold the SmartSense tag affixed to the consumable’s
packaging in proximity to the scanner (located on the NXT docking
station) for three seconds. Verify that the consumable appears in the
Consumable Traceability window.
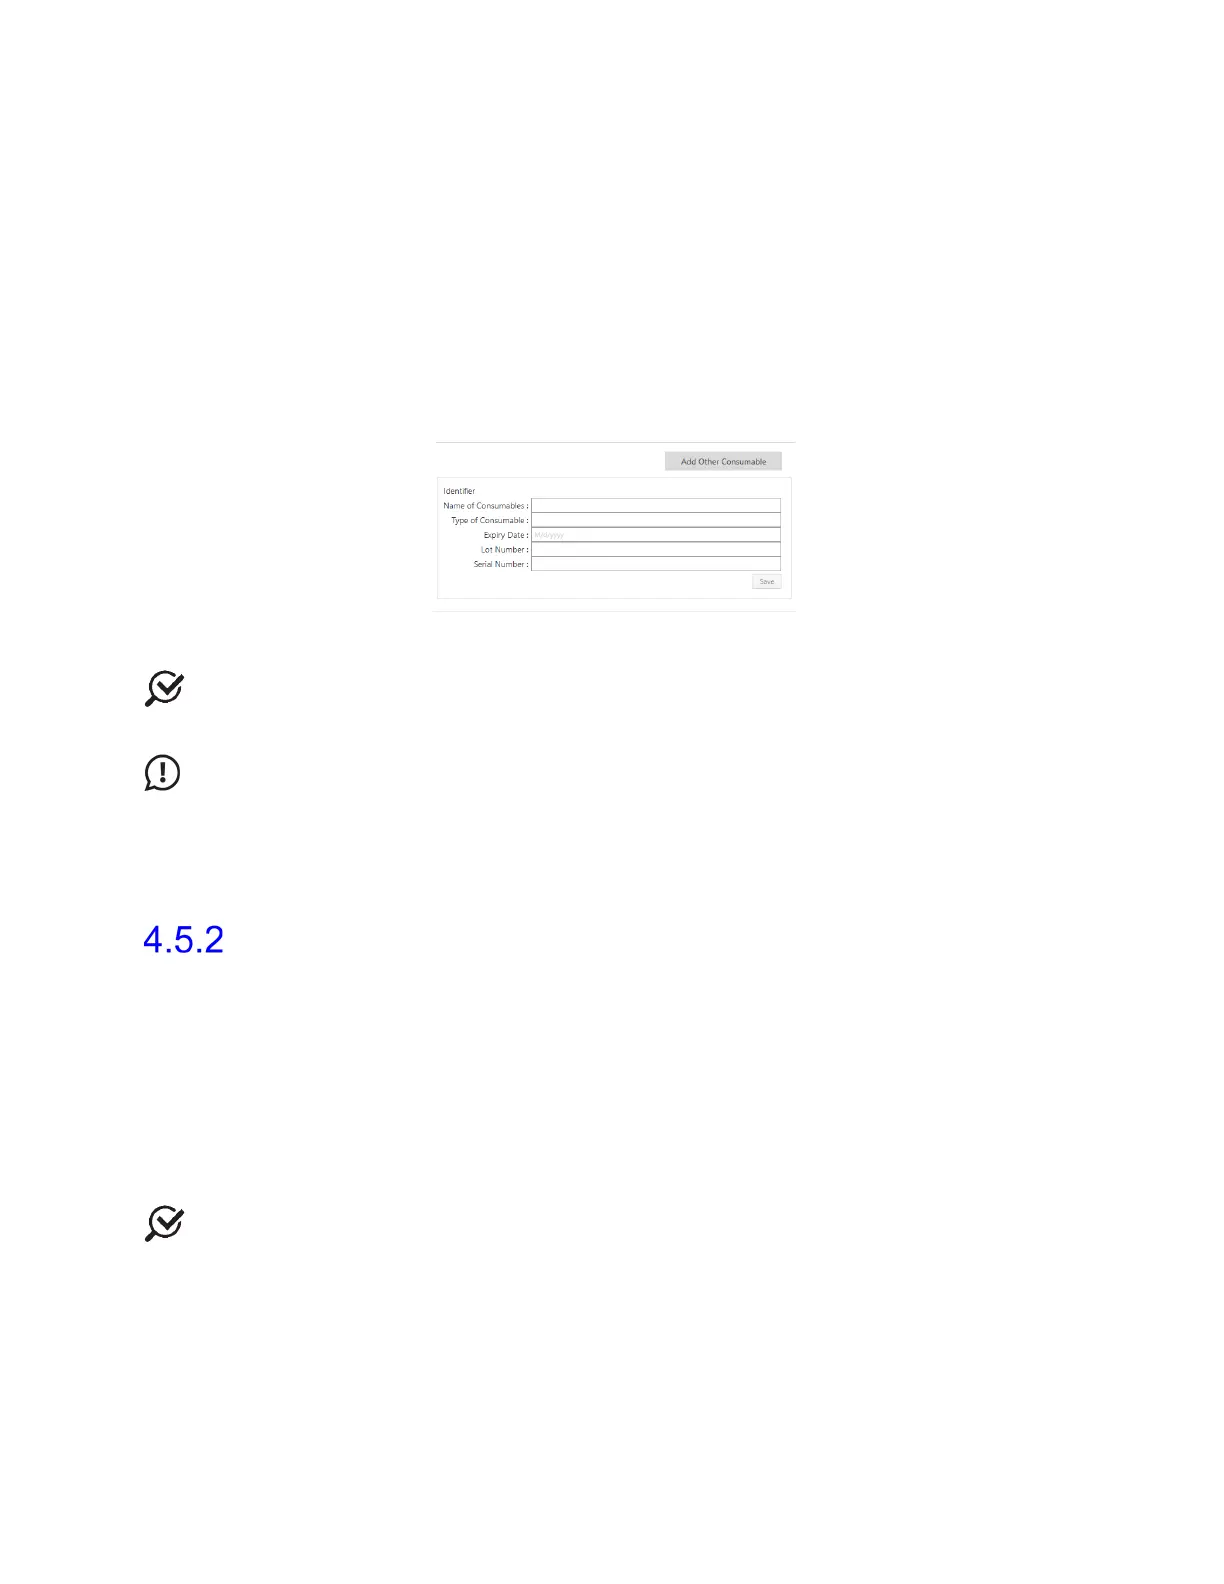
b. To manually enter consumable data into Synergy, click the Add Other
Consumable button. In the manual consumable entry window
(Figure 55), type the Name of Consumables, Type of Consumable,
Expiry Date, Lot Number, and Serial Number of the applicable
consumable, and then click Save.
Figure 55: Manual Consumable Traceability
NOTE: If consumable registration fails, consult the Synergy screen for error codes
indicating the reason for the failure.
IMPORTANT: Synergy will not recognize catheters or infusion pump tubing that have
previously been registered in the software for other patients. Synergy allots two hours of
activity for catheters and infusion pump tubing starting at the time of registration. Synergy
considers consumables as registered to a specific patient as soon as the user proceeds to
the recording phases with the submitted consumables.
Procedure—Recording Phases
After the setup activities are complete, move to the recording phases of the Procedure
workflow step. During the Recording phases, data received during the study is recorded.
The Recording phases are Flow, Filling, and Voiding.
• As each Synergy channel records data, during the recording phases it is displayed
on screen as a continuous curve and as a digital value.
• Each Synergy channel is assigned its own color by default. To change the color of
each channel, click the Channel Name to open the editing window. Click the
assigned color, select a new color from the color palette that opens, and then
click OK to save changes (Figure 56).
NOTE: The channel color can be changed during all workflow steps or configured in the
workflow before beginning the study.
 Loading...