TRANSAXLE J
1.
Engine mount No.2
2. Iransaxle
lnstallation
Note........
page
J-57
3. Stittner
4. Exhaust
pipe
bracket
5. Engine mount member
installationNote........
pageJ-57
6. Staner
7. Driveshatt
Installation Note..........................
page
J-58
8. Control rod
lnstallation Note ..........................
page
J-58
9.
Extension bar
lnstallation Note..........................
page
J-58
10.
Neutral
switch connector
11. Back-up light switch connector
'12.
Clutch cable
lnstallatlon Note..........................
page
J-58
11
qno6.l^mal6r
^.h16
lnstallation Note..........................
page
J-58
14.
Battery,
battery carrier
15. Splash shied
16.
Wheel
and
trre
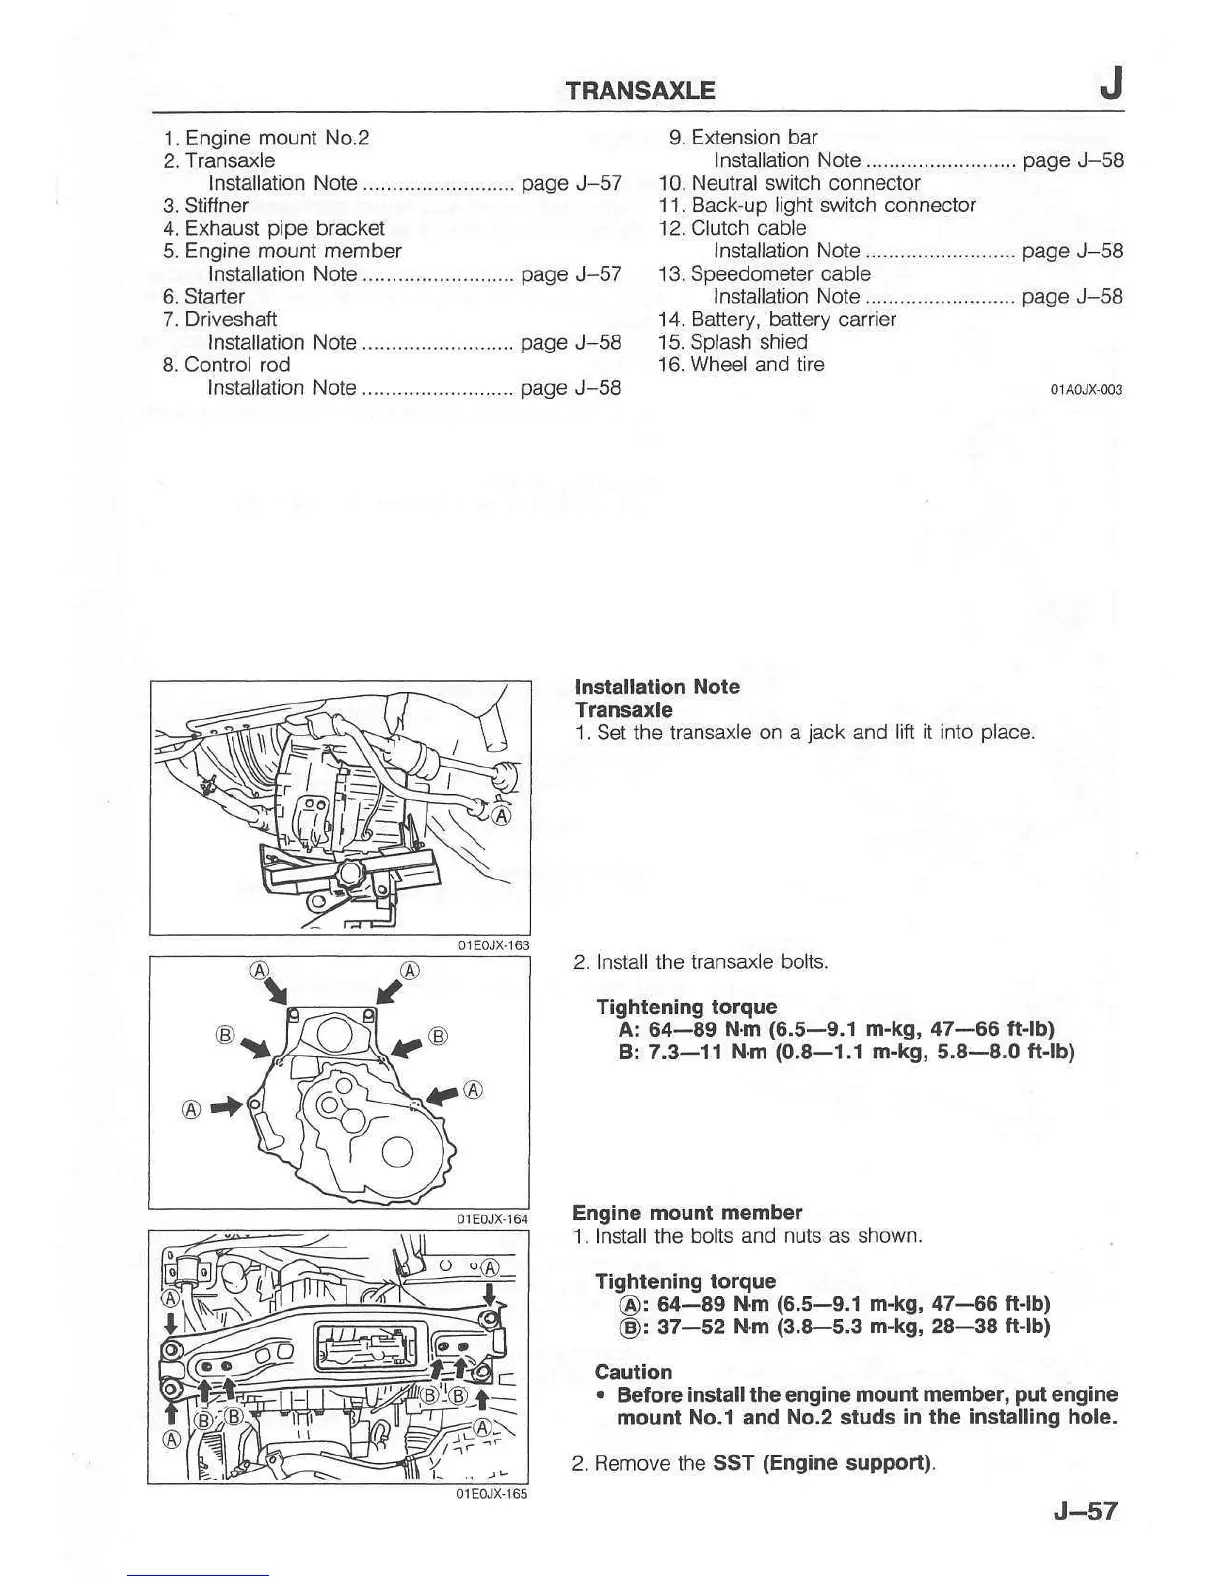
Installation Note
Transaxle
1. Set the transaxle
on a
jack
and lift it into
place.
2. lnstall lhe transaxle bolts.
Tightening lorque
A: 64-89
N.m
(6.5-9.1
Bt 7.3-11 N.m
(0.8-l.l
m-kg, 47-66 ft-lb)
n-kg, 5.8-8.0
ft-lb)
Engine mount member
1.
Install
the
bolts and nuts as shown.
Tightenlng torque
@:
64-89 N.m
(6.5-9.1
m-kg, 47-66 ft-lb)
@:
37-52
N.m
(3.8-5.3
m-kg, 28-38 ft-lb)
Caution
.
BetoF
install
the engine
mount member,
pul
engine
mount No.1 and
No.2
studs
in the installlng hole.
2. Remove the SST
(Eqine
support).
@rj&{r@
J-57