BATTERY CHARGING AND STARTING SYSTEMS
90-826883R2 JUNE 1998 Page 2B-17
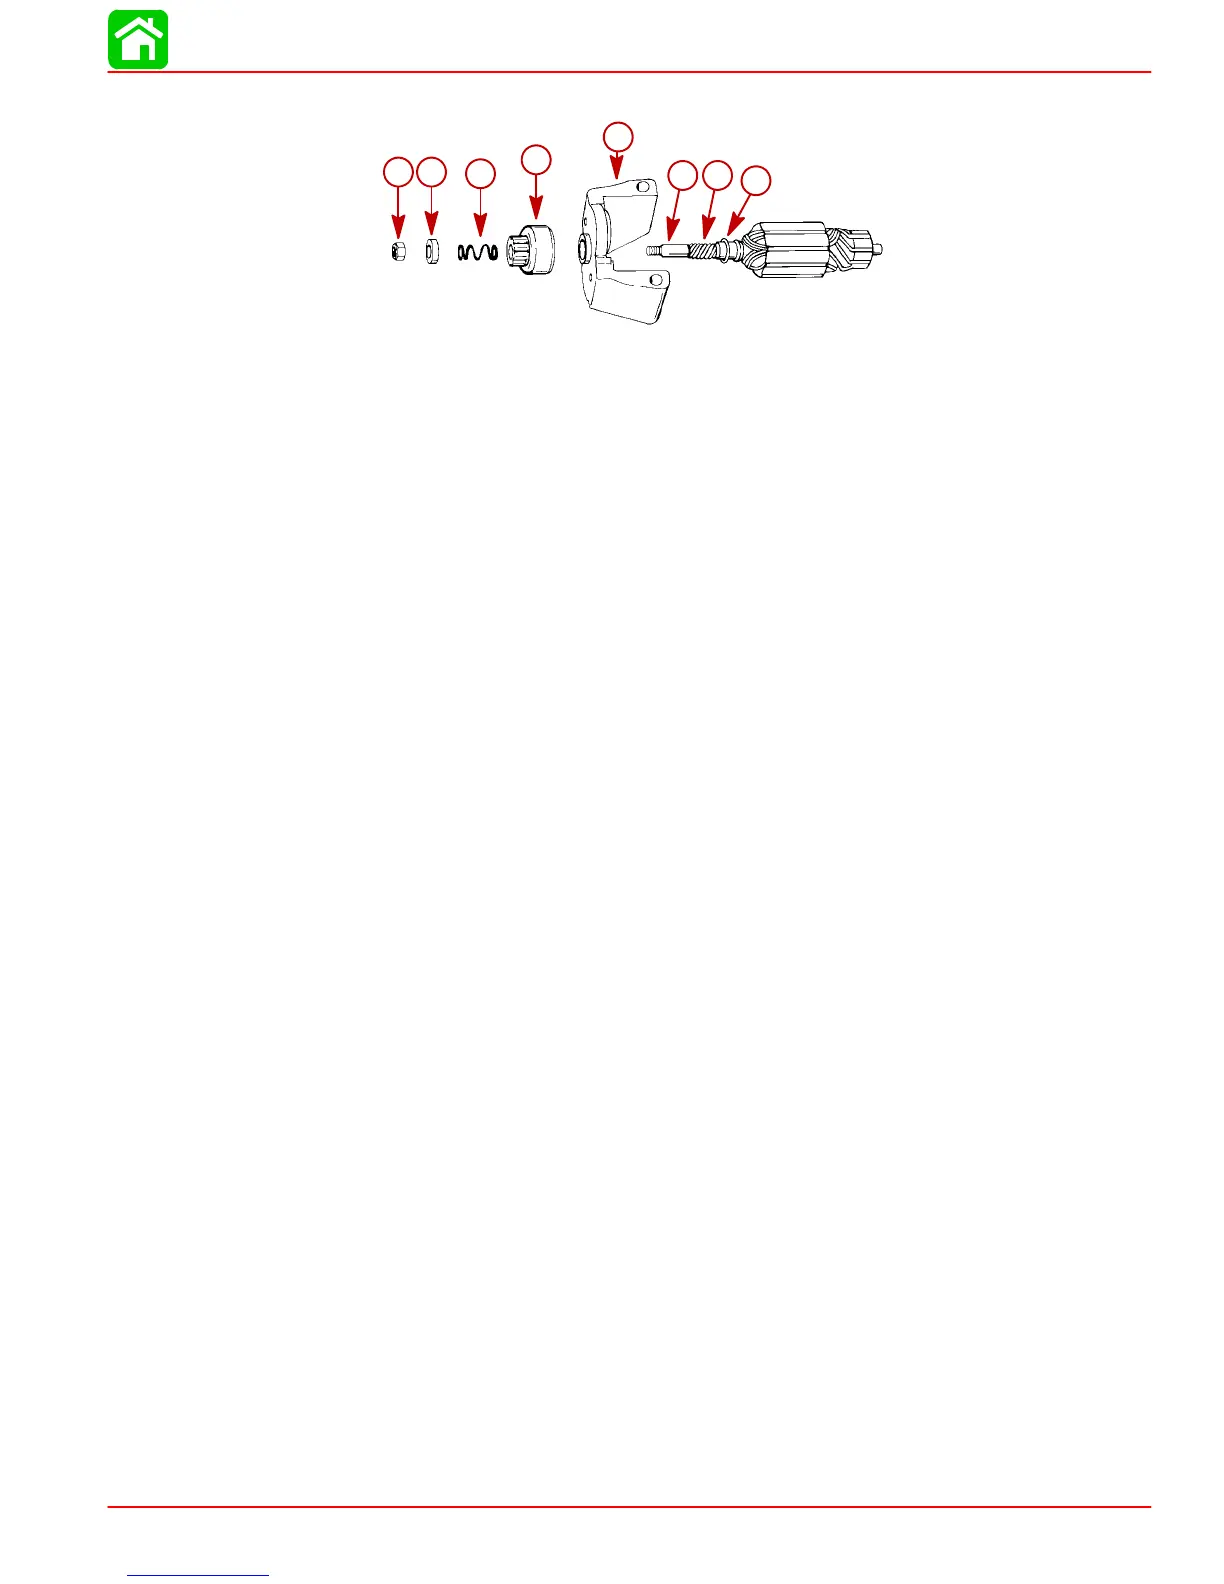
5. Remove parts from shaft.
53228
a
b
c
d
e
f
g
h
a - Locknut
b - Spacer
c - Spring
d - Drive Assembly
e - Drive End Cap
f - Armature Shaft
g - Helix Threads
h - Washer
Cleaning and Inspection
1. If brushes are pitted,chipped or worn toless than3/16 in.(4.8mm), replacebrushes.
IMPORTANT: DO NOT clean the starter drive assembly or armature shaft while
startermotoris installedonoutboard. Thecleaningsolution willdraindirtintomo-
tor housing.
2. If the motor drive assembly does not fully engage with flywheel, the drive assembly
may be binding on the helix threads on the armatureshaft due to dirt or wear. Locate
cause of binding and correct before reassembling.
3. Clean drive components with cleaning solution and inspect parts for wear.
4. Clean commutator with No.00 sandpaper. Removeanyoil from commutator.If com-
mutator surface is pitted , rough or worn unevenly, resurface on a lathe.
5. Resurface commutator on a lathe as follows:
a. Usealathetoturndownthecommutatorsurface.DONOTturndownthecommu-
tator surface excessively.
b. Clean copper particles from slots between commutator bars.
c. Sandthe commutator lightly with No. 00 sand paper to remove burrs.Thoroughly
clean the armature after resurfacing and sanding.
 Loading...