Installing Welding Device
78
OM-296747A | 4/15/24
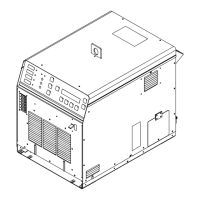
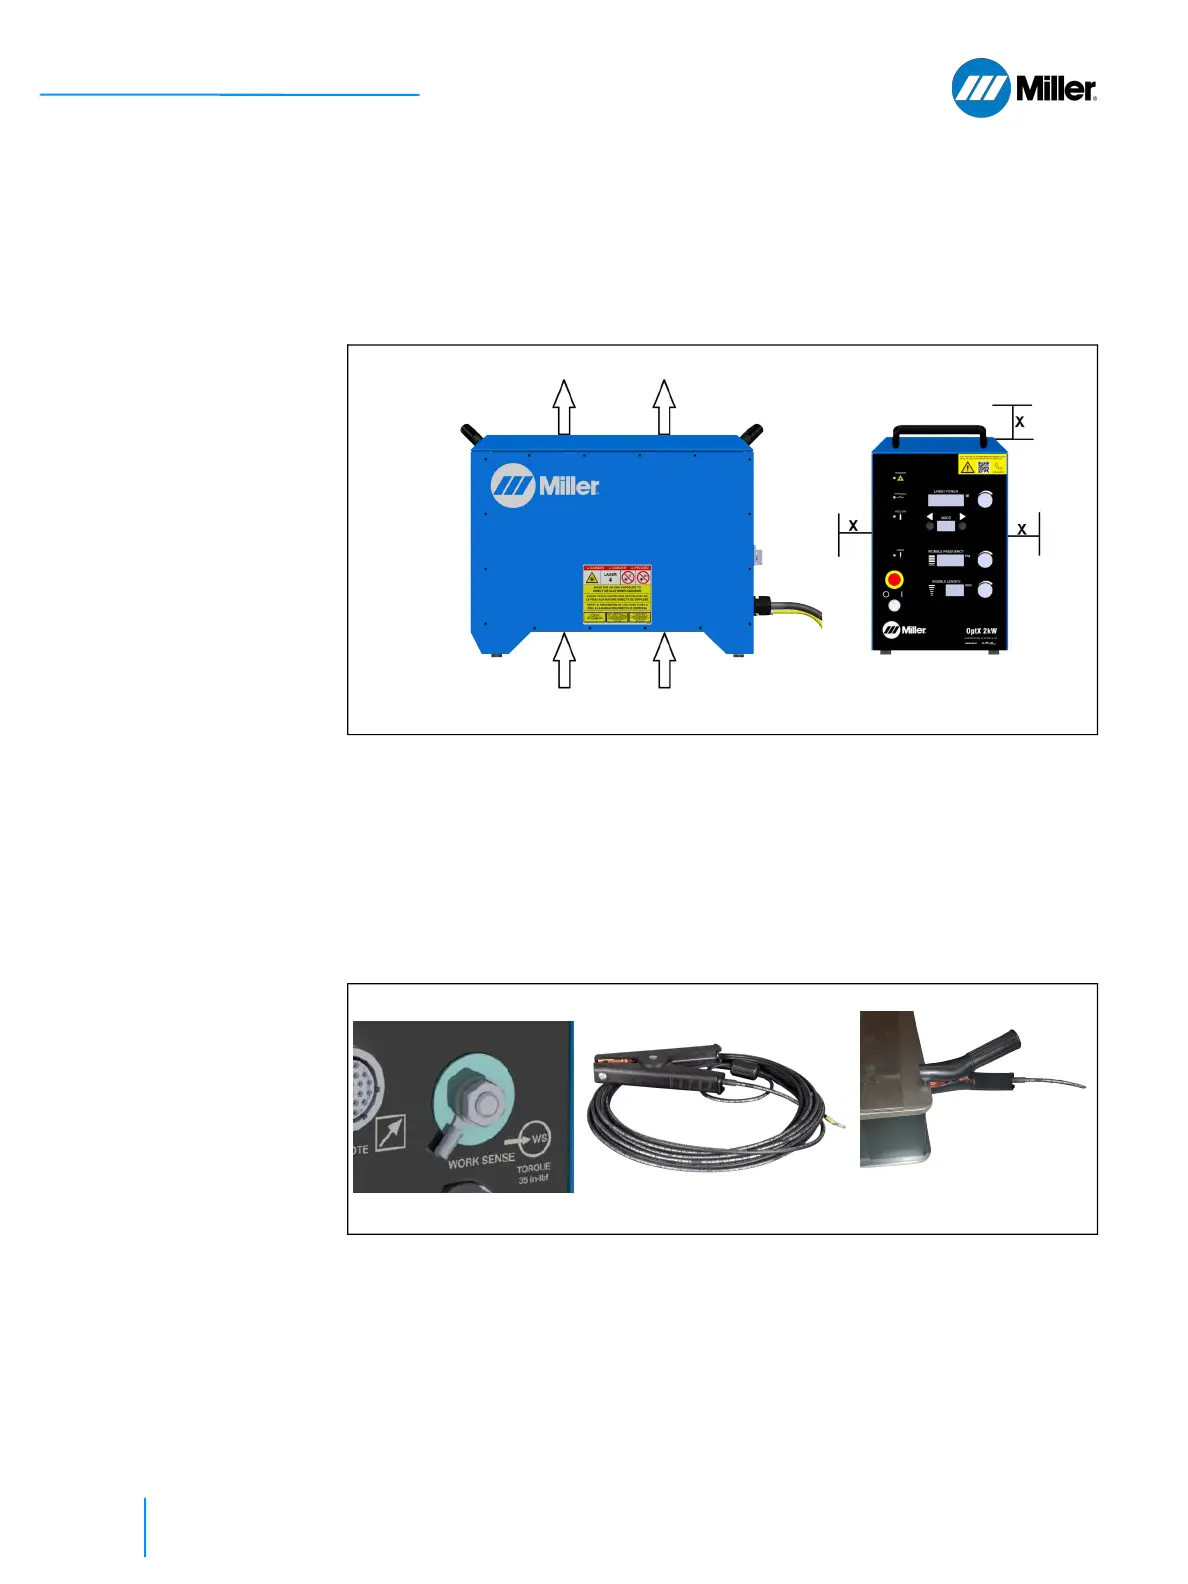
5.2 Air Flow and Installation Clearances
The laser welder unit is air cooled. In choosing the location to install the unit, make
sure to leave approximately a 4 inch (10 cm) clearance above and to the left and
right of the unit. Never place any objects on top of the unit that can block the air
exhaust. The direction of the airflow is illustrated in Figure 15 [▶ 78].
▼Figure 15. Unit Air Flow and Installation Clearances
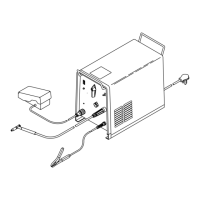
5.3 Connect Work Sense Clamp Cable
A threaded M8 shank exits the back panel. The clamp cable must be attached to
this shank (torque 35 in-lbf) and either the workpiece or the electrically conductive
welding table on which the workpiece is placed is clamped before the laser can be
turned ON. This closes a safety interlock loop between the welder nozzle tip and
this shank.
▼Figure 16. Connect Work Sense Clamp Cable to Shank
AIR EXHAUST
AIR INLET X = 4 inch [10 cm]
 Loading...