SECTION 5
DISASSEMBLY AND ASSEMBLY
100
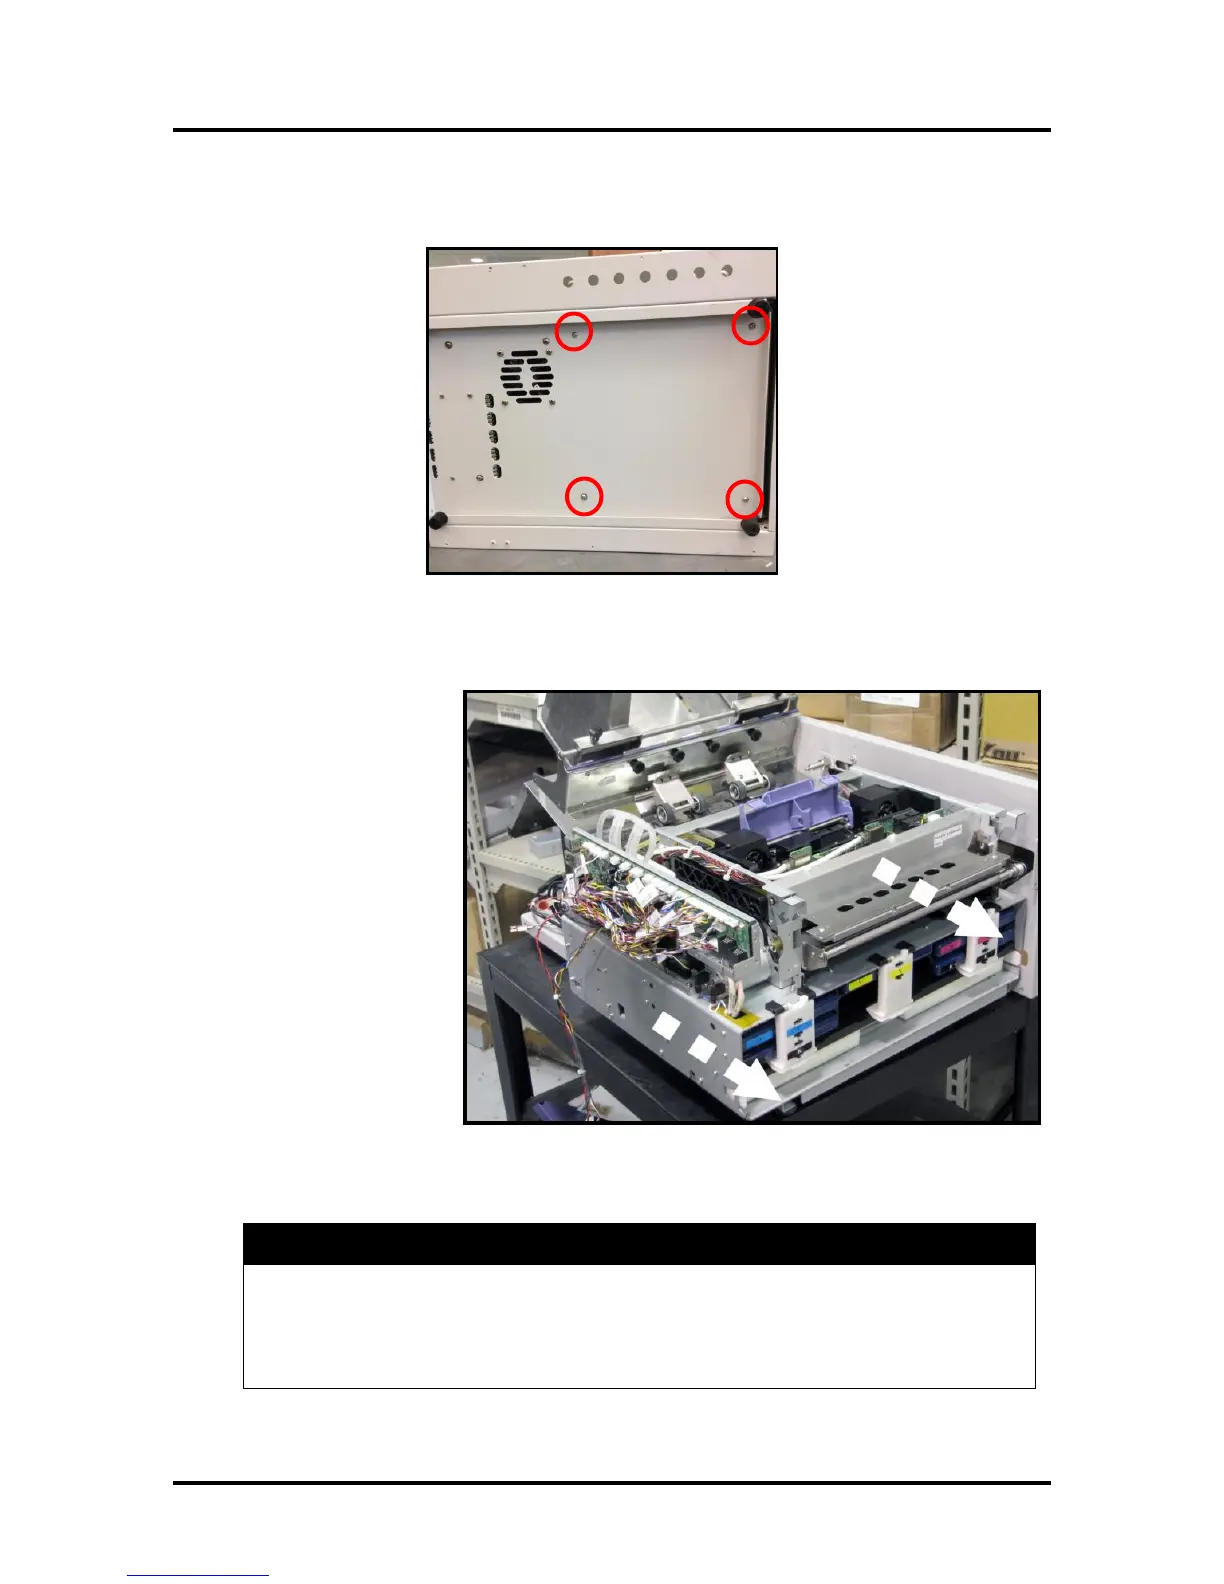
13. Slide the printer off the side of the work table so you can reach underneath to access and remove the
four Allen screws; securing the Print Engine to the Base Plate.
NOTE: The image above shows a printer on its side to help identify screw locations only.
This is NOT the suggested way to access and remove these screws.
14. Carefully slide Print Engine
out of Printer. (Print Engine
is entire unit including the
Ink Station)
15. Reassemble in reverse order.
WHEN REINSTALLING THE PRINT ENGINE, MAKE SURE THAT THE ALIGNING
PINS ARE FLUSH WITH EACH OTHER WHEN THE PRINT ENGINE IS PUSHED
AGAINST THE FRONT CENTER PLATE ASSEMBLY. EVEN A SLIGHT
MISALIGNMENT MAY CAUSE FEEDING AND PRINTING PROBLEMS.
ALSO BE CAREFUL NOT TO PINCH WIRES OR INK TUBES IN THIS PROCESS.

 Loading...

