Repair
8-3
Part 1602966−05
E 2015 Nordson Corporation
Latch Replacement
Latch Removal
To remove a latch from the purge manifold:
1. Perform steps 1−3 in Latch Pawl Replacement.
2. Disconnect the air lines from the purge manifold clamping cylinder.
3. See Figure 8-2. Grasp the cylinder clevis and pull the cylinder shaft out
to the fully extended position to extend the latches and provide access
to the latch set screws (3).
1
2
5
3
6
7
4
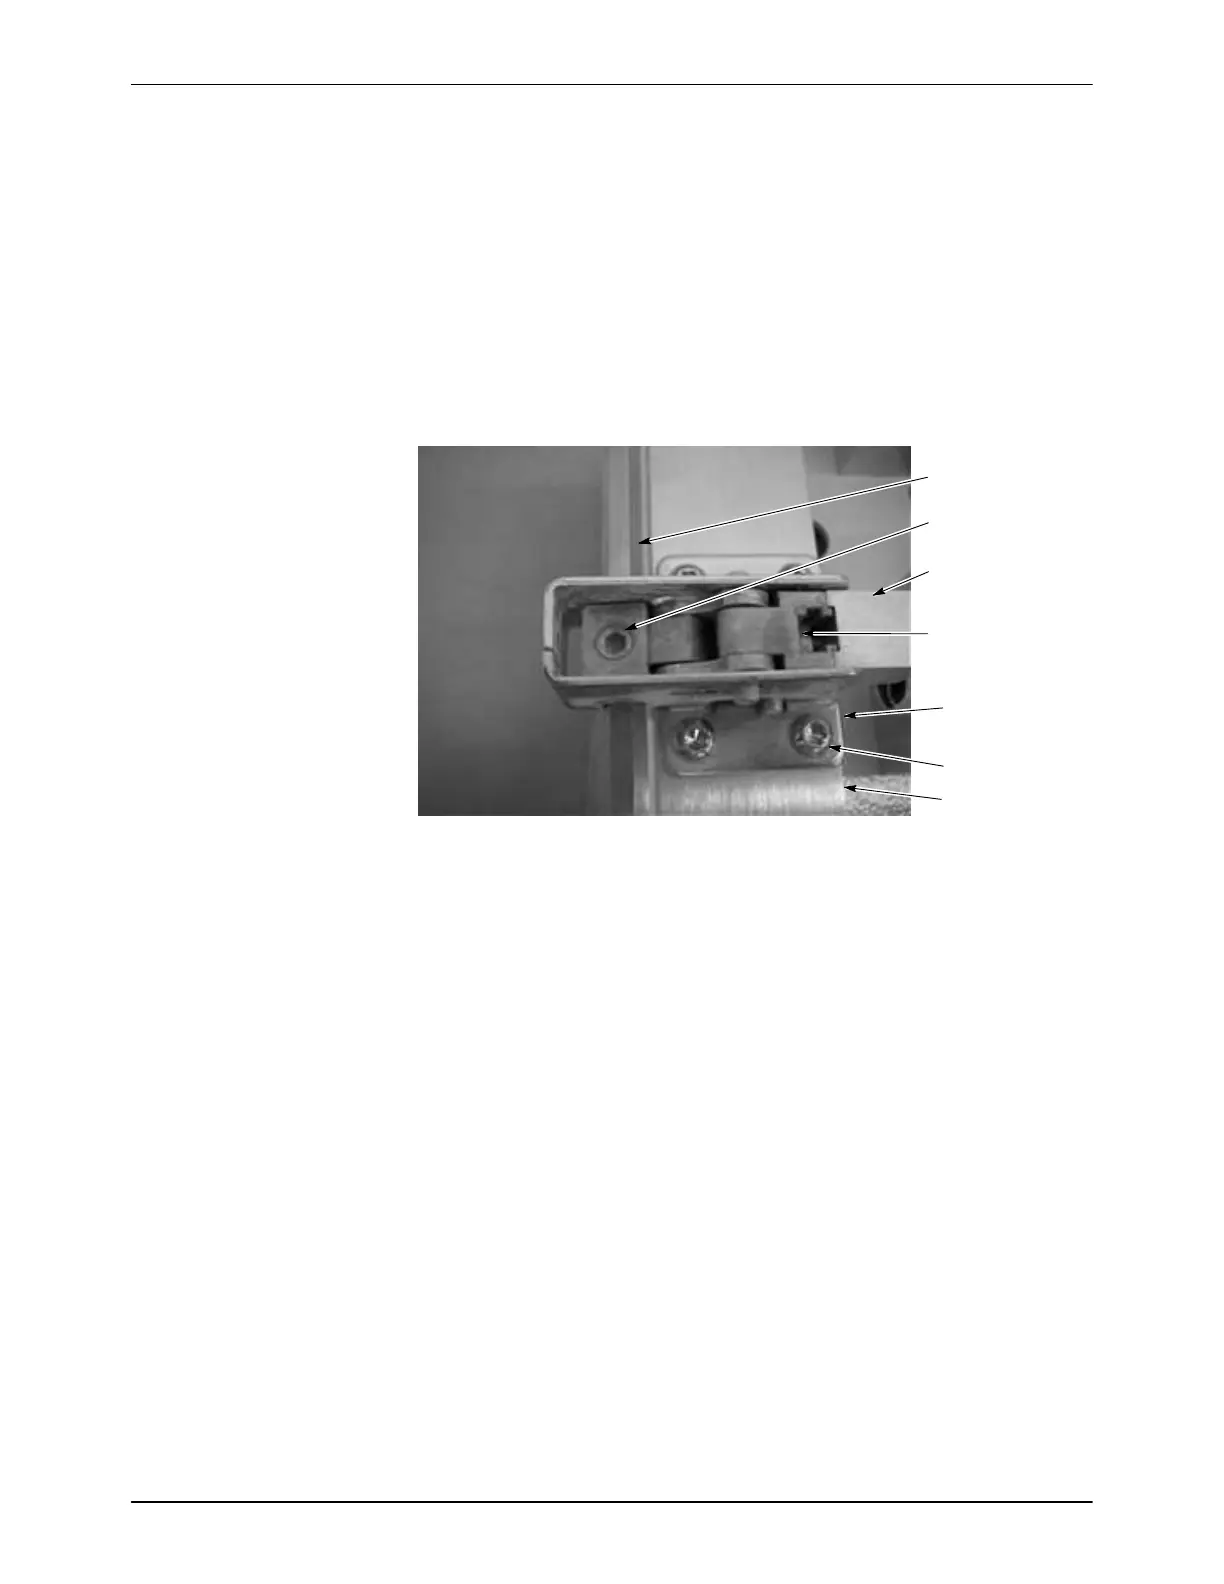
Figure 8-2 Latch Replacement
1. Pawl
2. Latch body
3. Set screw
4. Pawl mount
5. Socket screws
6. Hex shaft
7. Mounting block
4. Loosen the set screw (3) securing the latch to the hex shaft (6), then
remove the four button-head socket screws (5) securing the latch body
(2) to the mounting block (7).
5. Remove other latches as needed if the broken latch is not the last latch
on the shaft. Slide the latch(es) off the end of the hex shaft.
Latch Installation
1. Make sure the clamping cylinder and the new latch are fully extended
and that the top surface of the latch pawl (1) is flush with the top surface
of the pawl mount (4). Adjust the pawl position if necessary by
loosening the Philips-head screw in the pawl recess.
2. Slide the new latch on the hex shaft so that the bottom of the latch body
is parallel to the surface of the mounting block.
3. Position the latch body over the tapped holes in the mounting block and
install the four socket screws.

 Loading...


