Repair
8-7
Part 1602966−05
E 2015 Nordson Corporation
17. Select Gun Purge on the control panel, and adjust the extend flow
control valve for a 3 second extend. Turn Gun Purge off and adjust the
retract flow control valve for a 3 second retract. Toggle Gun Purge on
and off as needed while adjusting the valves.
18. Select Gun Purge and clamp the lance. Position the extend proximity
switch (LS403):
a. Slide the switch on the cylinder until it senses the magnet in the
cylinder piston and the LED lights.
b. Note the position where the LED turned on, then continue sliding it in
the same direction until the LED turns off.
c. Position the switch in the midpoint between LED off positions and
tighten the clamp screw to secure it in place.
19. Turn off the Gun Purge and allow the cylinder to retract. Adjust the
retract proximity switch at the fixed end of the cylinder in the same way
as the extend switch.
20. Raise the lance and re-install the hopper/box table.
21. Adjust the purge air pressure to 5.5 bar (80 psi).
Lift Cylinder Replacement
The replacement lift cylinder listed in the Parts section of this manual does
not include the trunnion flange and fasteners, clevis and clevis pin, or
proximity switches. Re-use your existing components, or order new ones
as needed.
Lift Cylinder Removal
1. Lower the lance assembly onto the purge manifold. The lance carriage
will be positioned against the stop bolt.
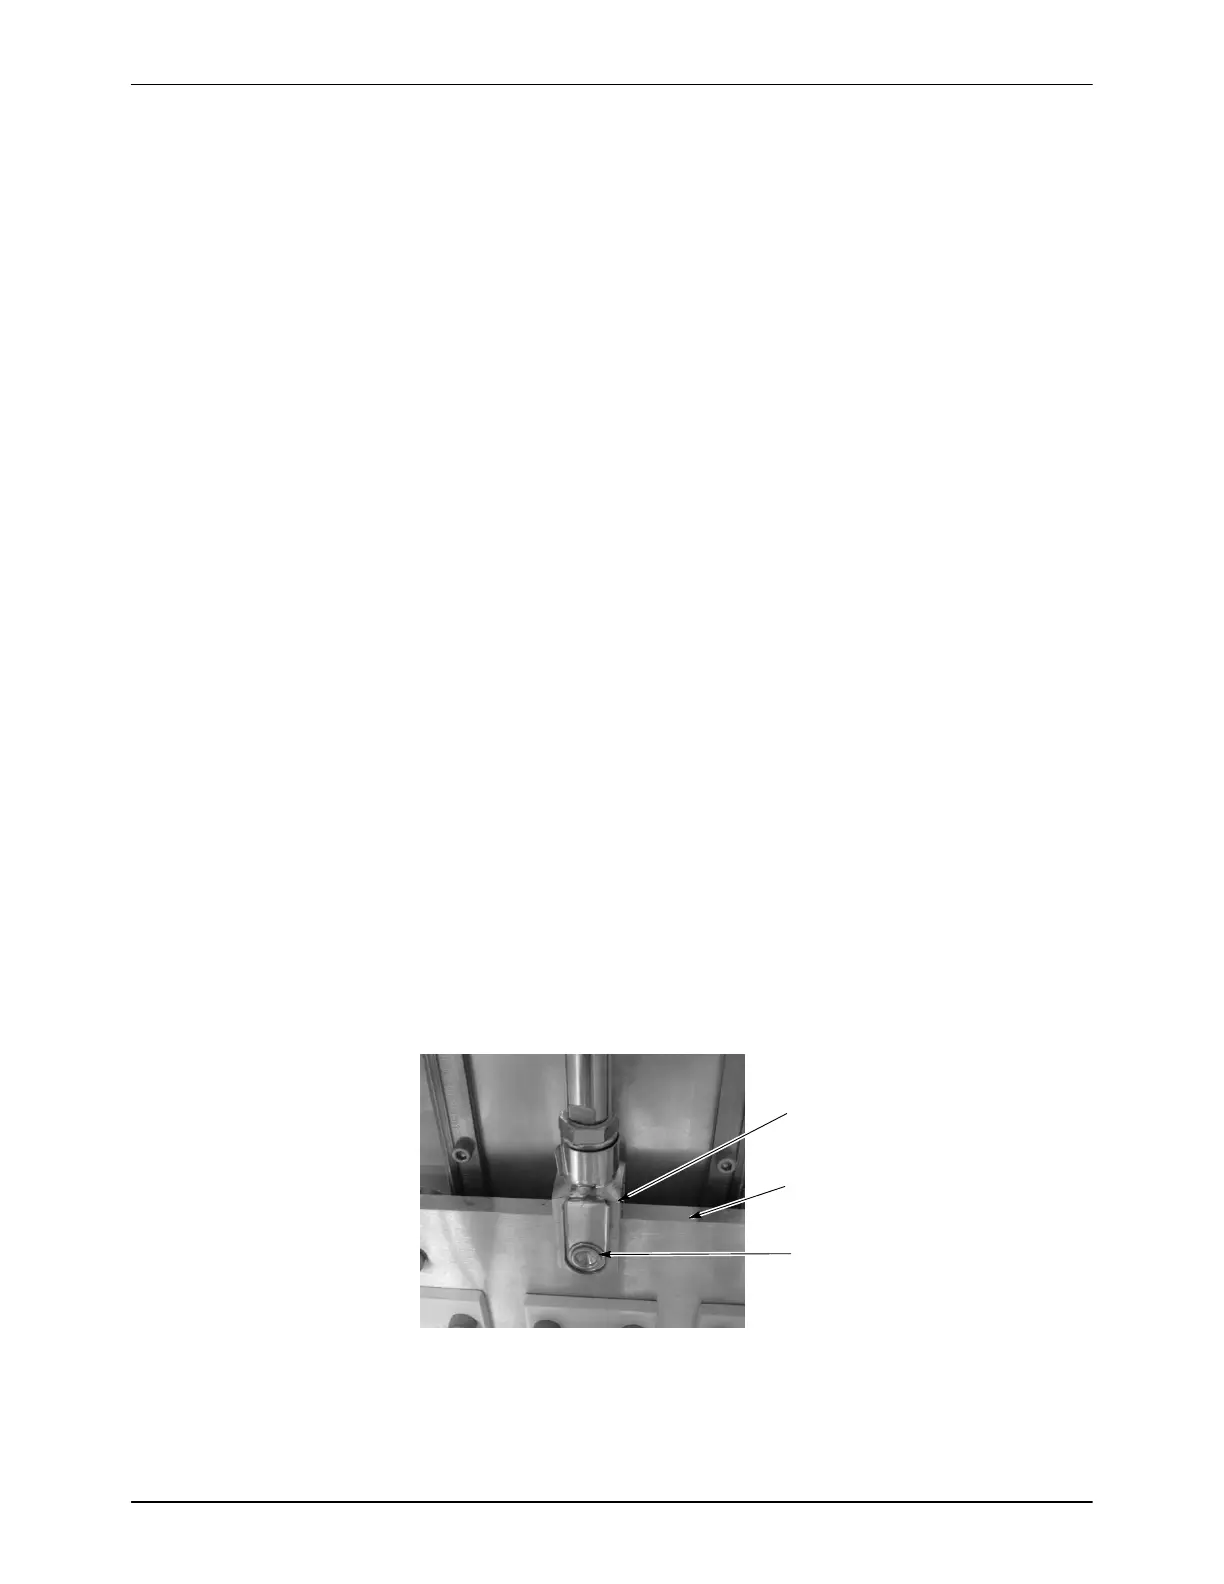
2. See Figure 8-6. Unclip the clevis pin (3) from the clevis (1) and pull the
pin out of the clevis and carriage plate (2). Do not lose the pin, as you
will need it to install the new cylinder.
1
2
3
Figure 8-6 Lift Cylinder Clevis Pin
1. Clevis
2. Carriage plate
3. Clevis pin

 Loading...


