Repair
8-12
Part 1602966−05
E 2015 Nordson Corporation
Lance Assembly/Purge Manifold Alignment (contd)
5. Set the purge air pressure to zero.
6. Move the lance down to the stop bolt (Purge Position). Verify that the
stop bolt is adjusted to stop the carriage just before the lance makes
contact with the purge manifold quad-ring seals. Manual alignment of
the lances to the purge manifolds may be necessary as all the fasteners
are loose.
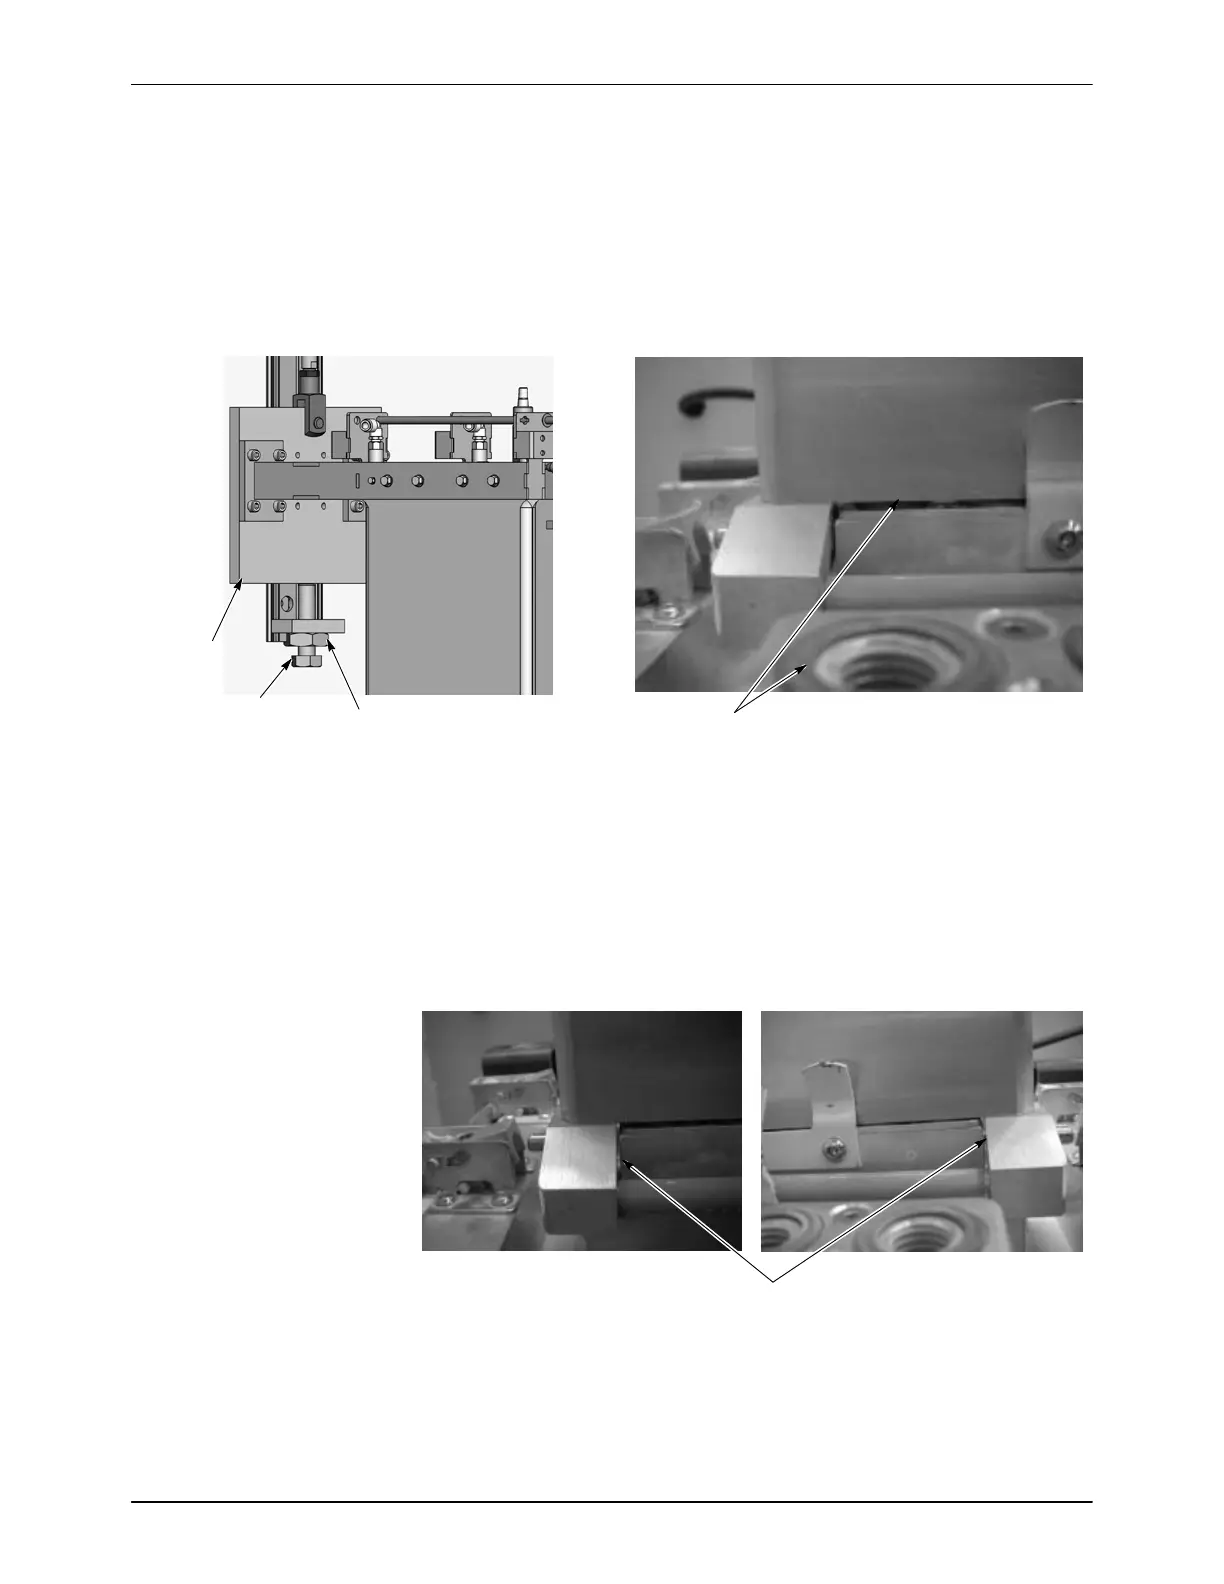
Carriage
Jam Nut
Quad-Ring Seals
Stop Bolt
Figure 8-9 Stop Bolt Adjustment
7. Turn the Purge Control switch to the Internal Gun Purge position. The
lance will be clamped into place.
8. Make sure the alignment between the lance latch blocks and the purge
manifolds, front to back, is correct.
The manifolds and lances should be parallel, and the gap between the
lances and the manifold seal retainer plate should be even all the way
around.
Even Gaps
Figure 8-10 Lance Adjustment, Step 8
9. When each of the lance plates and manifold latches are adjusted
correctly, the fasteners loosened in steps 2−4 can be tightened. Tighten
the through bolts first, then the four screws securing the lance arms to
the lift carriage, then the ground screw.

 Loading...


