- 170 -
Using a Web Browser to Configure the Network Setup
4
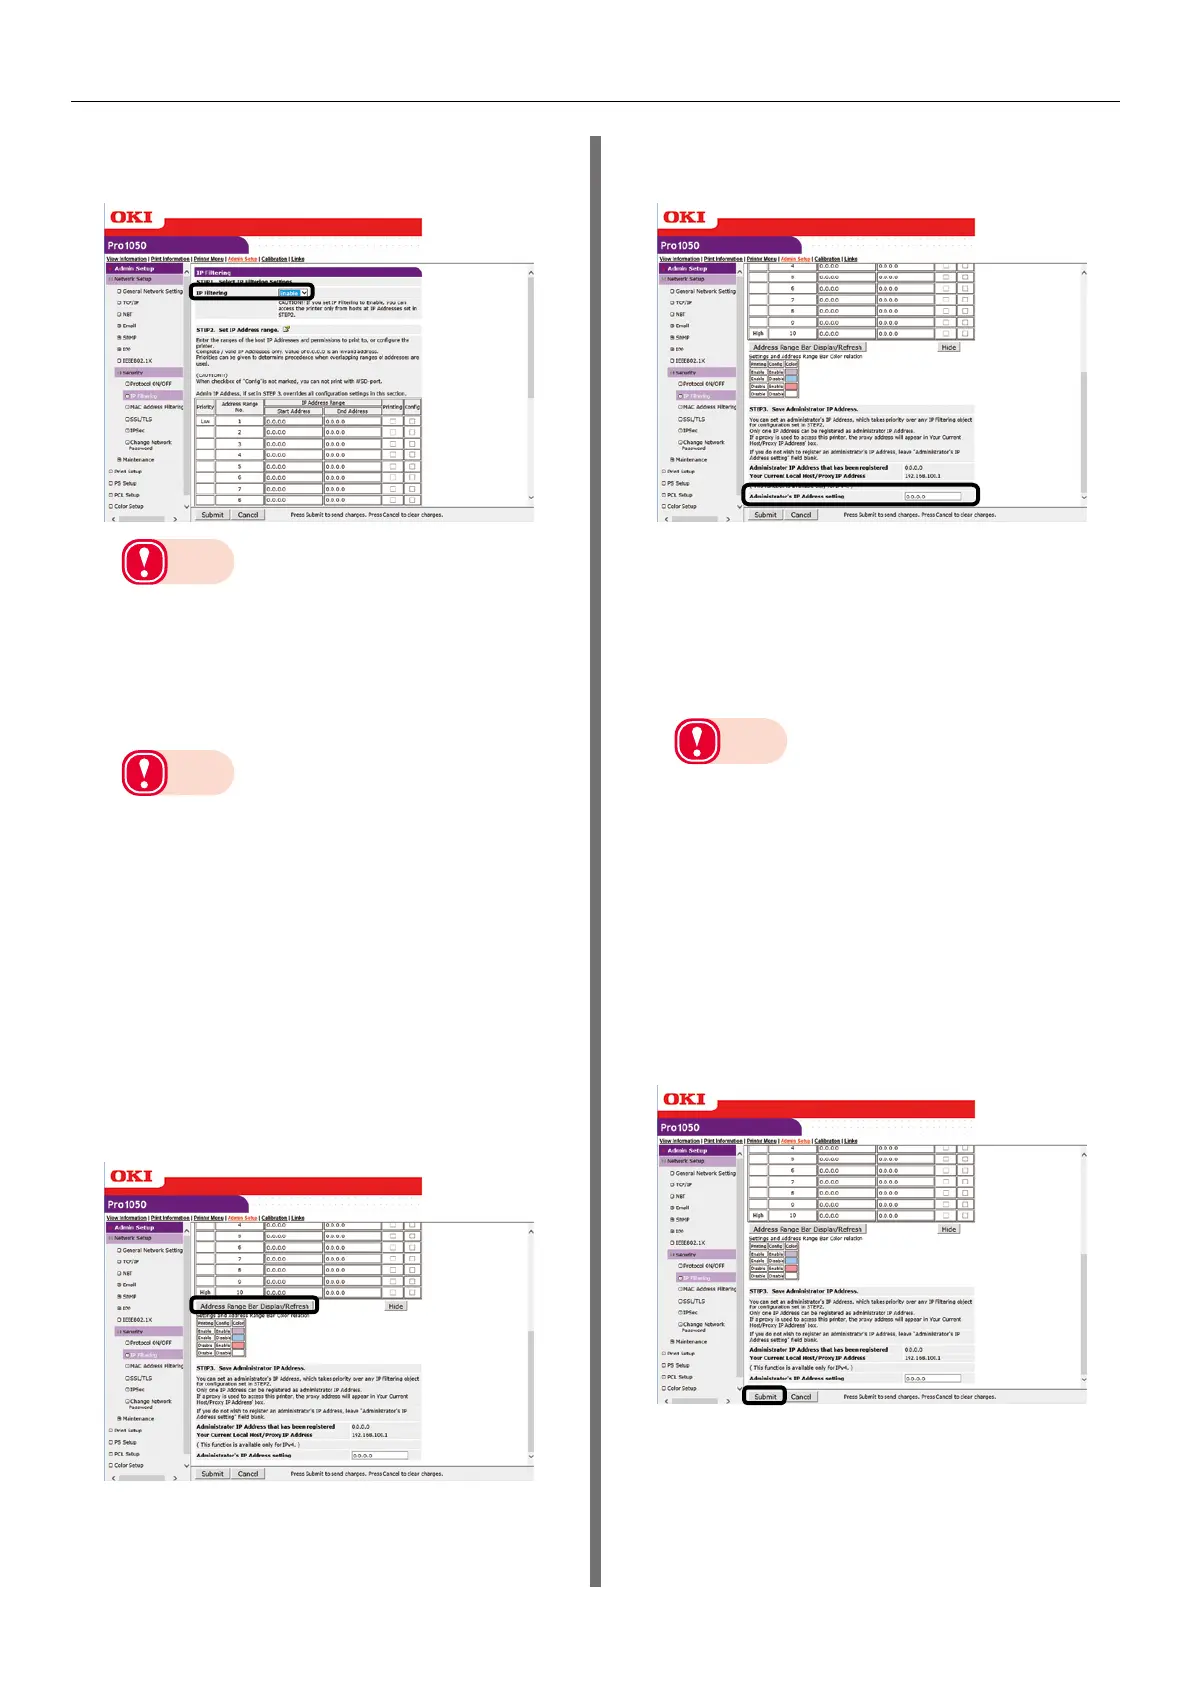
Under [STEP1], select [Enable] for [IP
Filtering].
Note
z
Enabling IP filtering disables all access from hosts
that are outside the range of IP addresses specified
in [STEP2].
5
Under [STEP2], specify the IP address
range.
Note
z
Using IP addresses, enter the range of hosts that
are allowed to print and configure settings.
z
For the IP addresses, use single-byte numerals
separated by periods (.).
z
Entry of IP address 0.0.0.0. is invalid.
z
When there is overlap of IP addresses, the address
range with the highest level set in [Priority] is given
priority.
z
Regardless of what is specified in [STEP2], you can
use [STEP3] to specify administrator addresses
for which printing and setting configuration are
enabled.
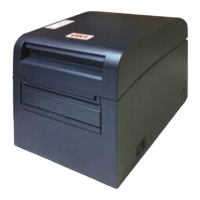
6
Click [Address Range Bar Display/
Refresh].
If you want to modify an IP address range,
re-enter the applicable IP addresses, and
click [Address Range Bar Display/Refresh]
again.
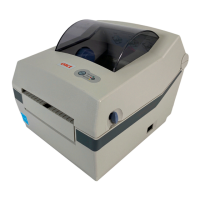
7
Under [STEP3], specify the
[Administrator’s IP Address setting].
Even if the wrong settings are configured
in [STEP2] due to administrator IP address
entry in [Administrator’s IP Address
setting], the administrator can re-configure
the setting from a host with the IP address
specified with [Administrator’s IP Address
setting].
Note
z
If the printer is being accessed via a proxy, the
intermediate device's address will be displayed
as [Your Current Local Host/Proxy IP Address].
Consequently, the address shown by [Your Host IP
Address] may be different from your actual host
address.
z
If nothing is registered for the administrator IP
address, the setting in [STEP2] may make the
printer completely inaccessible.
z
If you do not want to register an administrator IP
address, leave [Administrator’s IP Address setting]
blank.
8
Click [Submit].
9
Settings are saved on the printer and
the network function is restarted.