- 18 -
Registering a Desired Paper Size with the Printer Driver
Using the Printer Driver to
Fine-tune the Cut Position
1
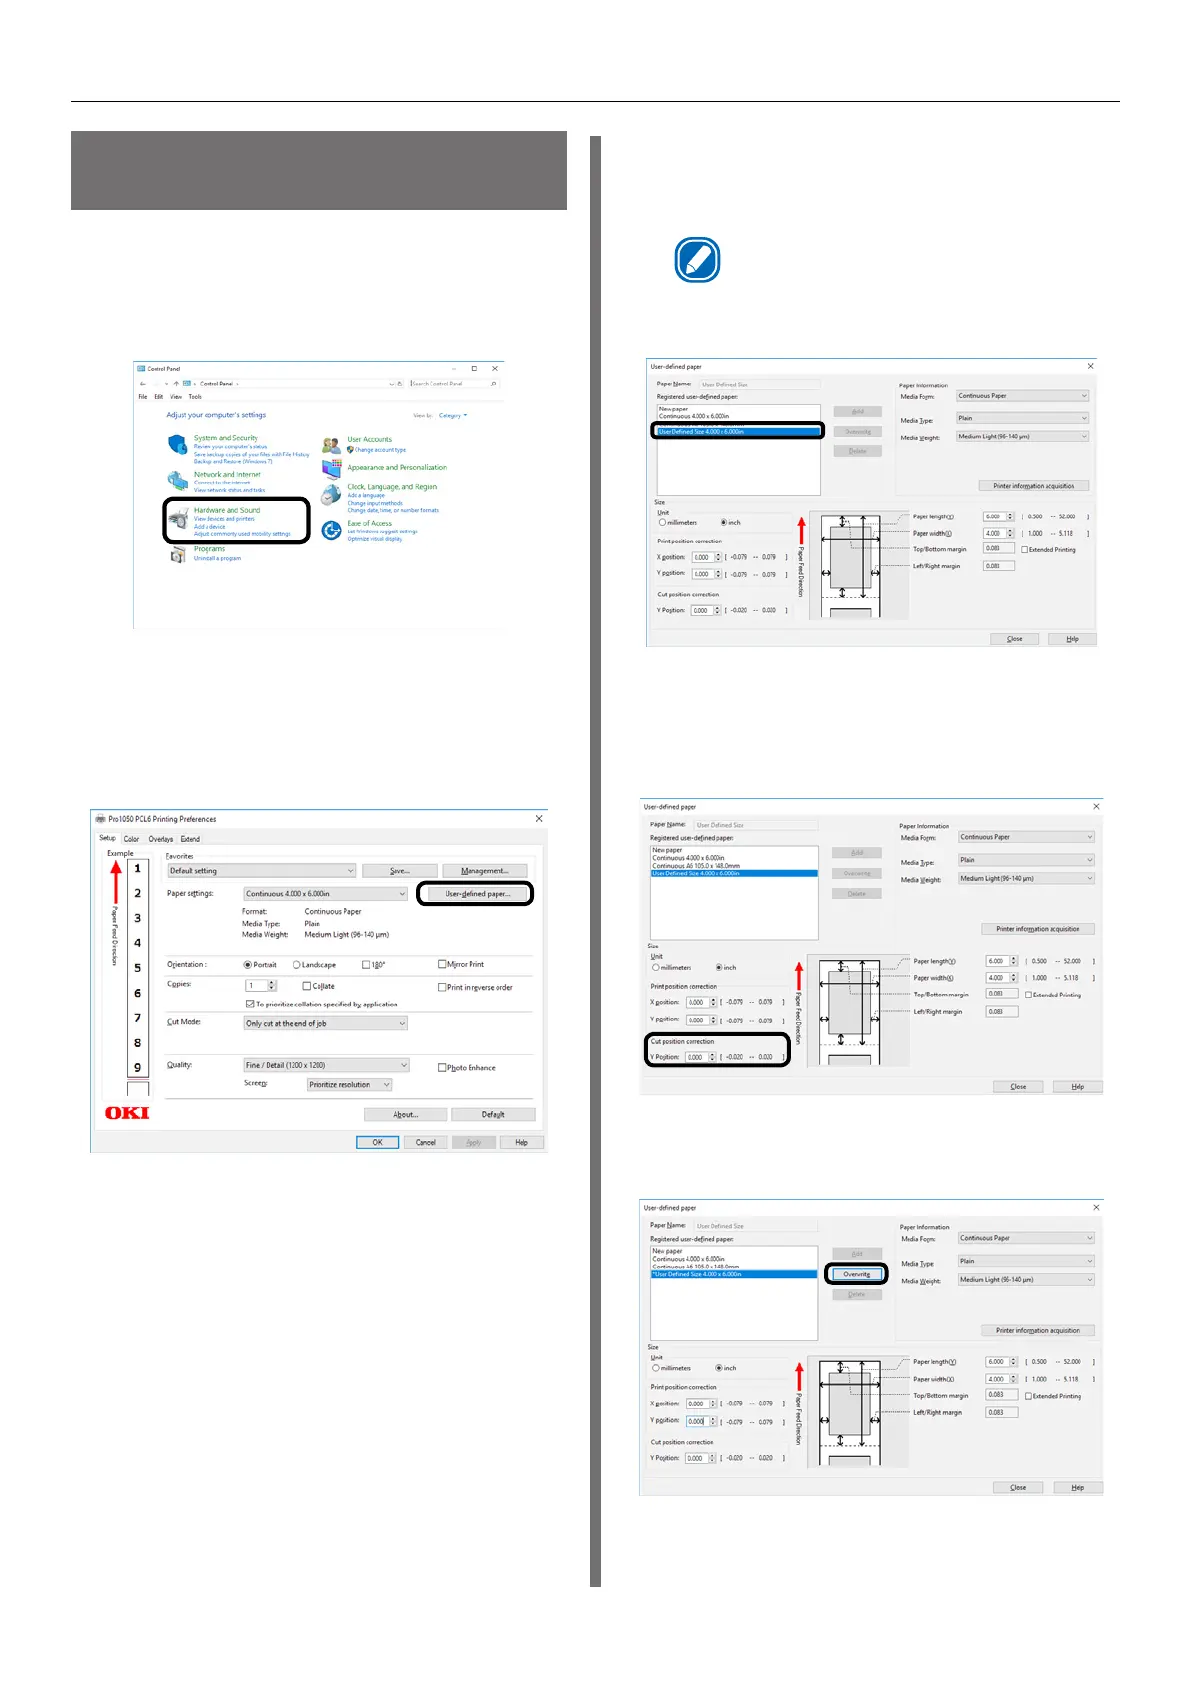
Click [Start] and select [Control Panel]
in [Windows System].
2
Click [View devices and printers].
3
Right-click the [Pro1050 PCL6] icon,
and then select [Printing preferences].
4
On the [Setup] tab, click [User-defined
paper].
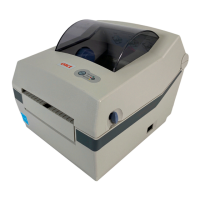
5
Use the [Registered user-defined paper]
list to select the paper whose cut
position you want to correct.
Memo
z
If the paper you want to use is not in the list, select
[New paper] and add it. See “Registering a Desired
Paper Size with the Printer Driver” (P.15).
6
Use [Cut position correction] to specify
an adjustment value for distance from
the print completion position to the cut
position.
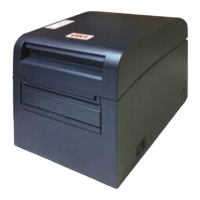
7
Click [Overwrite].