- 16 -
Registering a Desired Paper Size with the Printer Driver
Memo
z
A blank piece of paper may be inserted after cut
pages if the paper length, label length, or black
mark interval is less than 4 inches.
6
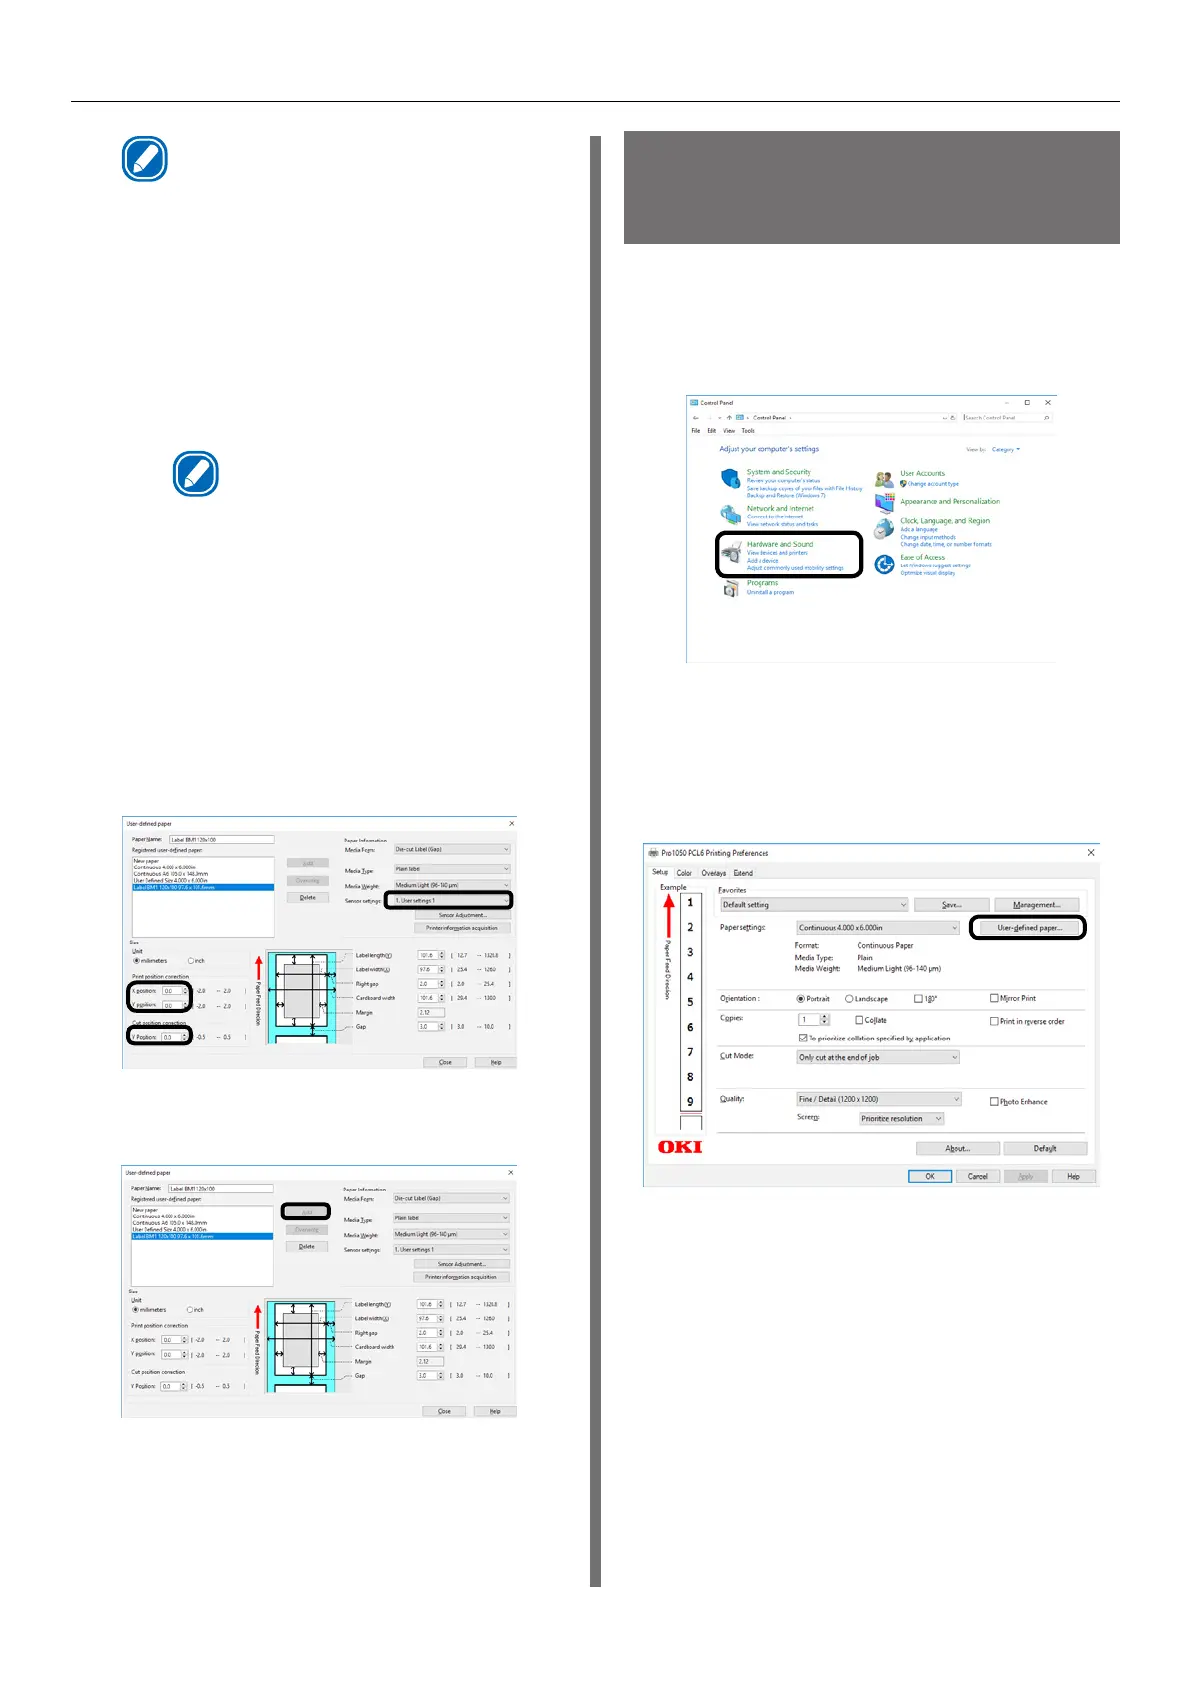
Enter other information as required.
(1)
If you performed sensor
adjustment, select the sensor
setting that was registered to the
device from [Sensor settings].
Memo
z
Refer to “Calibrating the Sensor” (P.30)
regarding how to adjust the sensor.
(2)
If you want to fine-tune the
image position, enter the position
shift amount into [Print position
correction].
(3)
If you want to fine-tune the paper
cut position, enter the position
shift amount into [Cut position
correction].
(2)
(1)
(3)
7
When all the input is complete, click
[Add].
Using the Printer Driver
to Fine-tune the Print
Position
1
Click [Start] and select [Control Panel]
in [Windows System].
2
Click [View devices and printers].
3
Right-click the [Pro1050 PCL6] icon,
and then select [Printing preferences].
4
On the [Setup] tab, click [User-defined
paper].